Ghost Drawing Tutorial for Beginners
Welcome to this beginner-friendly ghost drawing tutorial. In this step-by-step guide, you’ll learn how to draw a simple horror character using basic shapes, soft shading, and gentle blending techniques.
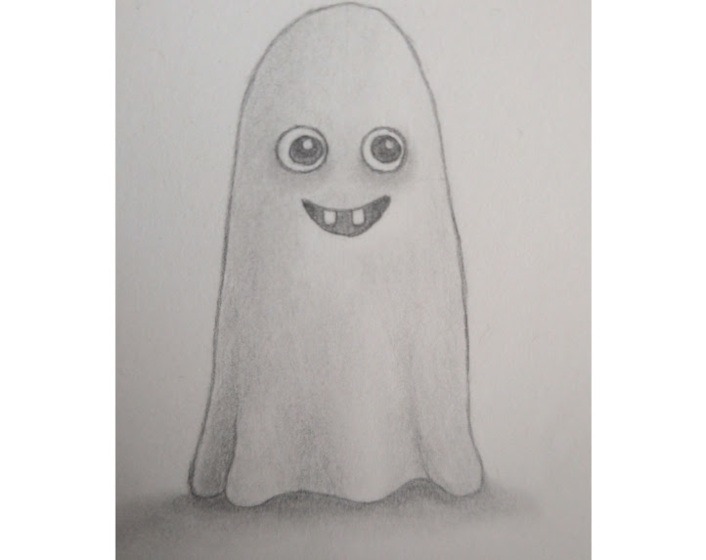
This ghost is designed to be approachable and expressive, with big eyes, a playful grin, and smooth shadows that help it feel rounded and floaty. I’ll focus on keeping everything clear and manageable, so even if you’ve only just started drawing, you can follow along with confidence.
You don’t need advanced skills or complicated tools. Just a pencil, some paper, and a willingness to let your ghost look slightly suspicious before it looks brilliant. That part is completely normal.
By the end of this tutorial, you’ll not only have a finished ghost drawing, but a better understanding of how simple shapes and soft shading can bring a character to life… or un-life.
What You’ll Need:
You don’t need anything fancy for this tutorial. Just a few basic tools:
- HB pencil – for sketching your ghost shape and features
- 2B pencil (optional) – for slightly darker shadows and details
- Eraser – any standard eraser will do
- Blending tool – a blending stump, cotton bud, or even a small piece of tissue
- Paper – sketchbook paper or regular printer paper works perfectly fine
If you’re brand new to pencil grades, don’t worry. HB is perfect to start with, and you can gradually build darker tones.
Not sure which pencils or tools are best for this? I’ve broken it all down in my Horror Drawing Tools Guide for Beginners.
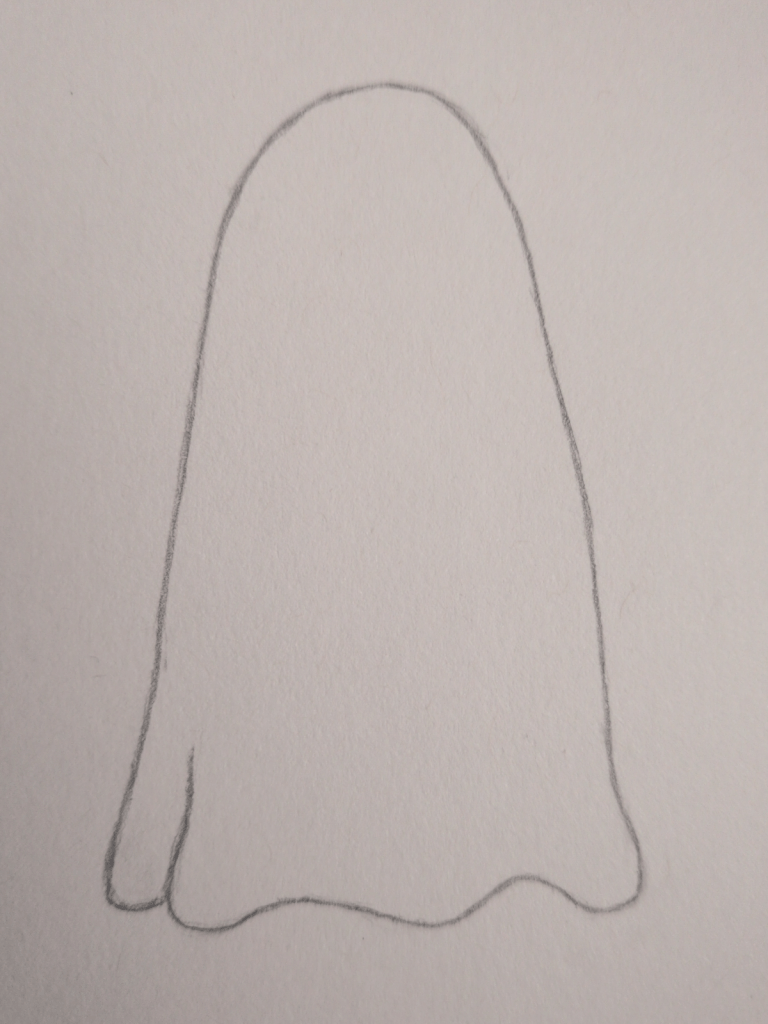
Step 1: Draw the Main Ghost Shape
We’re starting with the most important part of the entire drawing: the silhouette. If the outline looks right, everything else becomes much easier.
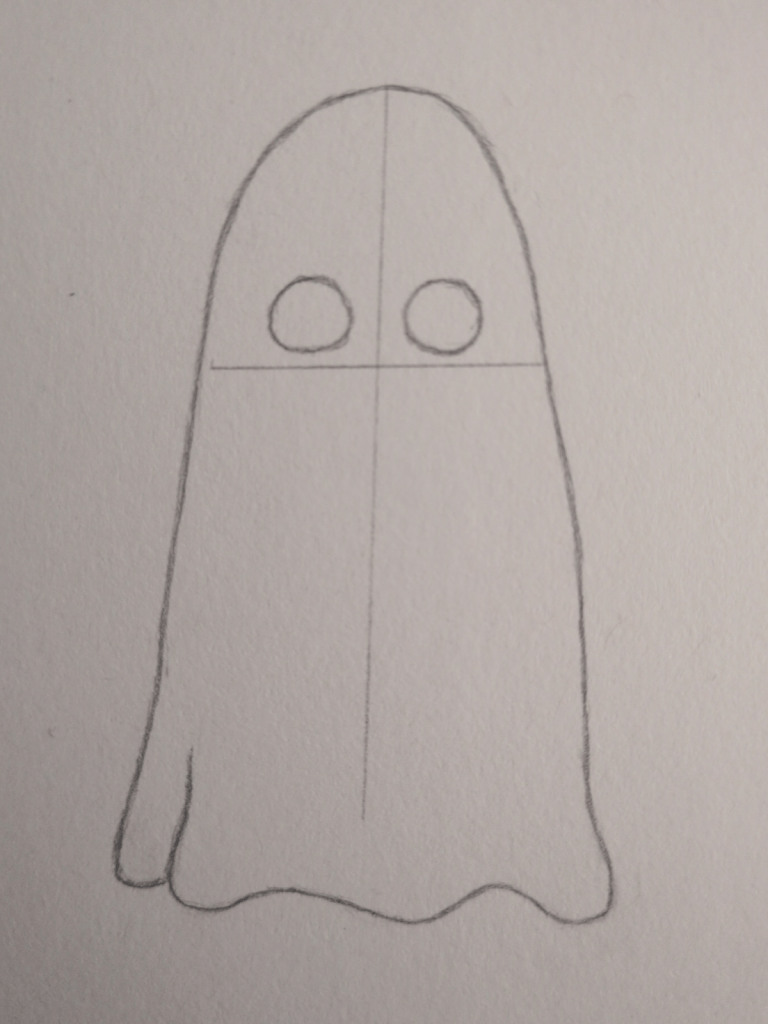
Using your HB pencil, lightly sketch a tall, rounded shape. Think of it as a stretched teardrop or a soft jellybean standing upright. Keep the top nicely curved and smooth.
Instead of letting the bottom taper into a point, gently flatten it. This helps the ghost feel like it’s hovering rather than melting into the page.
Now add 2 to 4 soft, rounded waves along the bottom edge to create that classic floating sheet look. Keep the bumps smooth and slightly uneven so they feel natural. Avoid sharp zigzags or pointed edges. We’re aiming for floaty fabric, not dramatic lightning bolts.
Keep your pencil pressure light throughout this step. You should still be able to adjust the shape easily if needed.
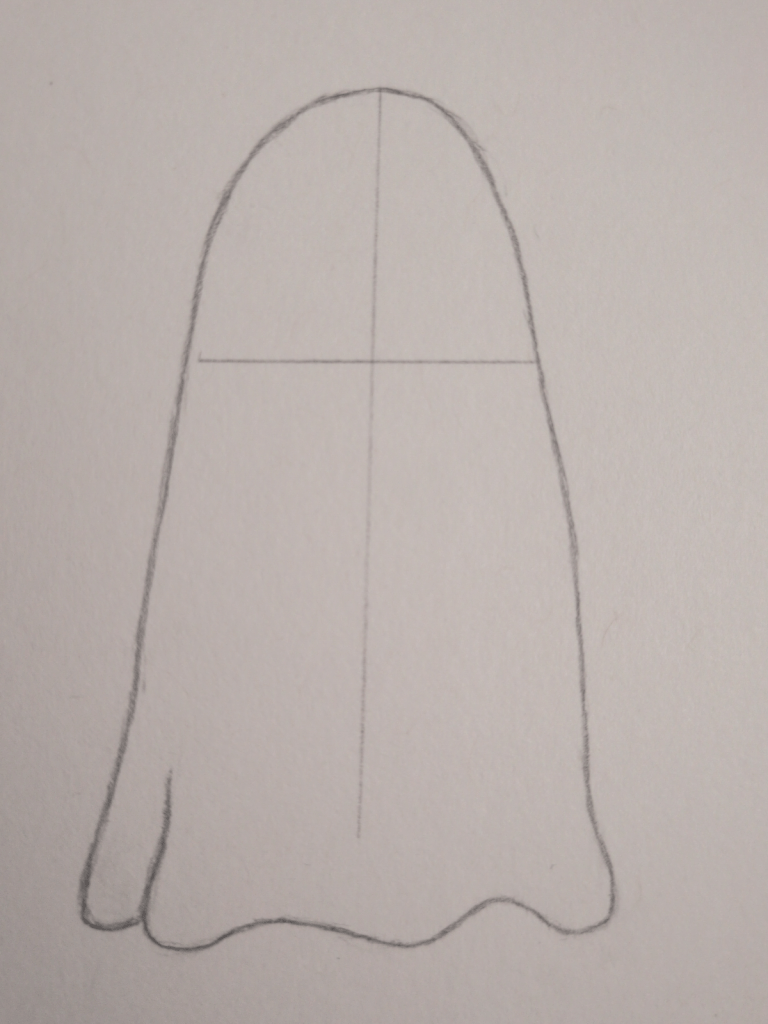
Step 2: Add Simple Face Guidelines
Before we draw any features, we’ll add two very light guidelines. These help keep everything balanced and stop one eye from floating off into another dimension.
Lightly draw a vertical line down the centre of your ghost. This will help you place the eyes and mouth evenly on both sides.
Next, draw a horizontal line across the upper half of the ghost, about one-third of the way down from the top. This will be your eye line. Placing it slightly above the middle gives your ghost a cuter, more expressive look.
Keep both lines very light. They’re just guides and will be erased later. Don’t worry if the centre line runs through the whole body shape. It won’t show in the final drawing.
Step 3: Draw the Eyes
Now your ghost finally gets a face. Things are getting serious…
Using the horizontal guideline, draw two evenly sized circles for the eyes. Place one circle on each side of the vertical centre line.
Try to keep:
- The middle of each eye circle sitting directly on the horizontal line
- The spacing even on both sides
- The size consistent
A helpful trick is to imagine that you could fit one more eye between them. That keeps the spacing natural and balanced.
Keep your lines light for now. These are just the outer shapes. We’ll add detail and shading later.
Step 4: Draw the Mouth
Now we’re going to give your ghost some personality.
Lightly draw a wide curved line just below the horizontal eye guideline. Keep it centred on the vertical line. The smile should be slightly wider than the space between the eyes.
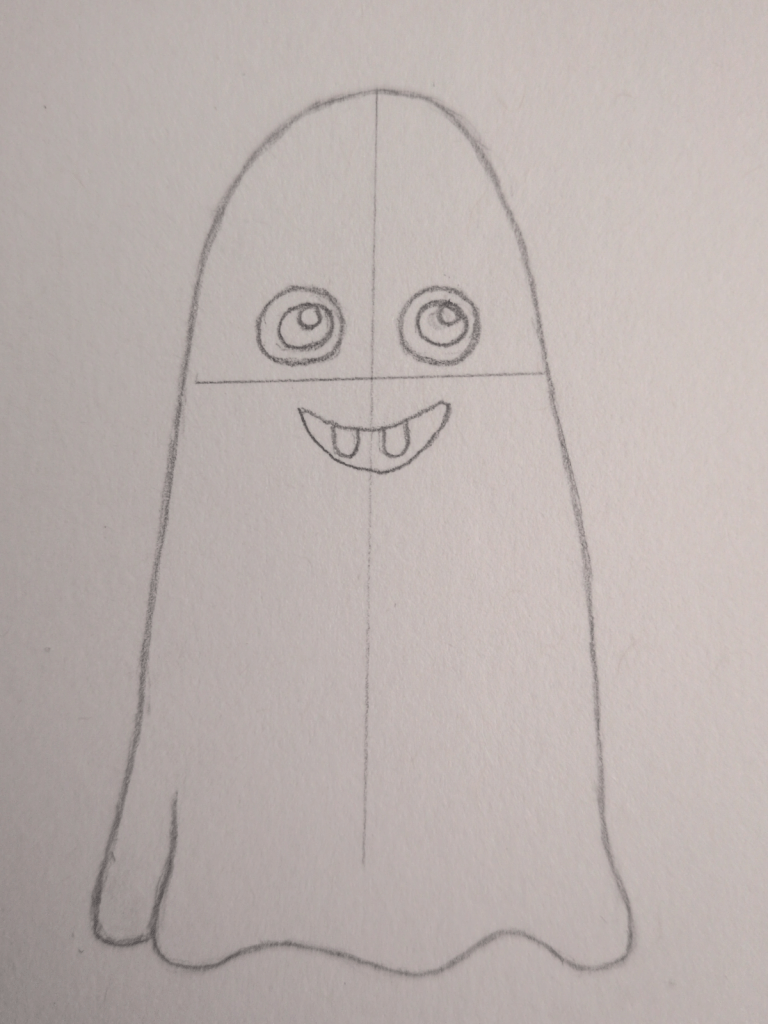
Next, add a second curved line underneath the first one to create a simple mouth band. Try to keep the spacing between the two lines even so the shape looks balanced.
Keep your lines light for now. We’ll darken and shade later.

Step 5: Add Pupils and Teeth
Now your ghost gets real personality…
Inside each eye, draw a smaller circle for the iris.
Inside that, draw an even smaller circle for the pupil.
Leave a tiny shape unshaded in each eye to create a highlight. Try to keep the highlights in the same position on both eyes.
Next, add simple curved lines inside the mouth band to create teeth. Keep them rounded and soft rather than sharp or pointed. This keeps the ghost friendly rather than terrifying.
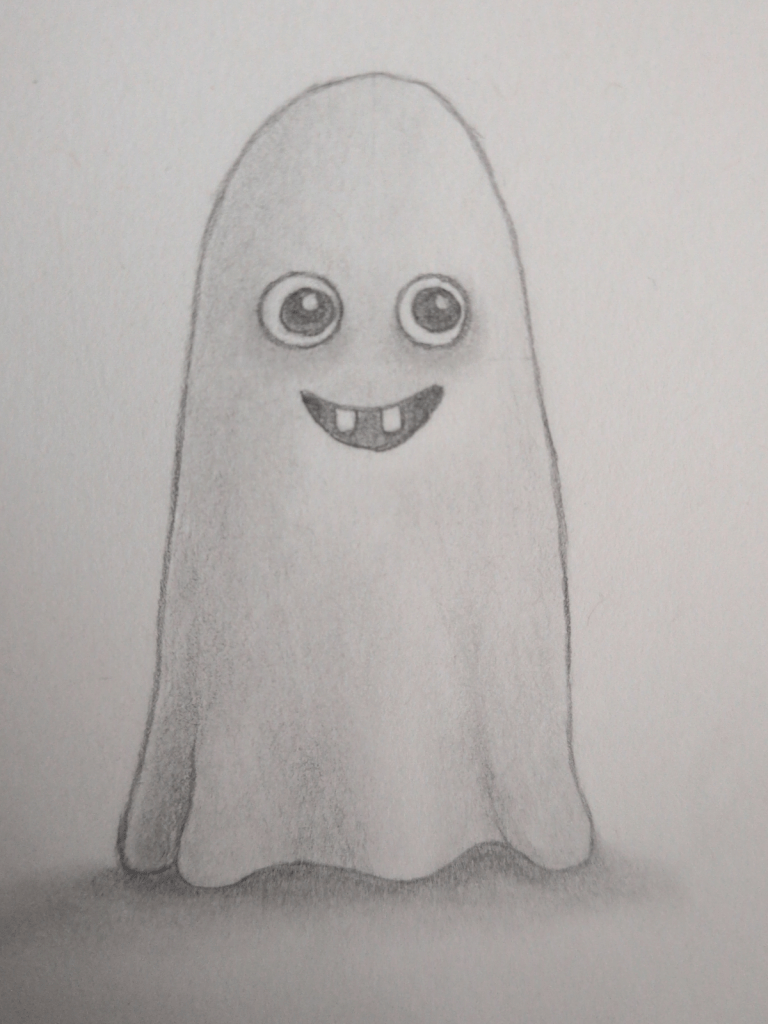
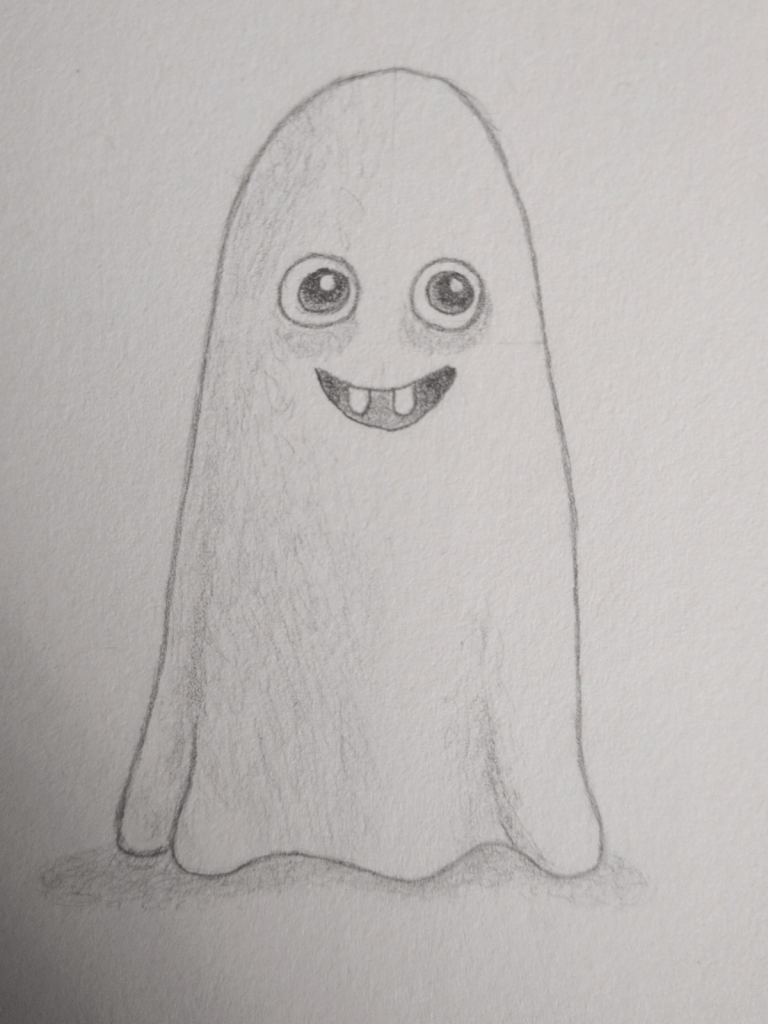
Step 6: Shade the Eyes and Mouth
Now we’re going to add a little depth before shading the body.
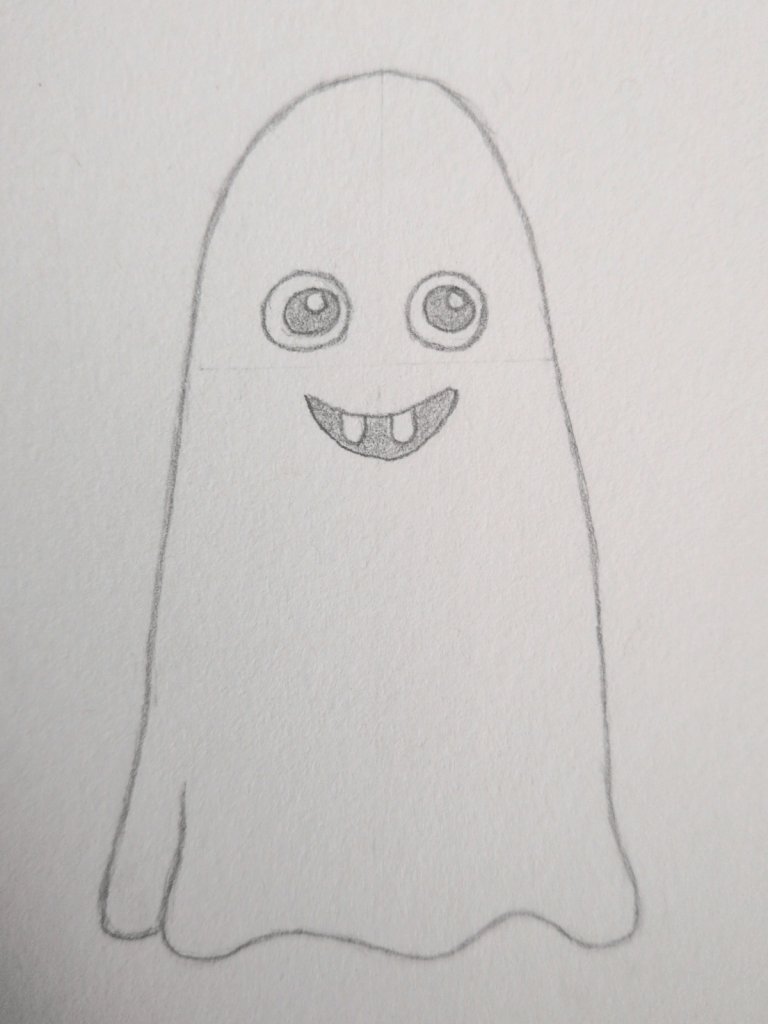
Start by shading the pupils using your HB pencil. Press slightly firmer than before so they appear darker than the rest of the eye. Leave the small highlight circles completely white.
Next, lightly shade inside the mouth. Carefully shade around the teeth, leaving the teeth white. This contrast helps the smile stand out and keeps it clean.
Keep this shading controlled and even. You don’t need heavy pressure yet. We’ll build darker areas later.
Once you’re happy with the eyes and mouth, gently erase the vertical and horizontal guidelines. Use a soft eraser and light pressure so you don’t disturb the shading.
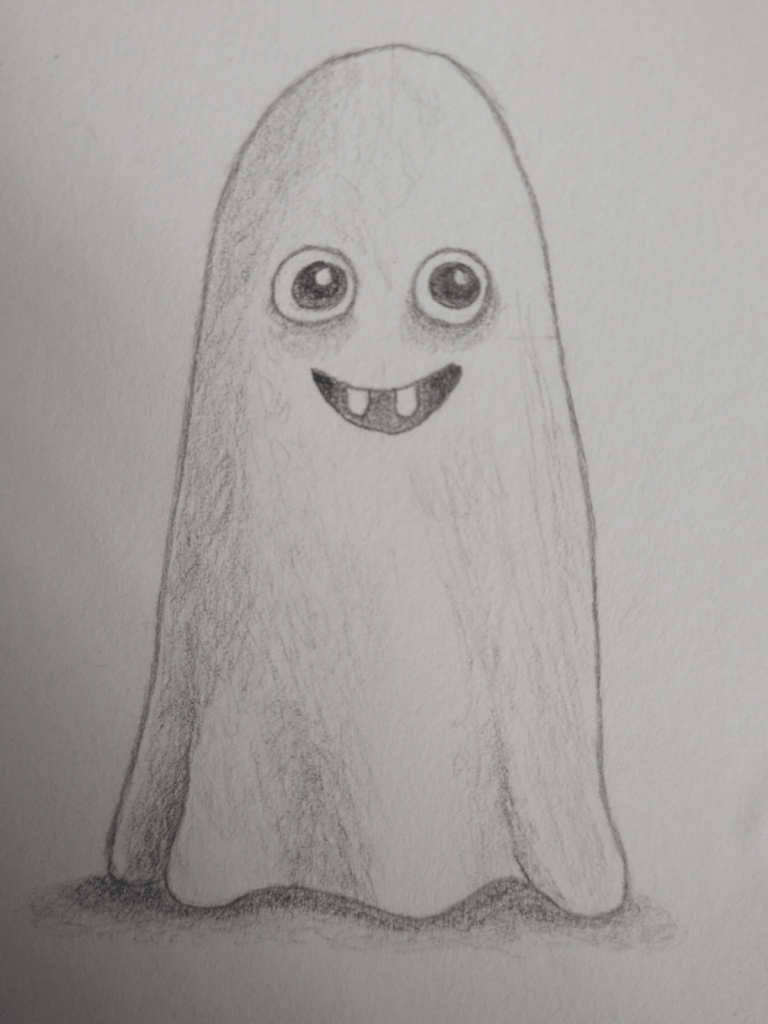
Step 7: Shade the Body
Now we’re going to give your ghost some shape and depth.
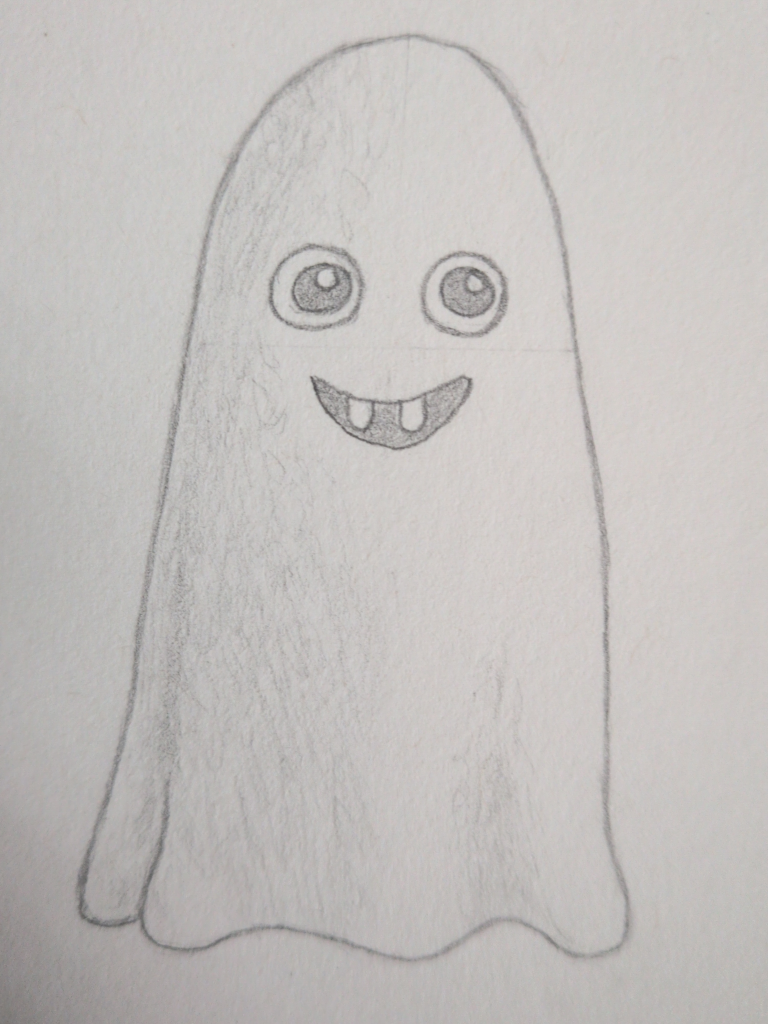
Choose one side of the body to be your shadow side. In this example, we’re shading the left side. Imagine your light coming from one direction.
Using your HB pencil, lightly shade down the left edge of the ghost. Start near the top and move downward with soft, controlled strokes. As you move toward the centre of the body, gradually reduce pressure so the shading fades out smoothly.
Don’t shade the entire ghost evenly. Leave the opposite side lighter. This contrast makes the ghost look rounded instead of flat.
Add slightly darker shading:
- Along the left edge
- Under the bottom folds
- Around the lower left curve
Keep your layers light. Build the graphite slowly rather than pressing hard straight away.
Note: If Your Shading Looks Streaky
At this stage, your shading might look a little scratchy or uneven. That’s completely normal.
Slow down. Lighten your pencil pressure. Work in smaller strokes and build the tone gradually. You can gently blend with a tissue or blending stump if you’d like a softer finish.
Ghosts should look misty and soft. If yours looks like it’s been aggressively scribbled into existence, ease up and layer lightly.
Step 8: Deepen the Shadows and Add a Cast Shadow
Now we’re going to strengthen the darkest areas and make the ghost feel grounded instead of floating awkwardly in mid-air.
Start by using a 2B pencil to darken (if you have one):
- The pupils of the eyes
- The darkest corners inside the mouth
Press slightly firmer than before, but keep your highlights intact. Leave the small white reflections in the eyes and the teeth untouched. Those bright areas create contrast and make the face feel alive.
Next, switch back to an HB pencil and lightly shade:
- A soft shadow under each eye
- A cast shadow underneath the ghost
For the cast shadow, keep it darkest directly under the body and fade it outward. This makes the ghost look like it’s resting on a surface rather than hovering dramatically, like it just forgot how gravity works.
If you’d like, you can also add a subtle extra fold line near the bottom edge of the ghost to suggest fabric movement. Keep it light and let it fade upward so it doesn’t overpower the drawing.
Take a step back and check your values. The eyes and mouth should now be the darkest areas, the body softly shaded, and the ground shadow gentle but visible.
Step 9: Strengthen the Darkest Values
Before we blend, we need to make sure the contrast is strong enough.
Blending slightly lightens graphite, so this is your chance to deepen the key shadow areas.
Using your 2B pencil, carefully darken:
- The pupils (leave the highlights untouched)
- The darkest corners inside the mouth
- The fold near the lower right edge
- The very base of the cast shadow directly under the ghost
Don’t darken the entire shadow side again. Only reinforce the deepest areas.
The goal is to create a clear difference between:
- Your darkest darks
- Your midtones
- Your highlight side
Take a step back and squint at your drawing.
You should clearly see:
- The eyes and mouth are the focal point
- One side of the body is darker than the other
- The cast shadow grounds the ghost
If everything looks evenly grey, add a little more depth to your darkest spots.
If the drawing has strong contrast, you’re ready for blending next.
This stage is about control, not more detail, not more lines, just stronger values.
Step 10: Blend and Soften the Shading
Now we’re going to soften the graphite to give your ghost a smooth, misty finish.
At this stage, we are not adding darker values. We are simply smoothing what is already there.
Use one of the following:
- A blending stump
- A clean tissue
- A cotton bud
- Your finger (very lightly)
Start blending in the darker areas first.
Work from dark into light using small circular motions. Slowly move toward the centre of the body, but stop before you reach the brightest highlight area.
Focus on blending:
- The shaded left side of the body
- The under-eye shadows
- The cast shadow beneath the ghost
- Very lightly inside the mouth
Avoid blending:
- The teeth
- The eye highlights
- The brightest side of the body
Blending will slightly lighten your graphite. That’s normal. This is why we strengthened the darkest areas in the previous step.
After blending, your ghost should look:
- Softer
- More rounded
- Less scratchy
- More fabric-like
If the drawing looks too flat after blending, simply reapply a small amount of 2B pencil to the deepest shadows to restore contrast.
Take a step back and view your drawing from a distance.
You should now see a smooth transition from shadow to light, with the ghost looking gently grounded on the surface instead of sharply sketched.
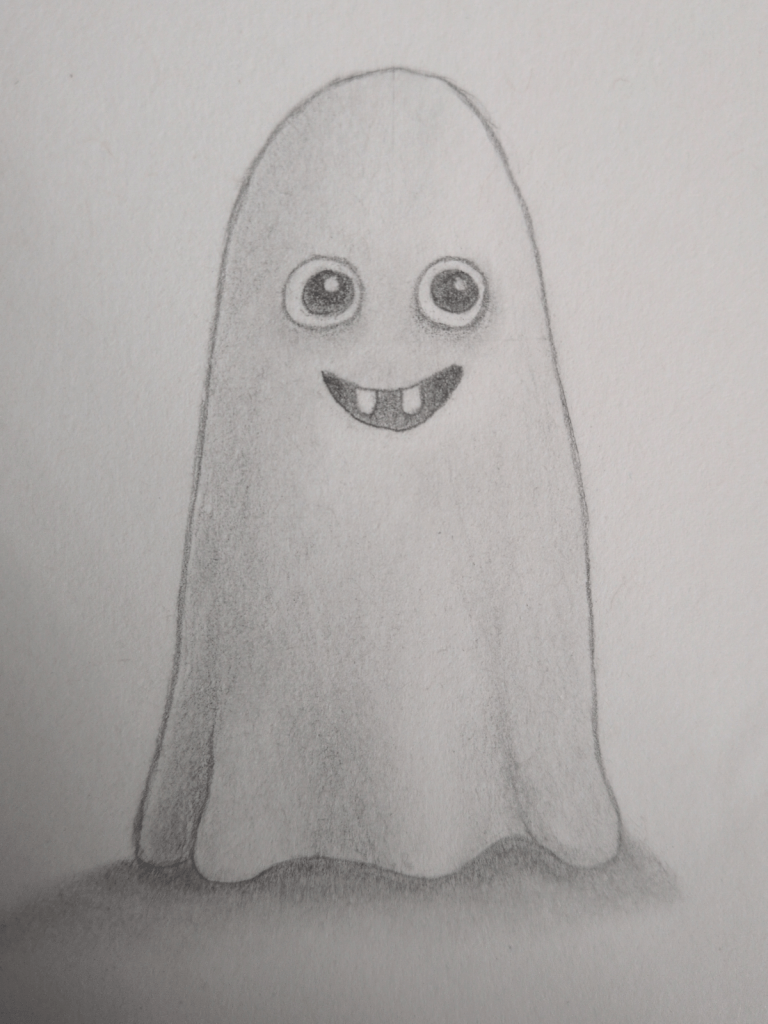
Step 11: Refine Your Shadows and Final Details
Now that your ghost is blended, it’s time to gently refine the darker areas.
Using a 2B pencil, carefully deepen the pupils and the darkest areas of the mouth. Keep your highlights clean and avoid pressing too hard. We want stronger contrast, not scratched paper.
Next, slightly darken the under-eye shadows to give the face more dimension. Blend lightly if needed so the transition remains soft.
If your left side is your shadow side, you can strengthen the fold slightly to enhance the light direction. Keep the right side lighter so the form stays rounded.
Finally, check your cast shadow. Darken the area closest to the ghost’s base, then let it fade outward. This helps anchor your ghost to the ground instead of letting it float away like it forgot gravity exists.
Step back from your drawing for a moment. If the light direction is clear and the darkest areas stand out confidently, you’re finished.

Conclusion
And that’s it, you’ve officially brought your ghost to life.
Starting with simple shapes, building up gentle shading, deepening your dark values, and blending everything together, you’ve created form and depth from a blank sheet of paper. That’s no small thing. That’s actual drawing magic.
Notice how the light and shadow now give your ghost volume. It’s no longer just an outline. It feels round, soft, and grounded instead of like a suspicious floating napkin.
If your shading isn’t perfectly smooth, that’s completely fine. Every drawing is practice in disguise. The more you repeat this process, the more natural light-to-dark transitions will feel. Confidence builds quietly, layer by layer, just like graphite.
You can always push it further by adjusting contrast, softening edges, or strengthening shadows. Or you can leave it exactly as it is and appreciate what you’ve learned here.
Either way, you now understand how to:
- Build structure with simple guidelines
- Add midtones before jumping to dark values
- Blend from dark into light for smoother transitions
- Use contrast to make features stand out
- Ground a character with a cast shadow
And that’s a solid foundation for every future horror creature you draw.
Your ghost may look cute now… but you and I both know it has plans.
Next time, try exaggerating the shadows or changing the light direction to create a more dramatic mood.
Keep practising, keep experimenting, and most importantly, keep drawing.
Stay spooky.
Draw Another Simple Horror Character
If you’d like to keep building your confidence, try one of these next:
- Creepy Pumpkin Drawing Tutorial
Work with bolder shapes, deeper shadows, and expressive features while practising balance and contrast. - Haunted Doll Drawing Tutorial
Focus on proportions, smooth blending, and subtle eerie details that give your character a quiet personality.