Birds are a fascinating subject for illustration, offering a mix of elegance, structure, and mystery. Whether you’re drawing a majestic raven or a skeletal pigeon that looks like it crawled straight out of a gothic horror novel, understanding bird anatomy is key to making your eerie art feel grounded and believable.
So, sharpen your pencils, spread your wings (figuratively, unless you’re part bird), and let’s dive into the world of gothic bird illustrations – where beauty, terror, and an alarming number of beady eyes collide.
1. Understanding bird anatomy
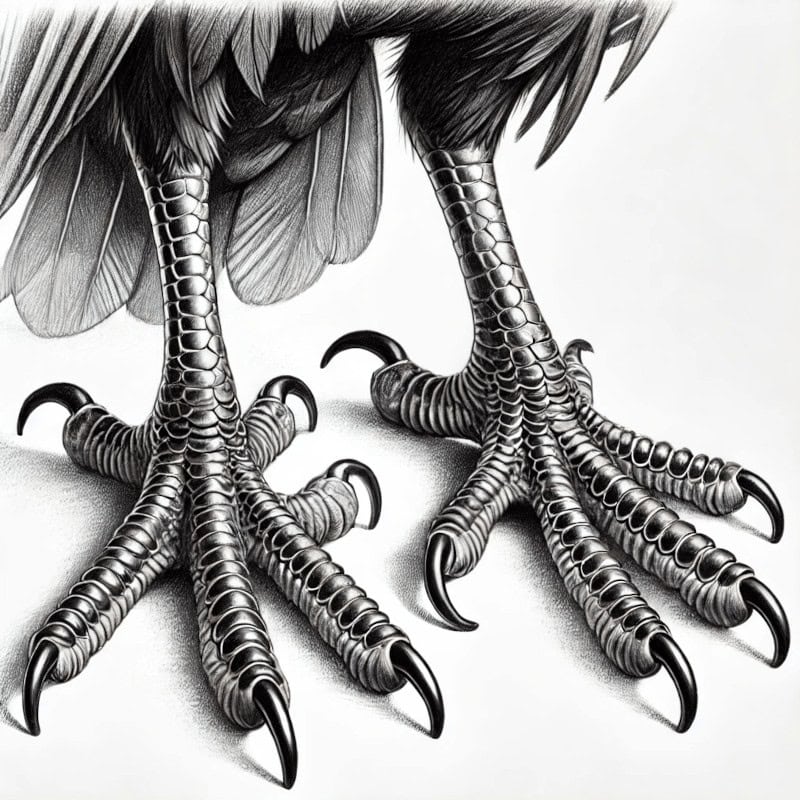
Birds may look graceful in flight, but under all those feathers, they’re just tiny dinosaurs with serious attitude problems. This section will break down their structure, from elegant wing motions to talons that scream, “I will steal your fries and your soul.”
- Basic Shapes & Forms – Breaking down birds into simple geometric shapes for easy sketching.
- Feet & Claws – Covering everything from delicate perching feet to murder talons.
2. Sketching the base form

Before you make your bird look creepy, it needs to exist first. We’ll go from rough outlines to refined shapes, ensuring your gothic bird doesn’t accidentally resemble an angry potato with wings.
- Rough Outline – Start with simple guidelines for the head, body, wings, and tail (so your raven doesn’t end up looking like a rubber chicken).
- Adding Depth & Perspective – Because nothing says “dramatic” like a bird glaring down at you from a spooky tree branch.
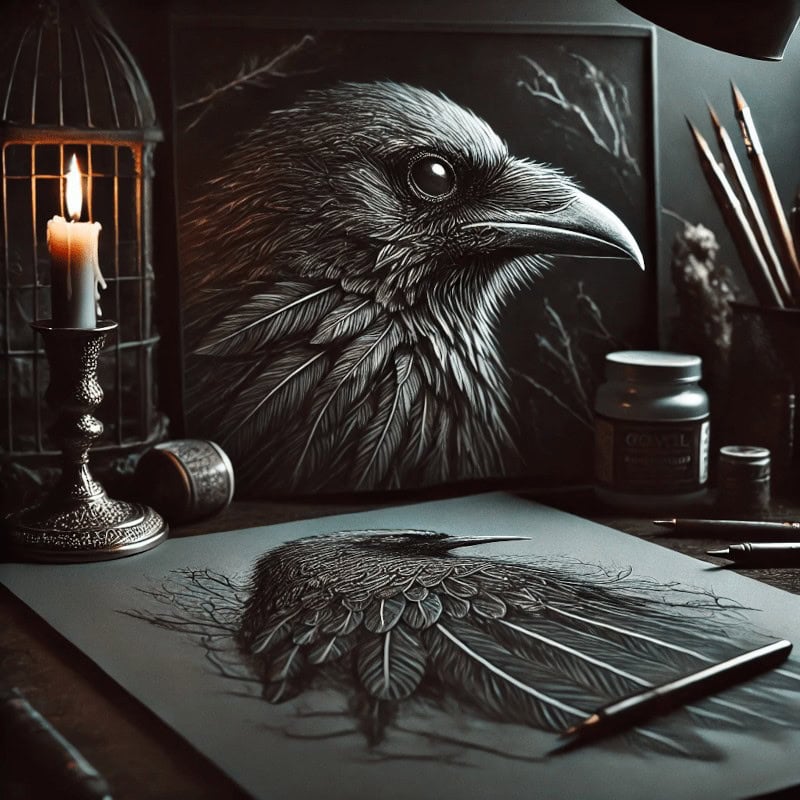
3. Feather textures & shading
Feathers: nature’s way of making birds look soft and majestic – or, in our case, ragged and haunted. We’ll explore techniques to create texture, depth, and just the right amount of “this bird has seen things.”
- Layering Feathers: Explaining primary, secondary, and covert feathers.
- Creating Texture: Using hatching, cross-hatching, and stippling for feather effects.
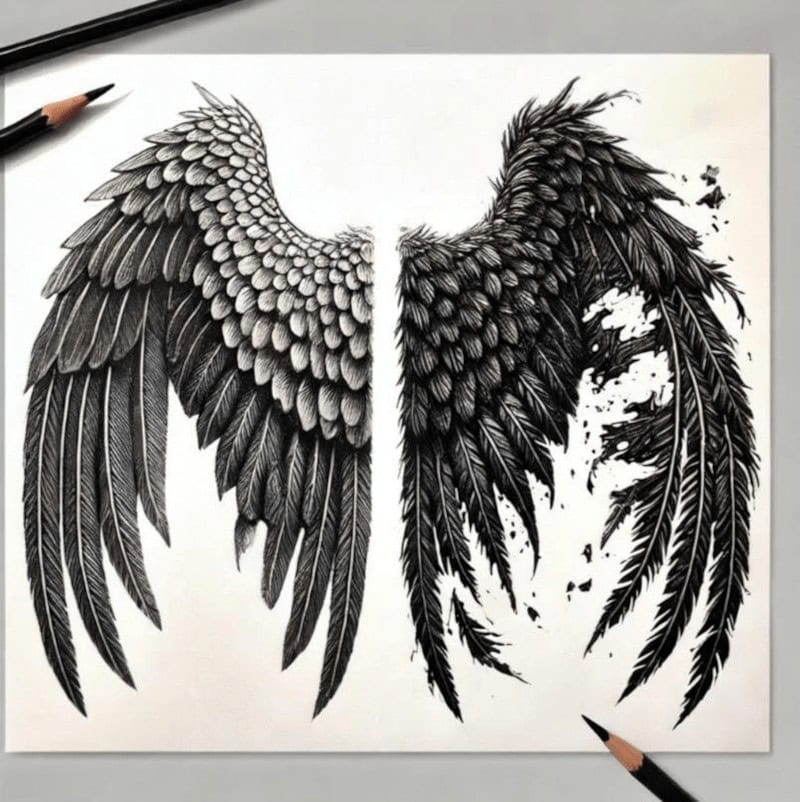
- Horror Style Feathers & Wings: Ragged feathers, missing patches, and exaggerated sharp edges for an eerie vibe in gothic bird illustrations.
4. Horror adaptations & stylisation
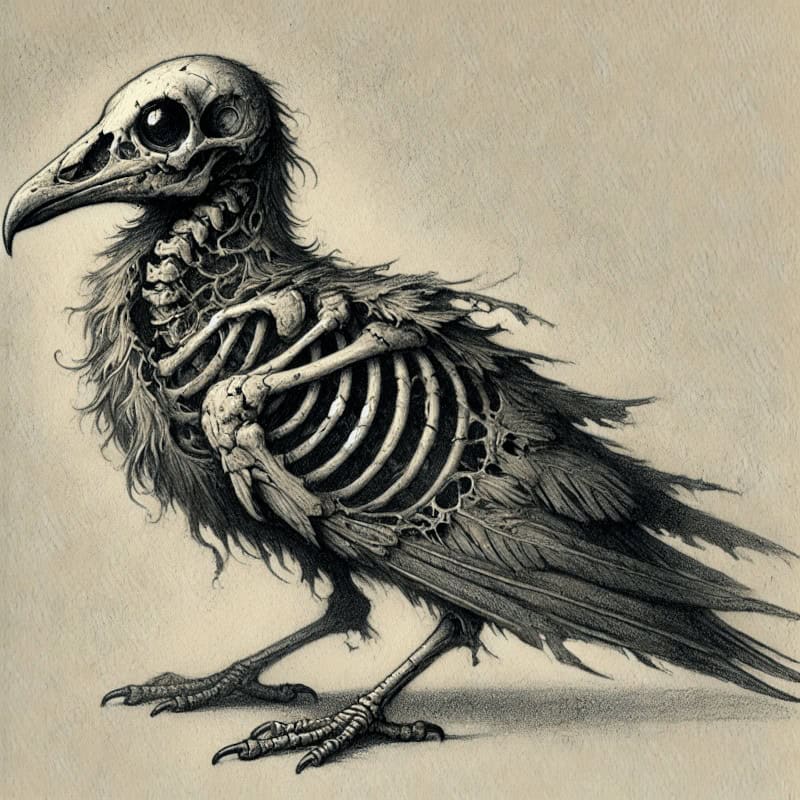
Want to make your bird look truly unsettling? This section covers everything from elongated beaks to glowing eyes, because nothing says “gothic horror” like a pigeon with a spectral aura and a stare that sees into your soul.
- Cursed & Undead Birds – Skeletal ravens, ghostly owls, and the kind of winged creatures that perch outside your window at 3 AM just to make sure you can’t sleep.
5. Finalising & enhancing the illustration
Now that the main structure of the bird is complete, it’s time to bring the drawing to life with fine details, atmospheric composition, and finishing touches. Enhancing contrast, adding highlights, and refining textures will help create a truly haunting effect.

- Fine Details & Highlights: Adding white gel pens highlights or smudging effects.
- Background & Composition: Placing the bird in an eerie setting (e.g., dark forests, abandoned structures, misty skies). These are ideal settings for gothic bird illustrations.
- Finishing Touches: Ensuring contrast, refining lines, and balancing the image.
Conclusion
Mastering bird illustration is about more than just capturing feathers and beaks – it’s about bringing movement, personality, and atmosphere to your artwork. Whether you’re sketching a skeletal owl, a ghostly raven, or a crow that looks like it has serious gossip to spill, every choice you make adds to the eerie atmosphere.
Keep experimenting, keep practising, and most importantly, watch out for the birds outside. They’re always watching.