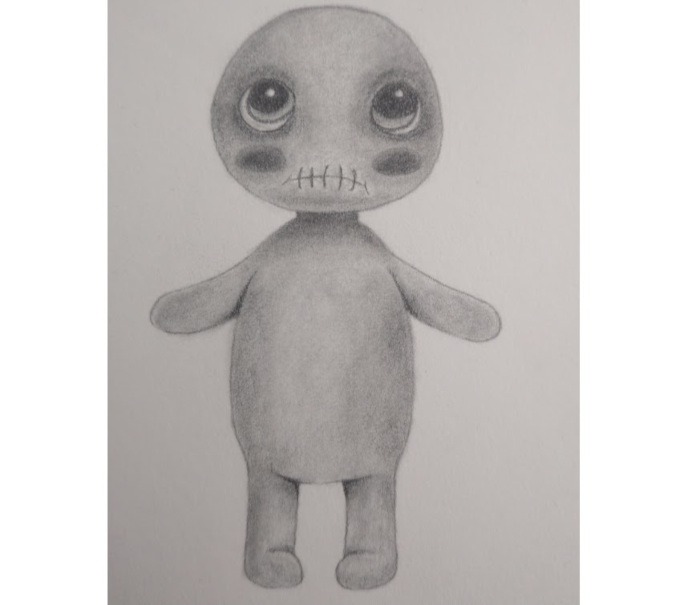
Haunted Doll Drawing Tutorial: A Beginner Friendly Step by Step Guide

Want to draw a haunted doll that looks creepy enough to unsettle guests but cute enough that you’d still apologise if you dropped it? This beginner-friendly guide breaks everything down into simple shapes and easy shading so you can create a doll that’s eerie, expressive, and full of personality. You’ll learn to sketch soft features, empty eyes, cracked details, and a slightly unsettling smile that says “I definitely didn’t move while you were sleeping”.
By the end, your doll will look haunting in all the right ways, and you’ll feel more confident with proportions, shading, and bringing spooky characters to life on the page.
Tools You’ll Need
- HB pencil for soft sketching and basic shapes
- 2B pencil for adding gentle shadows
- 4B pencil for darker areas and creepy depth
- 6B pencil for the deepest shadows and final dark values
- Eraser for tidying lines and softening details
- Sharpener to keep your lines clean
- Smooth drawing paper (any sketchbook page is fine)
- Optional: Blending stump or cotton bud for soft shading transitions
Not sure which pencils or tools are best for this? I’ve broken it all down in my Horror Drawing Tools Guide for beginners.
Before You Start: Beginner Tips
- Work lightly at first so your guidelines can be adjusted easily.
- Focus on simple shapes: circles, ovals, and soft curves.
- Keep your hand relaxed. Haunted dolls don’t judge wobbly lines.
- Build shadows slowly, layer by layer.
- Zoom in on your reference image if needed. It’s not cheating. It’s strategy.
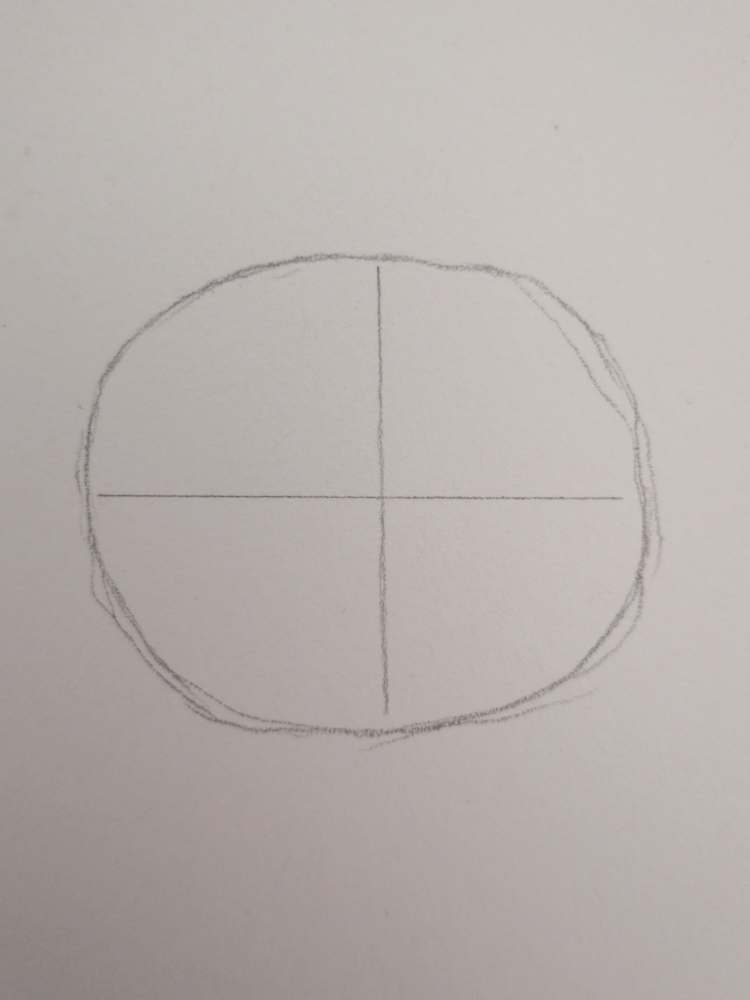
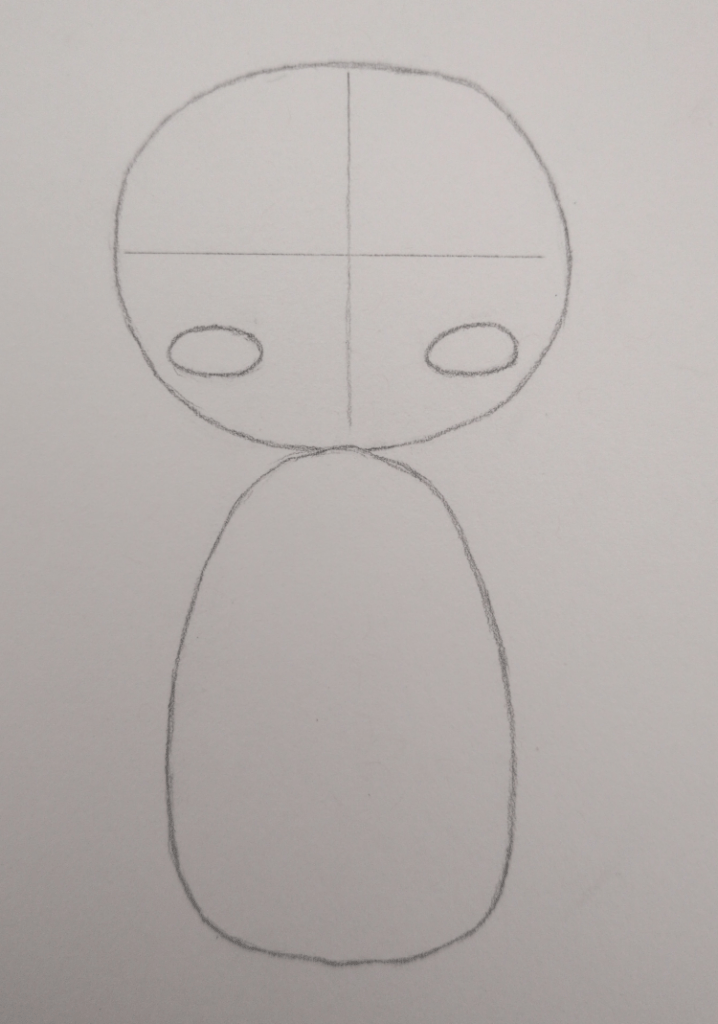
Step 1: Simple Head Shape and Guidelines
Start by drawing a simple circle for the doll’s head. Don’t worry about making it perfectly round; haunted dolls rarely follow perfect geometry anyway.
Next, add two very light guidelines:
- One vertical line straight down the middle
- One horizontal line halfway across the circle
These lines will help you place the eyes, nose, and mouth later without everything drifting around like a ghost with no sense of direction.
Keep your pencil strokes soft so they’re easy to adjust as we build on the structure.
Tip:
Try drawing the circle lightly in two or three passes instead of one heavy line. This makes it easier to fix the shape and keeps your sketch clean as you build the doll’s features.
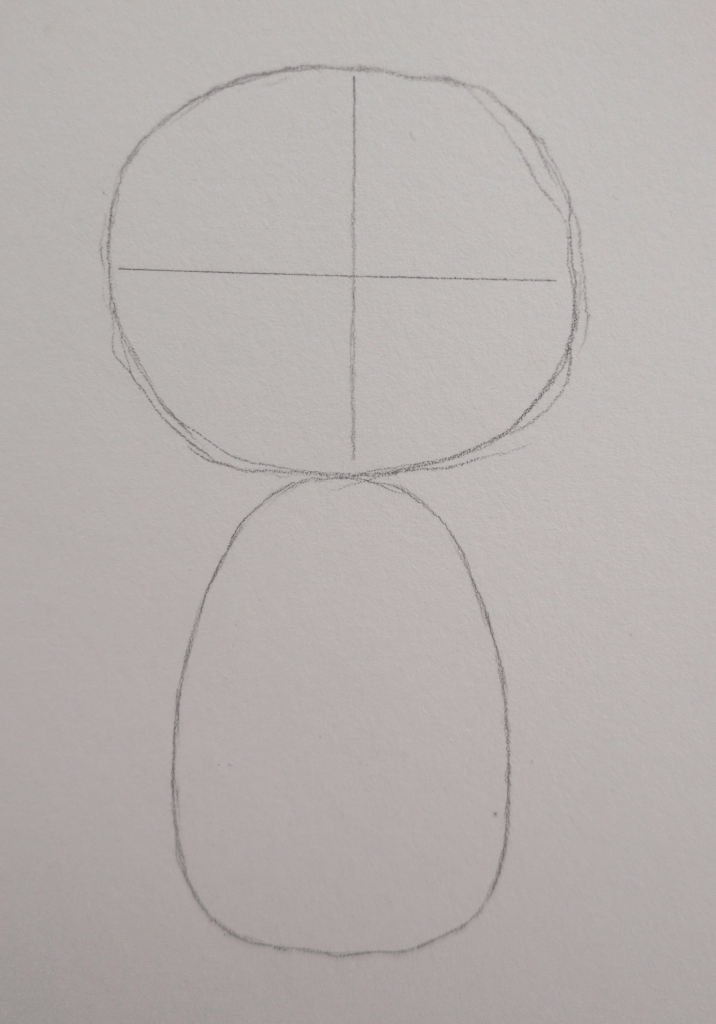
Step 2: Add the Doll’s Body Shape
Under the head, sketch a rounded oval to create the doll’s body.
Let the top of the oval touch the bottom of the head so the shapes connect naturally. Don’t worry if the head outline is still a little loose or uneven – that’s totally normal at this stage and actually makes it easier to refine later.
Keep this oval light and simple. It’s only the basic structure of the torso, and it gives us something to build the doll’s posture and details onto in the next steps.
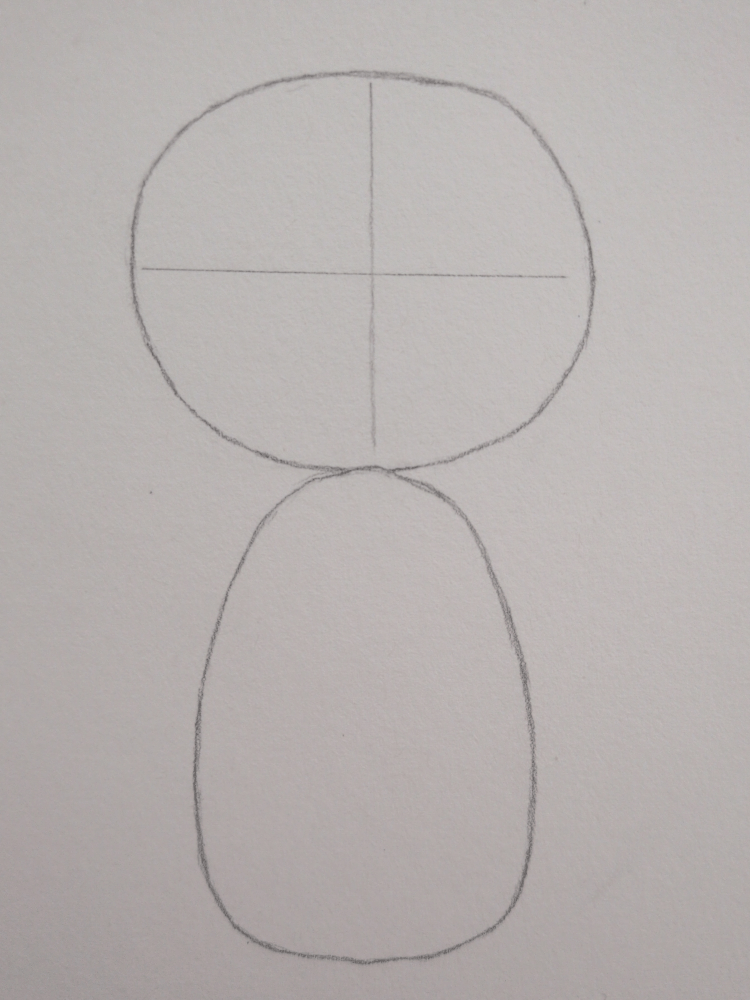
Step 3: Refine the Head Shape
Now that you have the basic head and body in place, gently refine the outline of the head.
Go over the circle with light, confident strokes to smooth out any bumps or uneven areas. You’re not aiming for mathematical perfection, just a cleaner, clearer shape that feels intentional.
This step helps remove the loose sketch lines from earlier and gives the doll a more polished base before adding facial features.
Keep the guidelines visible. We’ll need them for placing the eyes and cheeks in the next step.
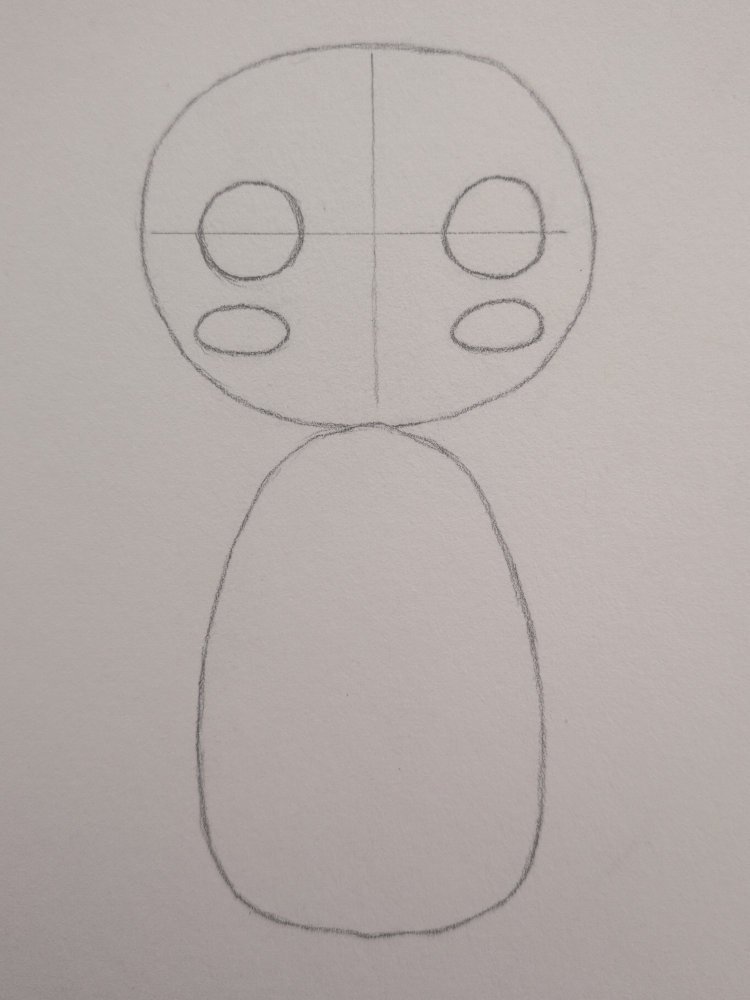
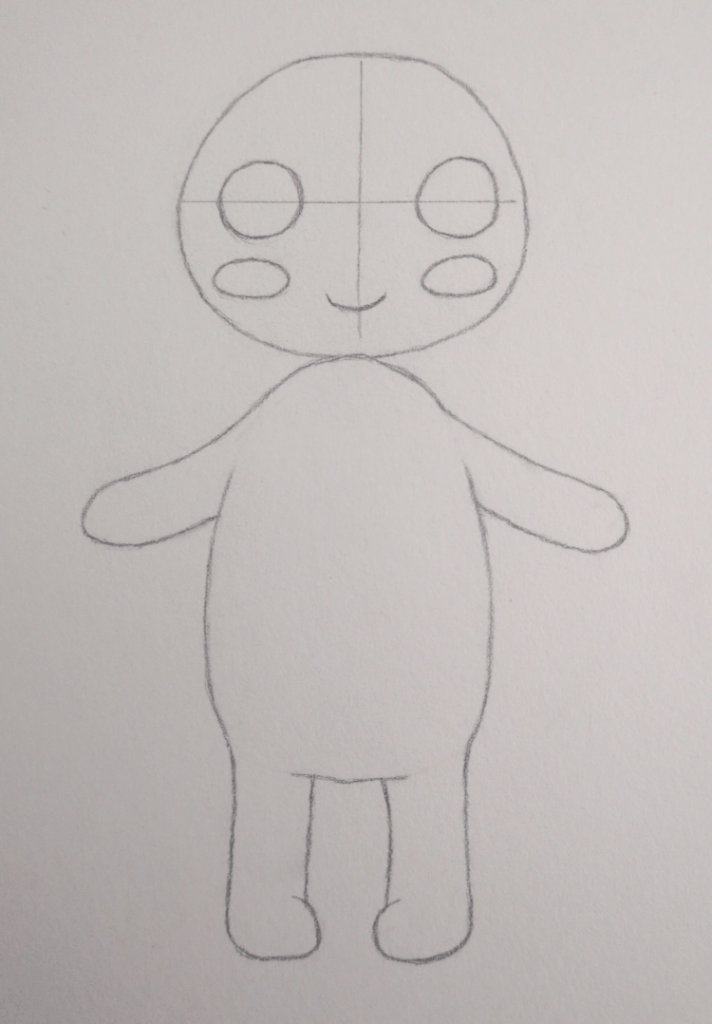
Step 4: Add the Cheek Shapes
Add two small oval shapes below the horizontal guideline to create the doll’s cheeks.
Place one on each side of the vertical line, keeping them lightly sketched. They should sit just above the body shape, giving the lower half of the face a soft, rounded structure. These shapes will help guide the placement of the eyes and mouth in the next steps.
Don’t worry about getting them perfectly symmetrical – a slightly uneven cheek just adds to that uniquely charming haunted doll personality.
Step 5: Draw Large Eye Circles
Now add two large circles for the eyes, placing them directly on the horizontal guideline so they sit above the cheek shapes.
Keep the circles roughly the same size and lightly drawn. These shapes are the foundations for the final eye details, so don’t worry about them being perfect.
Spacing is important here – try to keep each eye an equal distance from the vertical guideline. This gives your doll a nicely balanced face while still leaving room for that spooky charm we’ll build later.
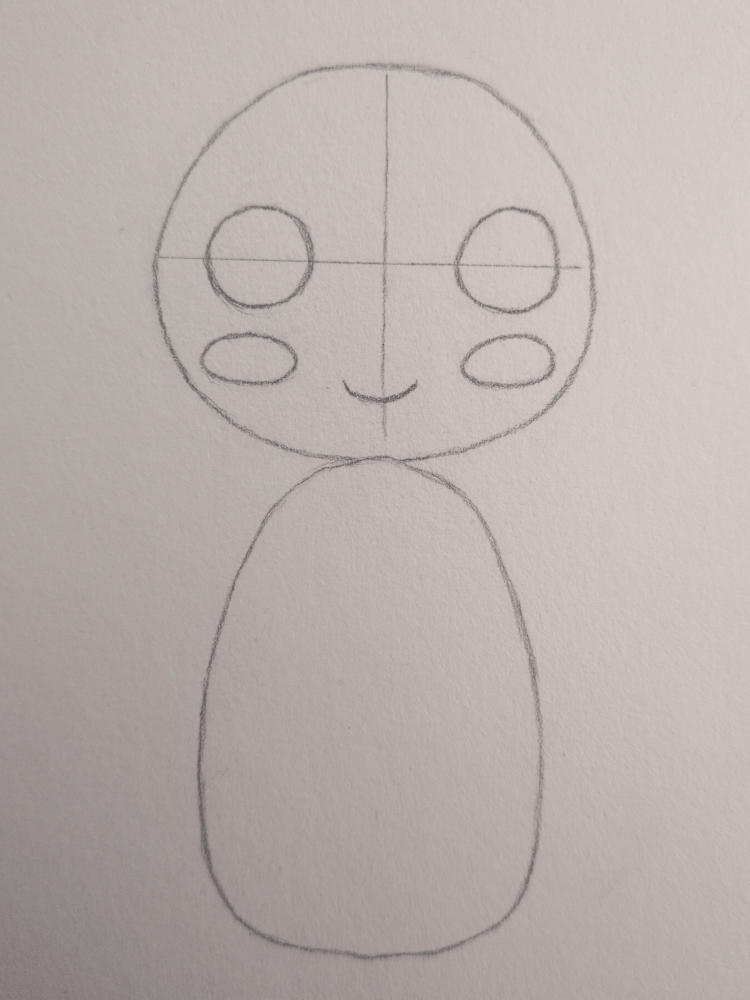
Step 6: Refine the Head Shape and Add a Simple Mouth
Now add a small curved mouth just below the cheeks.
Keep it simple and light, using a gentle “u” shape to give the doll a soft, neutral expression.
Next, bring the upper sides in slightly if needed to make the head shape feel more balanced. This helps clean up the construction lines and makes the face look more intentional before adding details.
Step 7: Add Simple Arms and Legs
Add simple arms and legs to your doll’s body using soft, rounded shapes.
Start the arms halfway down the torso and let them gently curve outward. For the legs, draw two rounded shapes extending from the bottom of the body. Keep everything light and simple – these are just the basic limb foundations that we’ll refine in the next step.
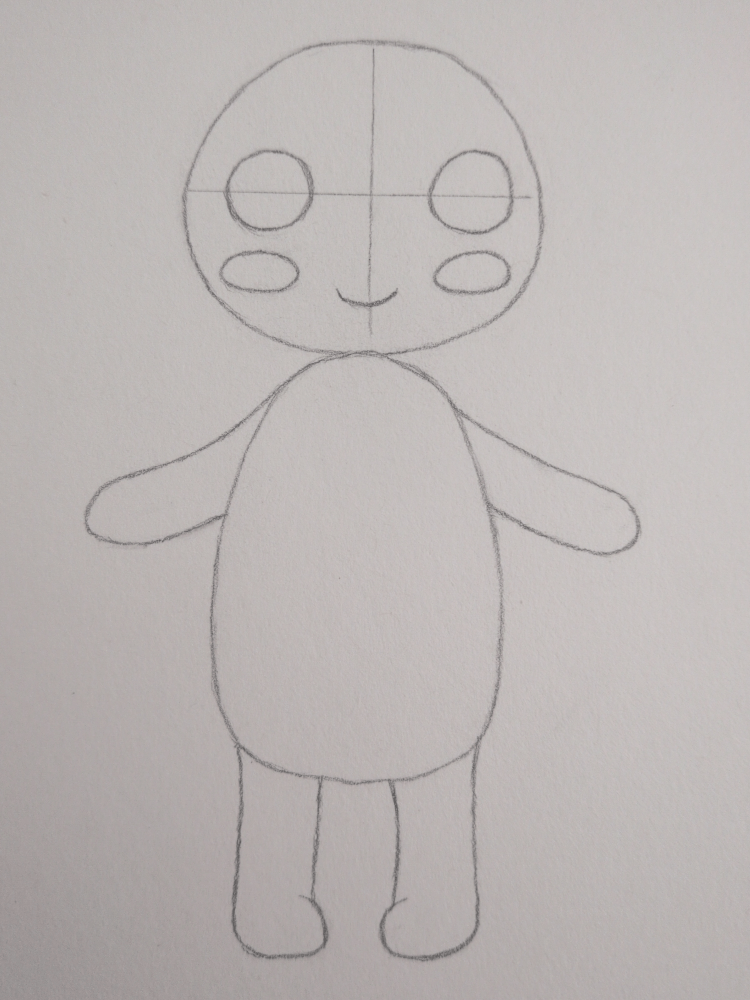
Step 8: Refine the Arms and Legs
Now gently refine the arms and legs by smoothing out any sharp angles or uneven areas.
Lightly erase parts of the original shapes and redraw them with softer curves. The goal here isn’t perfect anatomy – it’s creating limbs that flow naturally from the body and look simple, rounded, and doll-like.
Keep your pencil pressure light so you can continue shaping things in the next few steps. This subtle refinement helps the whole figure look more intentional and prepares the doll for clothing and details later.
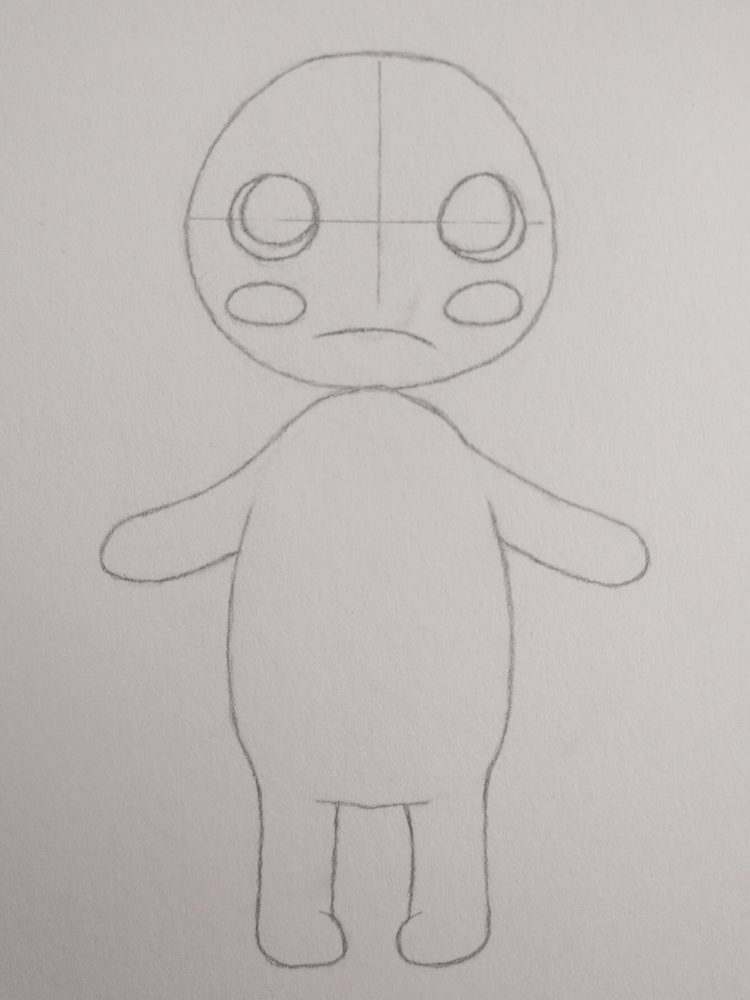
Step 9: Refine the Eye Shapes and Adjust the Expression
Now lightly draw smaller circles inside each eye to begin shaping the eye openings. These don’t need to be perfectly even. In fact, keeping one slightly larger or a bit lower helps give the doll an uneasy, off-balance look.
Next, gently adjust the mouth shape. Instead of a clear smile, flatten it or curve it slightly downward to soften the expression. This small change makes the face feel more neutral and subtly unsettling rather than cheerful.
Keep your pencil pressure light here. You’re still refining shapes, not committing to details yet. If something looks odd, that’s actually a good sign. Haunted dolls are not supposed to look perfect.
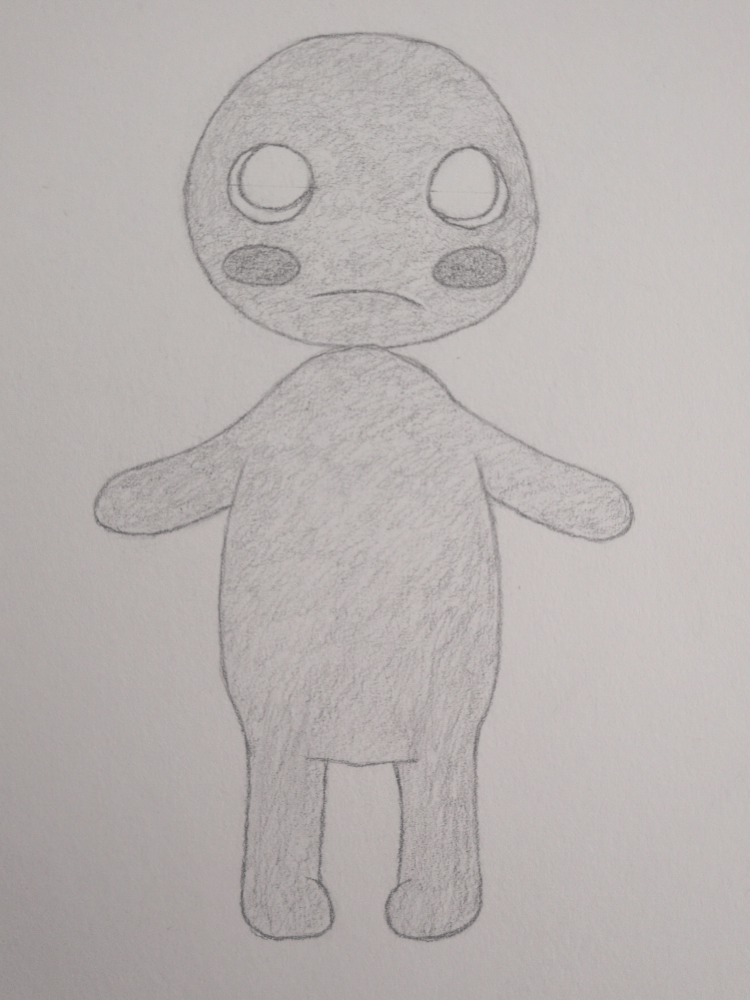
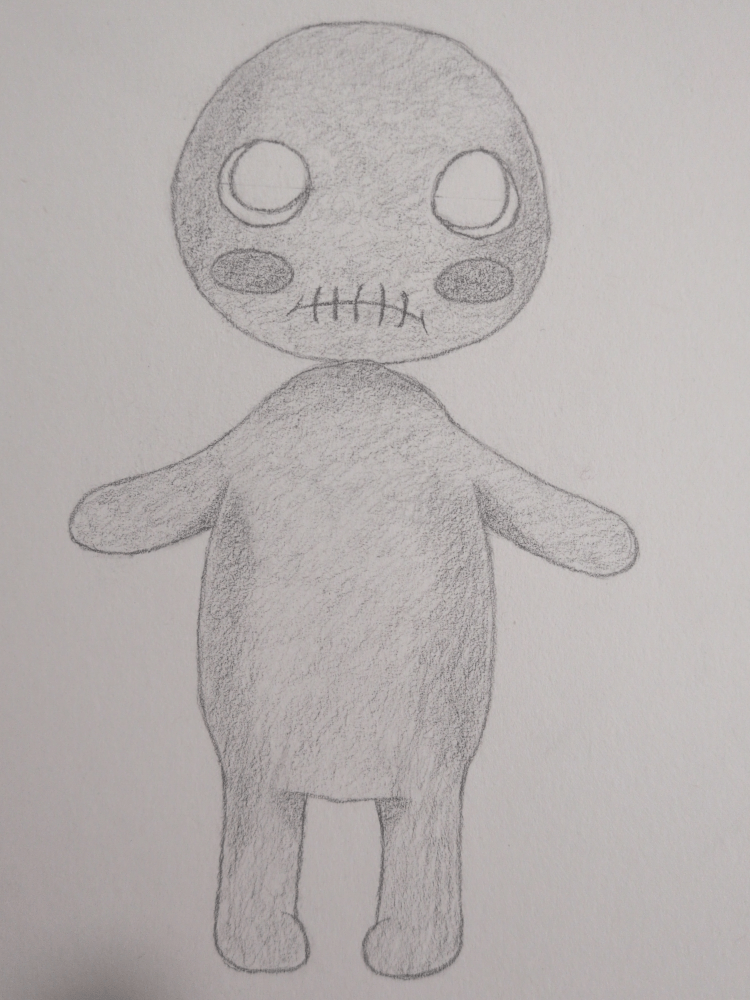
Step 10: Add a Soft Base Shading Layer
Now we’re going to add a light base layer of shading to the whole character.
Using an HB pencil, shade gently over the head, body, arms, and legs. Try to keep your pressure even and soft, rather than pressing hard. Think of this as laying down a misty grey layer rather than proper shadows yet.
For this step, avoid shading inside the eyes. Leaving them light helps them stand out later and adds to that slightly eerie doll look.
You can also erase the facial guidelines now, since they’ve done their job and aren’t needed anymore. Don’t worry if a few faint lines remain. They’ll disappear naturally as we build more layers.
Take your time here. This step is about control, not darkness. We’re setting the mood before things get creepy.
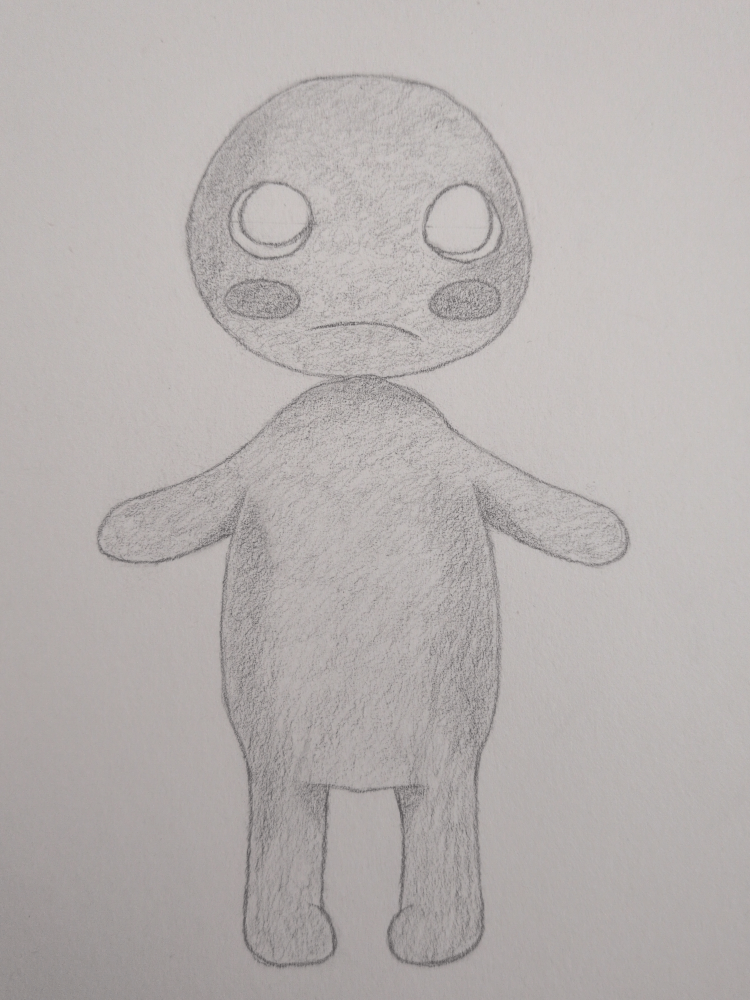
Step 11: Build Up Darker Shading With More Pressure
In this step, we’re going to deepen the shading using the same HB pencil, just with slightly more pressure.
Go back over the drawing and gently darken areas like:
- Around the edges of the head
- Under the chin, where the head meets the body
- Along the sides of the body
- Around the arms and legs where they connect
Try not to press hard all at once. Instead, slowly layer the shading by going over the same areas again. This keeps everything smooth and avoids harsh lines.
Still leave the eyes mostly untouched for now. Keeping them lighter makes them stand out later and helps build that unsettling doll stare.
At this stage, the goal is not strong shadows yet. We’re simply adding depth so the character doesn’t look flat.
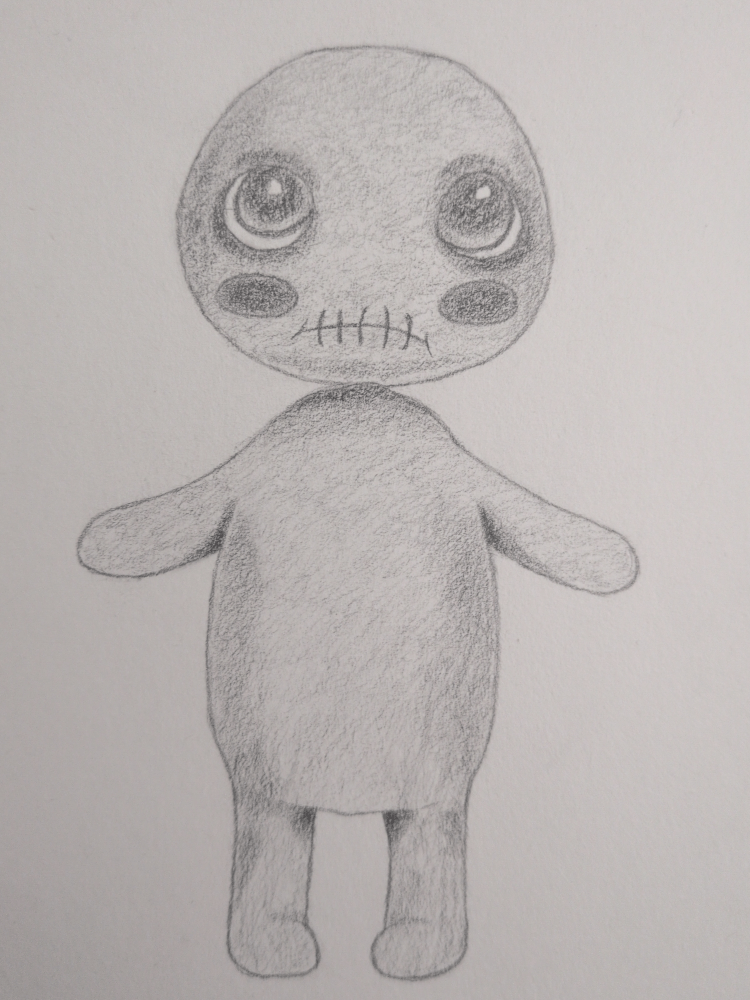
Step 12: Add Simple Mouth Stitches
Now it’s time to give our doll a slightly unsettling upgrade.
Using your HB pencil, lightly draw short stitch lines across the mouth. Keep them uneven in length and spacing.
You do not need to press hard here. These lines should feel subtle, almost like they were sewn in a hurry by someone who absolutely should not have been trusted with a needle.
Try to curve the stitches slightly to follow the shape of the mouth rather than keeping them completely straight. This helps them feel naturally attached to the face instead of floating on top.
At this stage, avoid adding shading to the stitches themselves. We will deepen and refine them later once the main shadows are in place.
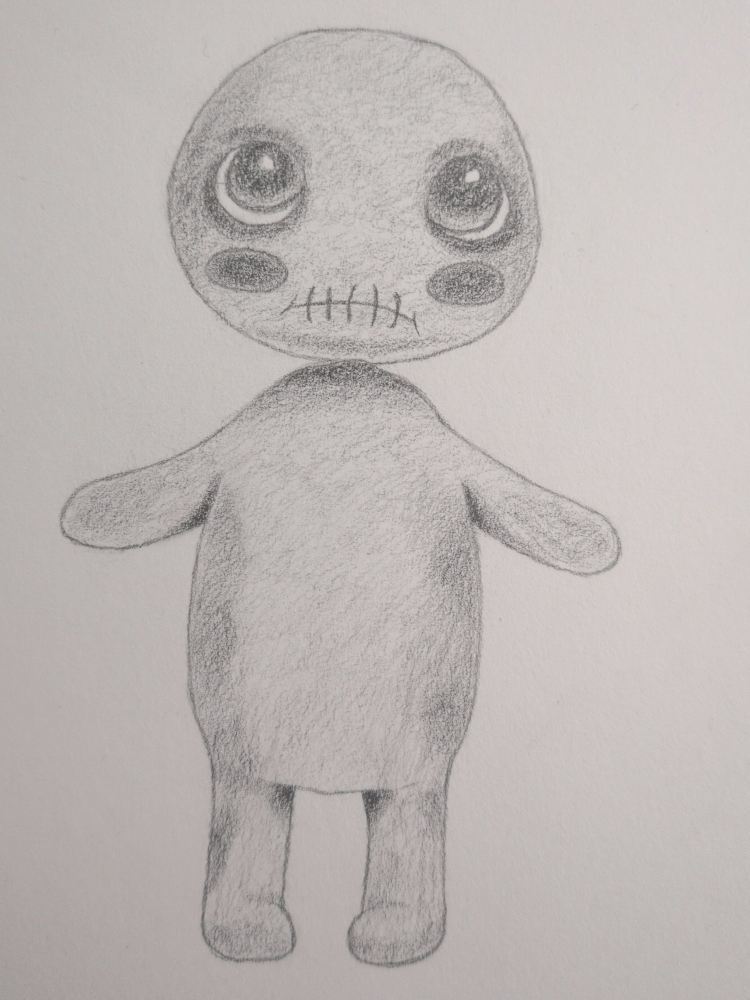
Step 13: Add Soft Shading to the Eyes
Now we’ll start giving the eyes a little life and a tiny bit of menace.
Using your HB pencil, lightly shade inside each eye, keeping the darkest area closest to the pupil. As you move outward, gradually reduce the pressure so the shading fades softly toward the edges.
Try not to fill the eyes in completely. Leaving lighter areas helps the eyes look round and slightly glossy, which adds that unsettling doll stare without making things too complicated.
Work slowly and use gentle strokes. This step is all about control, not speed. You can always darken the eyes later, but it’s much harder to erase a spooky mistake once it’s fully committed.
By the end of this step, the doll should start looking a little more alive… in a “please don’t blink first” kind of way.
Step 14: Add Depth Around the Eyes
In this step, we’re starting to bring the eyes to life by gently increasing contrast, without fully shading them just yet.
Using an HB pencil, lightly darken the area around each eye to suggest depth in the socket. Keep your pressure soft and build the tone slowly. You should still be able to see the paper texture underneath.
Next, slightly darken the outline around the pupils. This helps the eyes stand out against the face and gives that subtle haunted look without going full nightmare mode yet.
Try to keep the shading darker closer to the pupil and lighter as it fades outward. The eyeballs themselves should stay mostly light for now. We’re teasing the creepiness, not unleashing it.
If it starts to look intense, you’ve gone too far. If it looks mildly uncomfortable to be stared at, you’re doing it right.
Step 15: Deepen the Shadows with a 2B Pencil
Now it’s time to gently increase the contrast.
Switch to a 2B pencil and begin darkening the areas that naturally fall into shadow. Focus on places where light would struggle to reach, such as under the chin, beneath the arms, along the sides of the body, and the inner areas of the legs. You can also add a little extra shading under the eyes to enhance that tired, haunted expression.
Use light to medium pressure and slowly build the graphite. The goal here is to create depth, not harsh lines. Let the darker areas softly fade into the lighter base shading so everything still feels smooth and rounded.
This step helps the doll feel more solid and three-dimensional, while keeping the overall look gentle and beginner-friendly.
Step 16: Strengthen the Shadows
Using a 2B pencil, gently deepen the darker areas of your drawing to add more contrast and depth.
Focus on shadowed areas such as:
- Around and inside the eyes to make them feel more sunken
- The cheeks to help them stand out from the rest of the face
- Under the chin to separate the head from the body
- Beneath the arms
- Along the inner legs
- Slight shading around the sides of the body
Work in soft layers rather than heavy pressure. Build the darkness gradually so the shading stays smooth and beginner-friendly.
Try to avoid shading everything the same darkness. Leaving lighter areas helps the doll look rounded instead of flat and keeps the face from losing its expression.
At this stage, the drawing should start to feel more three-dimensional, slightly worn, and just a little bit unsettling in that “this thing definitely stares at the wall at night” kind of way.
Reminder:
If your shadows start to look patchy, lightly blend with a tissue or clean blending stump before adding more graphite.
Step 17: Deepen the Shadows with a 4B Pencil
For this step, switch to a 4B pencil to begin strengthening the darkest areas of the drawing.
Do not shade everything darker. This step is about selective shadows, not turning the doll into a graphite potato.
Focus on these areas:
- Around the eyes, keeping the darkest tones closest to the pupils
- The upper eyelids and eye rims to make the eyes feel deeper
- The cheeks, gently darkening them to keep that eerie doll-like blush
- Under the chin to strengthen the head shadow
- Under the arms, where they meet the body
- The inner legs and lower body for depth and weight
Use light pressure, even with the 4B. Let the softness of the pencil do the work instead of pushing hard. This helps avoid shiny graphite and keeps the texture nice and matte. At this stage, the shading should look darker but still slightly rough.
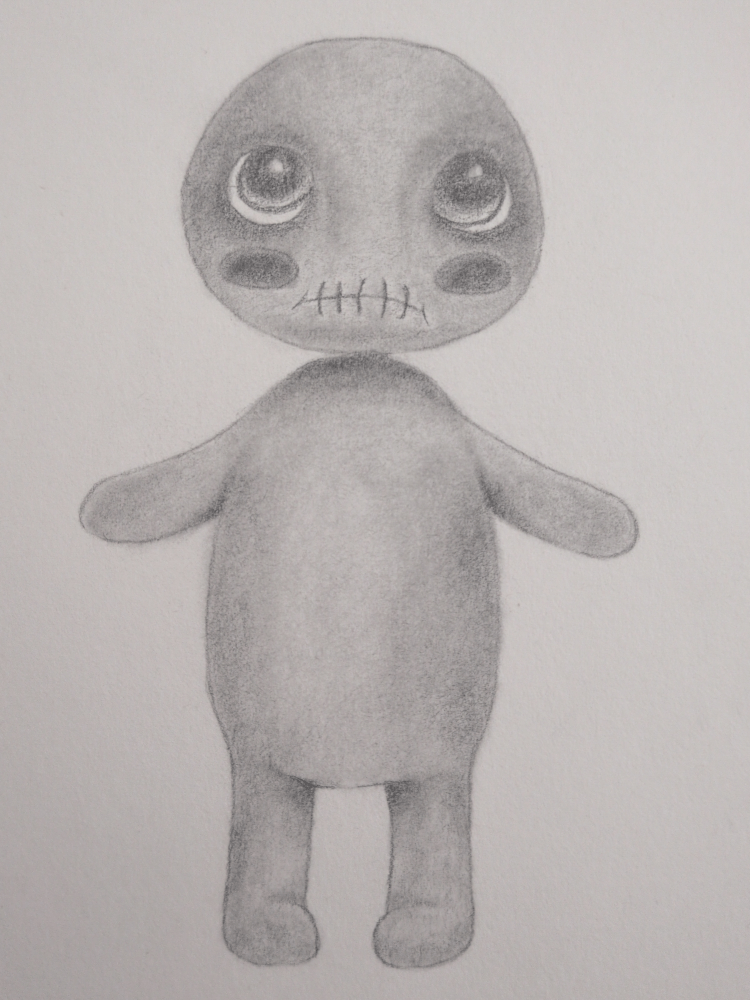
Step 18: First Blending Pass
In this step, we soften the shading to help the drawing feel smoother and more unified.
Using a blending stump, cotton bud, tissue, or clean kitchen roll, lightly blend the graphite across the drawing. Work with gentle pressure and small circular motions.
Blend gradually from lighter areas into darker ones, allowing the shading to flow smoothly without spreading dark graphite too far.
Try to blend most areas of the face and body, but avoid the eyes and stitches. Leaving these unblended helps them stay sharp and stand out from the softer shading around them.
After blending, the drawing may look slightly lighter. This is completely normal and means the surface is ready for deeper shadows and final details in the next step.
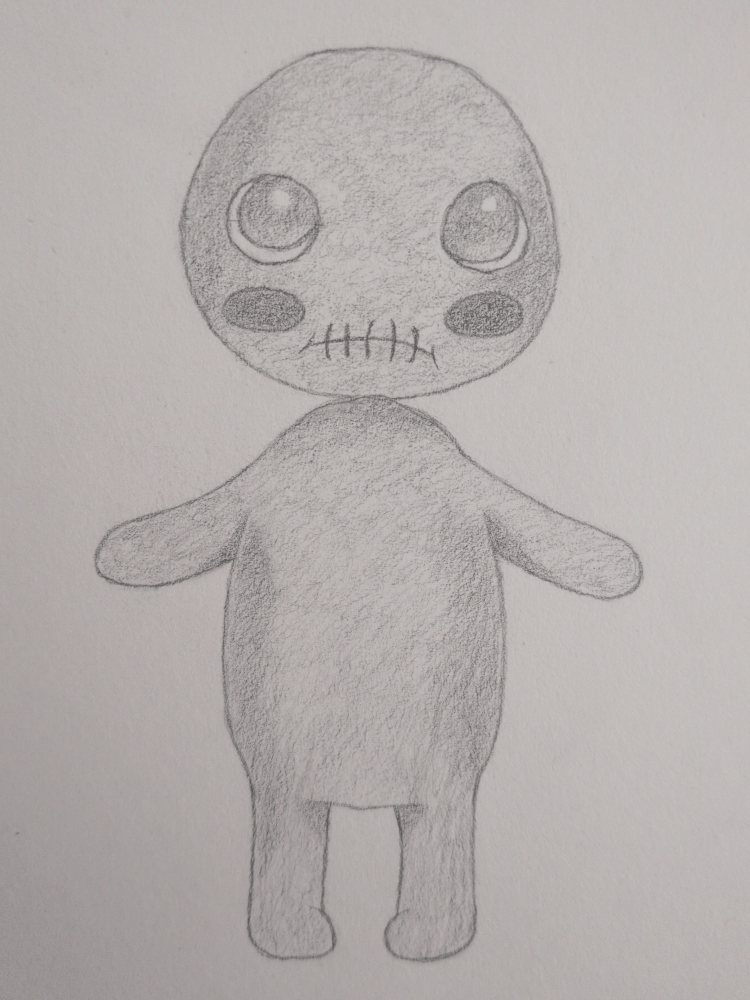
Step 19: Refining the Eyes and Facial Shadows
Now it’s time to focus on the face and push the mood a little further.
Using a 4B pencil, carefully deepen the shading inside the eyes and around the eye rings. Avoid shading in a perfect circle. Instead, let parts of the ring fade or break slightly. This helps the eyes feel more natural and prevents them from looking flat or cartoon-like.
Darken the areas just around the eyes to create a soft hollow effect, but keep the shading gentle. You want the eyes to sit into the face, not look like they’ve been drawn on top of it.
Next, deepen the cheeks slightly. Keep the edges soft and blended so they melt into the surrounding face rather than forming hard shapes. The cheeks should feel padded and subtle, not bold or sharply defined.
Throughout this step, work slowly and build up the graphite in light layers. Keep the highlights in the eyes clean and untouched, as these will help the eyes stay glossy and eerie.
At this stage, the goal is not perfection. You are refining the expression and mood, letting the face feel tired, sad, and quietly unsettling.
If something feels a little uneven, that’s okay. Slight imperfections actually make the doll feel more believable and creepy.
Step 20: Connecting the Neck
In this step, we focus on making the head feel properly connected to the body.
Using a 4B pencil, gently darken the area directly underneath the head where it meets the shoulders. This shadow should be darkest right under the chin and gradually fade as it moves down into the body.
Avoid drawing a hard neck outline. Instead, let shading do the work. This creates the illusion that the head is sitting on the body rather than floating above it.
Keep your pressure light and build the shadow slowly. The goal is a soft transition, not a harsh line.
At this stage, the doll should feel more solid and grounded, with the head visually anchored to the body.
If it starts to look like he is wearing a tiny graphite turtleneck, you have gone a bit too dark. Ease up and blend lightly to soften it back.
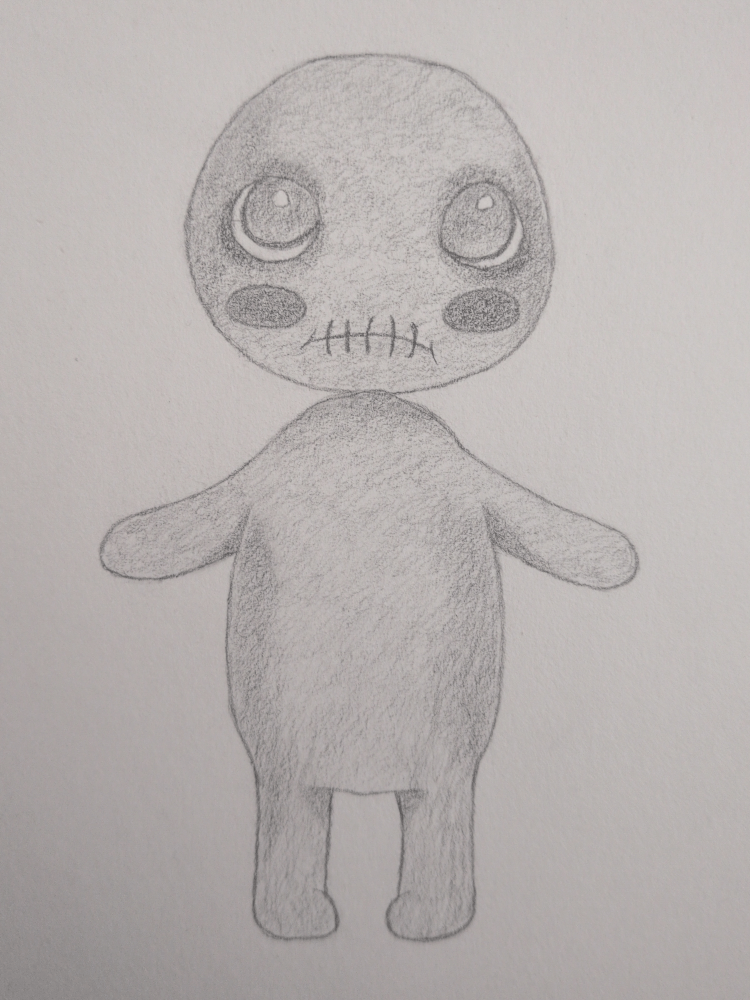
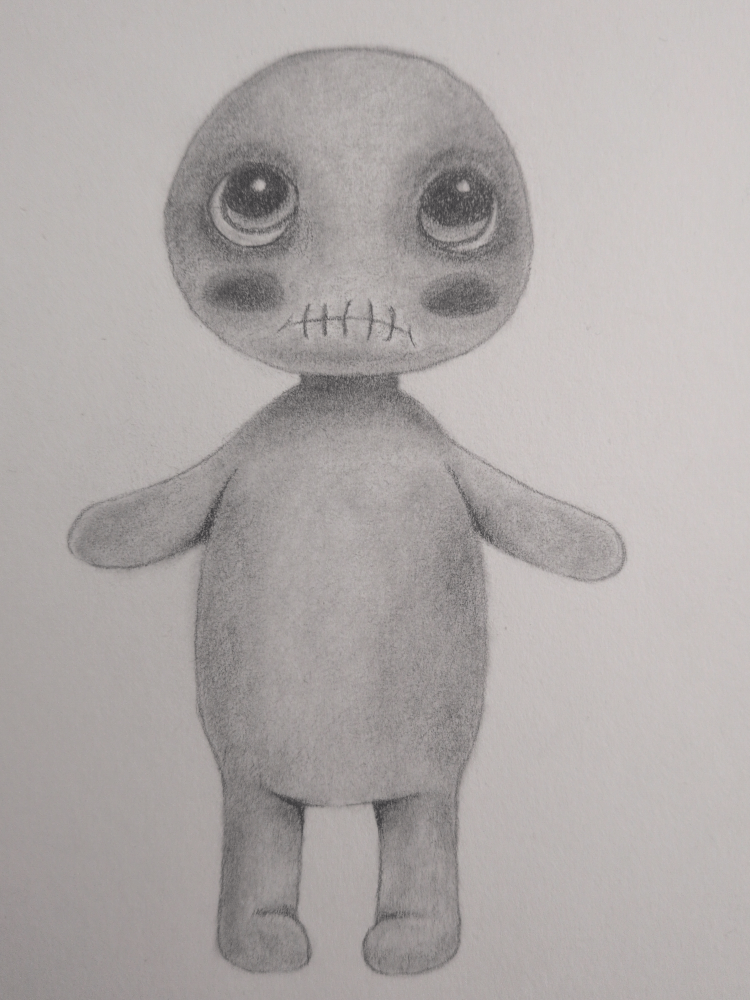
Step 21: Deepening the Darkest Values
Now we strengthen the darkest areas using a 6B pencil.
At this stage, some areas may no longer darken easily with a 4B pencil and can start to look slightly shiny. Instead of pressing harder, switching to a softer pencil allows us to deepen the shadows while keeping the drawing clean and soft.
Using light pressure, carefully build darker values in the following areas:
- Around and inside the eyes, especially near the upper eyelids
- The shaded rings around the eyes
- The cheeks to give them more depth
- Under the head where it meets the neck
- The inner legs and lower body, where shadows naturally sit
Work slowly and build the darkness gradually. Avoid filling everything in solid black. Leaving subtle variations in tone helps the doll look more realistic and unsettling.
If your pencil begins to glide smoothly without getting darker, that’s your sign to stop. Overworking this stage can flatten the drawing, so it’s better to leave a little texture than push too far.

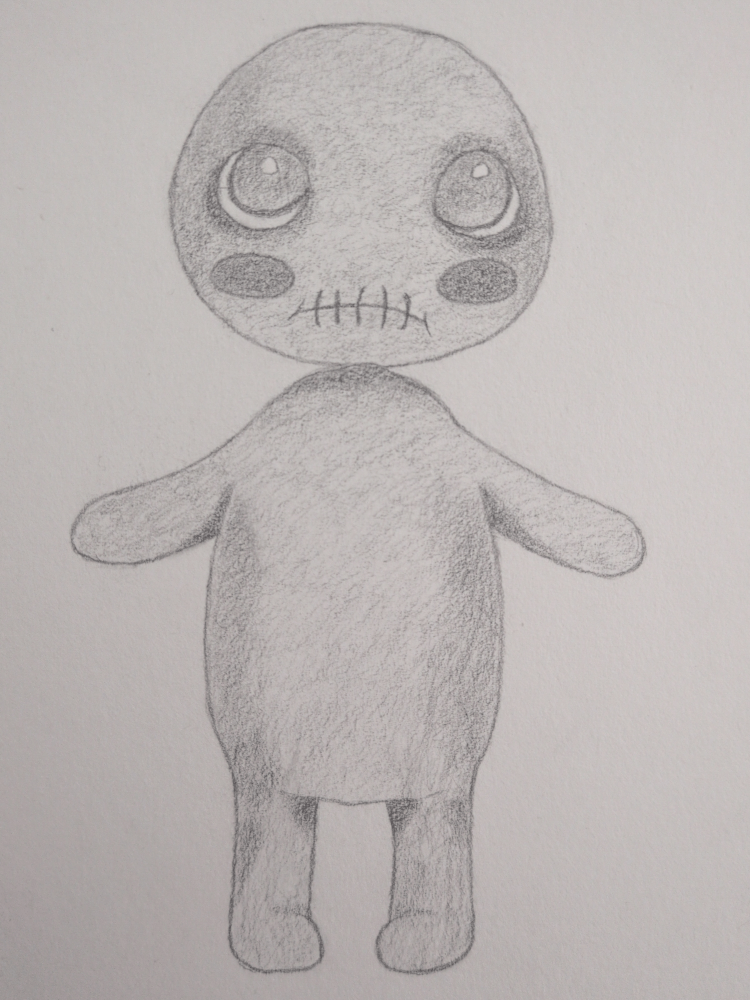
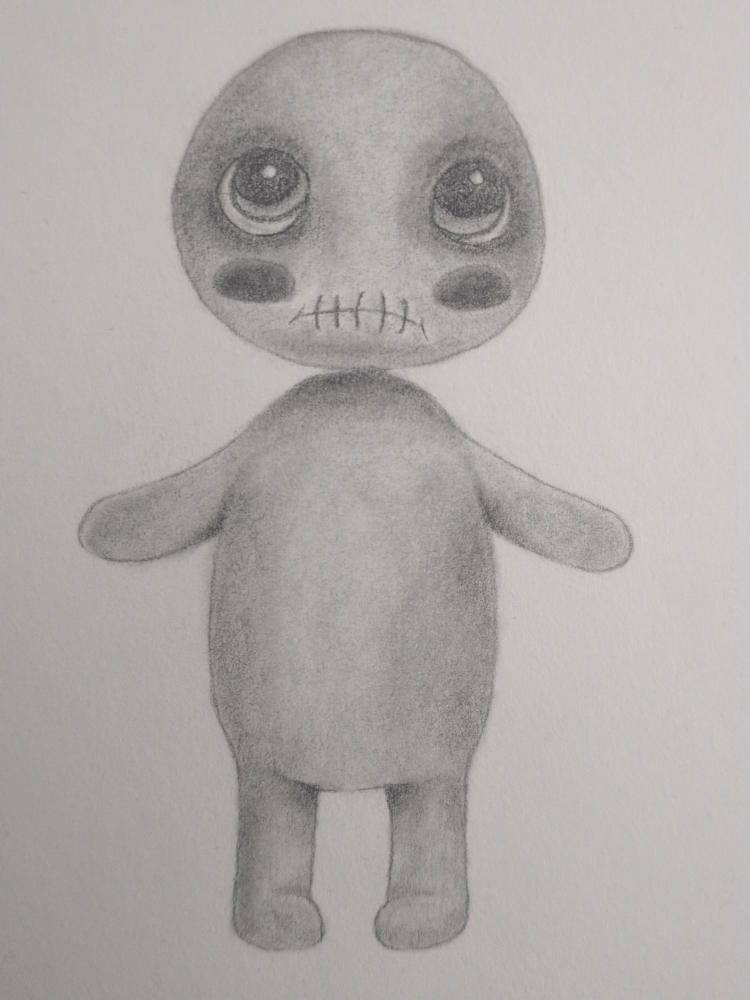
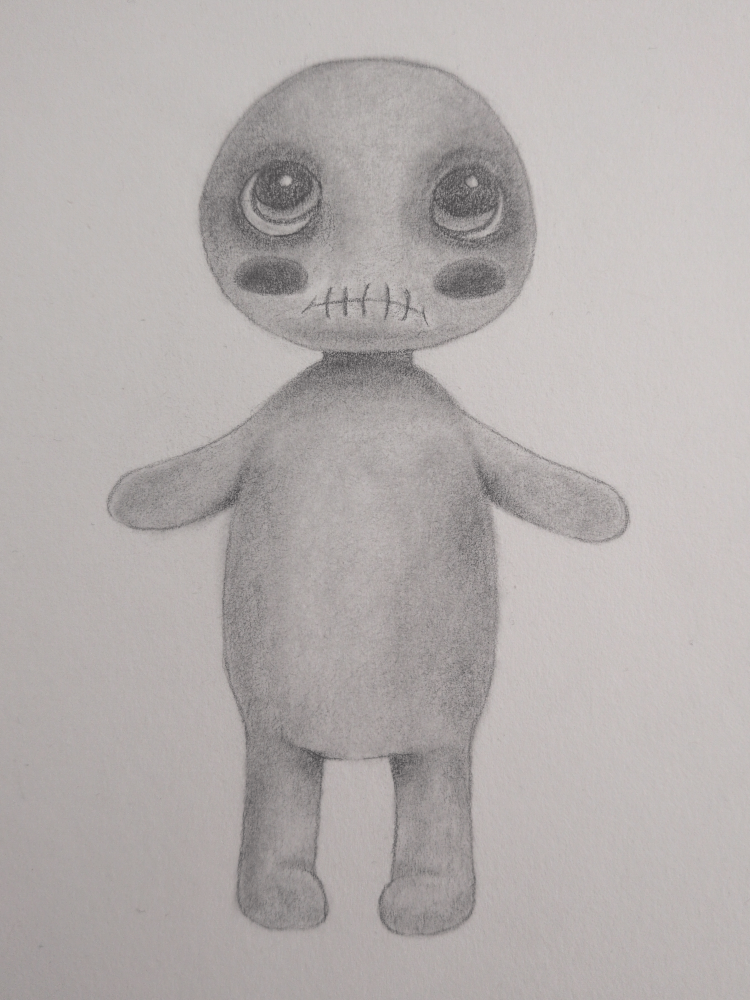
Step 22: Final Cleanup and Details
In this final step, we tidy up the drawing and make small adjustments to bring everything together.
Lightly clean the outer edges of the character using a kneaded or standard eraser. This helps sharpen the silhouette without turning the outlines harsh or overly dark.
Gently redefine important details such as the stitches, eyes, and edges of the face. Keep these lines slightly uneven so the doll still feels handmade rather than perfectly polished.
Avoid adding heavy new shading here. This step is about refining what is already there, not rebuilding values. If something looks too dark, softly lift the graphite instead of adding more.
Once everything feels balanced, step back and check the overall drawing. The goal is a clean, soft finish that still keeps that slightly creepy, stitched-together charm.
And that’s it.
Your creepy little doll is officially complete.
Final Thoughts
And just like that, your creepy little doll is complete. Please do not blame me if it starts staring at you when you turn the lights off. That’s between you and the sketchbook.
If your drawing doesn’t look exactly like mine, that’s actually a win. Art isn’t about copying perfectly; it’s about learning, experimenting, and slowly confusing your pencil until something cool happens.
Look how far you’ve come. You started with basic shapes, and now you’ve got a fully shaded, spooky little character sitting on the page like it owns the place. That’s progress, even if your brain is currently going “yeah, but I see flaws.” Brains lie. Graphite doesn’t.
The more you draw, the more confident your lines will become. Every sketch teaches you something, even the ones that feel a bit wobbly. Especially those ones, actually.
Be proud of this one. You earned it.
Try Another Beginner Horror Drawing
Keep experimenting with simple horror designs:
- Ghost Drawing Tutorial for Beginners
Build confidence with soft transitions from light to dark and controlled graphite layering. - Creepy Pumpkin Drawing Tutorial
Experiment with strong contrast, bold expressions, and dramatic shadow placement.