Simple Body Guidelines for Horror Characters
(How to Stop Your Characters From Looking Like They’re About to Fall Over)
Drawing a horror body often starts with confidence and ends with a character who looks like they’ve lost the will to stand. Limbs drift. Shoulders tilt for no reason. The head looks fine. The body underneath it seems confused about gravity.
That’s not a skill issue. That’s a structure issue.
This tutorial shows you exactly how to use simple body guidelines to place posture, balance, and proportions before you add details or distortion. Nothing complex. Nothing overly anatomical. Just enough structure to stop your horror characters collapsing halfway through the sketch.
Before moving on to the full body structure, it really helps to have the head placement sorted first. If you haven’t already, the Basic Face Guidelines for Horror Characters tutorial walks you through placing facial features so your characters don’t start falling apart from the neck up.
What Body Guidelines Are Actually For
Body guidelines are basic planning lines that map out the body before the details.
Their job is to:
- Establish posture and balance
- Show how the body is standing or moving
- Prevent limbs from drifting as you draw
They are not:
- Detailed muscle diagrams
- Full anatomy breakdowns
- A test you can fail
Without guidelines, you’re guessing proportions and balance instead of planning them.
Think of them as a stick figure with better intentions.
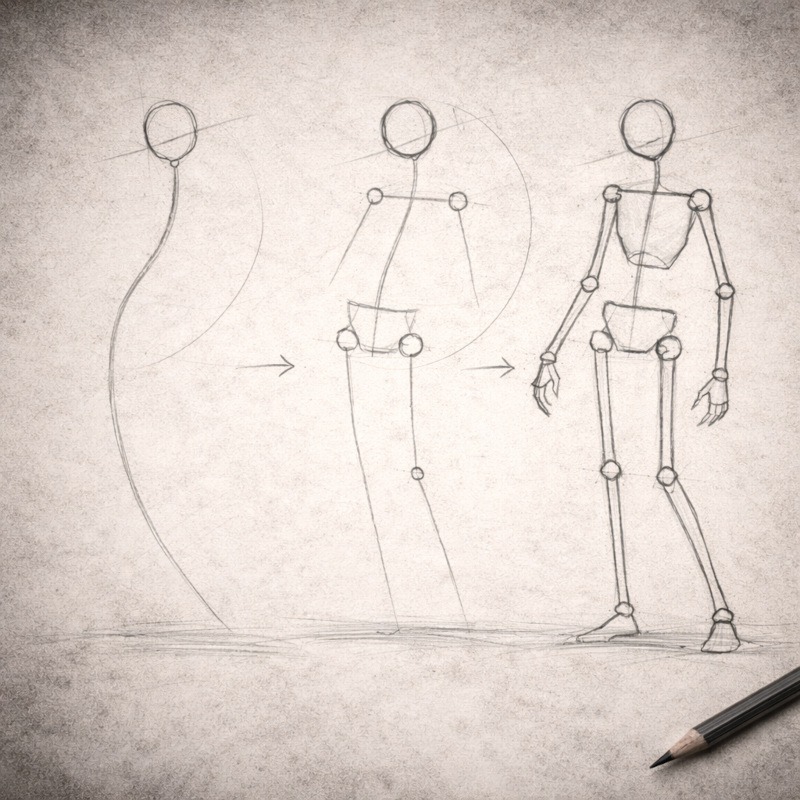
Step 1: Draw the Line of Action
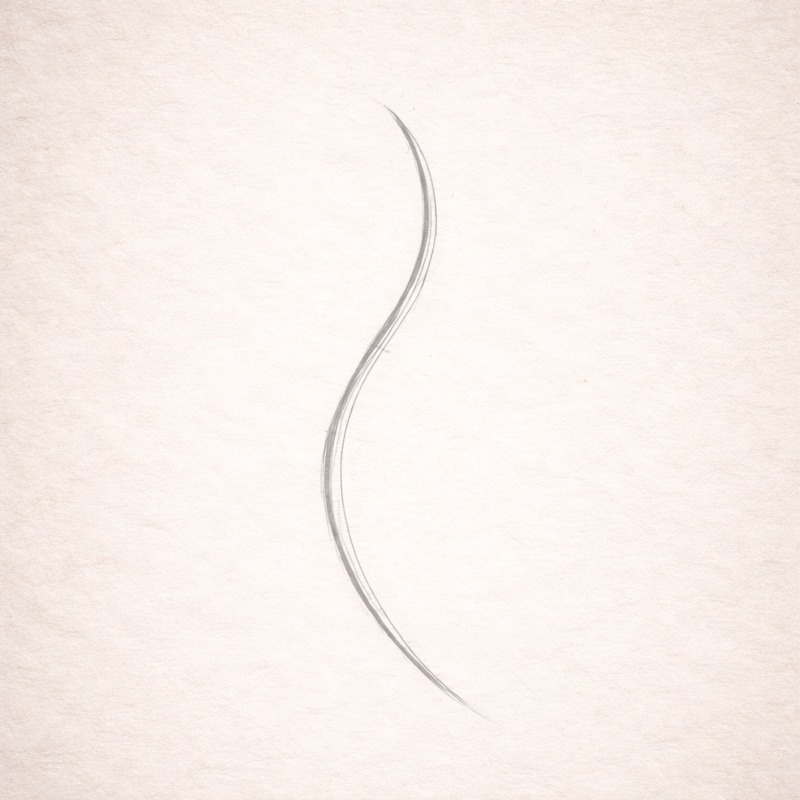
This is the most important line in the entire body.
Draw one long, light line showing the overall direction of the pose before you add anything else. (It usually runs from the head down through the spine toward the standing leg.)
This line:
- Shows movement or stillness
- Sets the mood of the character
- Keeps the body unified instead of stiff
Straight line = rigid, tense, lifeless
Curved line = movement, weight, unease
Horror loves imbalance, so don’t be afraid to curve it slightly. A perfectly straight line often looks polite. Horror characters are rarely polite.
Step 2: Place the Head and Spine
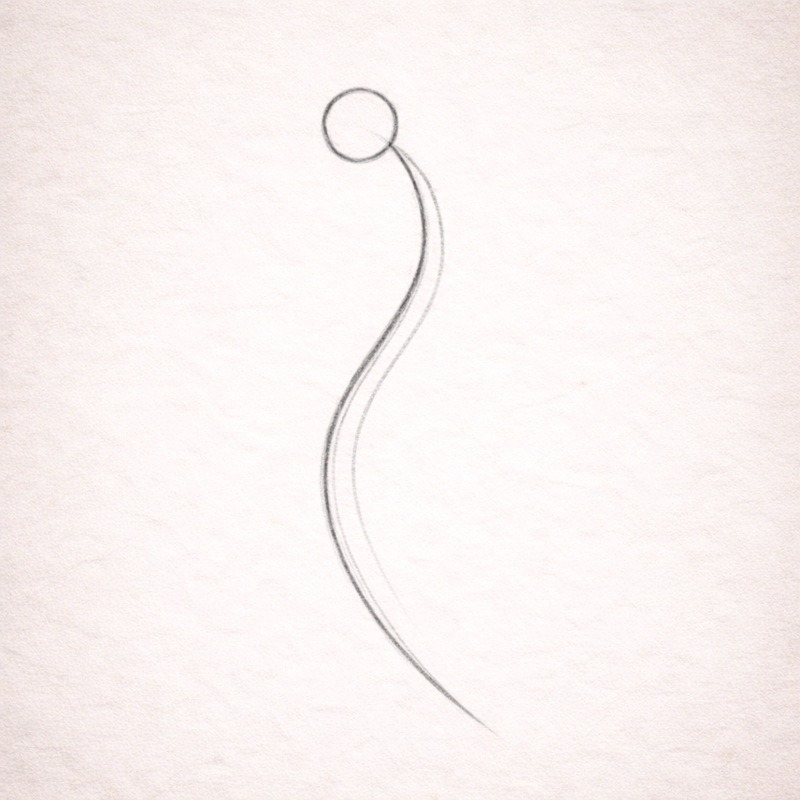
Place the head at the top of the line of action.
From the base of the head, let that same line continue downward as the spine.
This keeps:
- The head connected to the body
- The pose flowing naturally
- The character from looking like a floating head again
If the head is tilted, the spine should follow that direction slightly too.
If the head and spine disagree, the drawing comes across as confused rather than creepy.
Step 3: Add the Shoulder Line
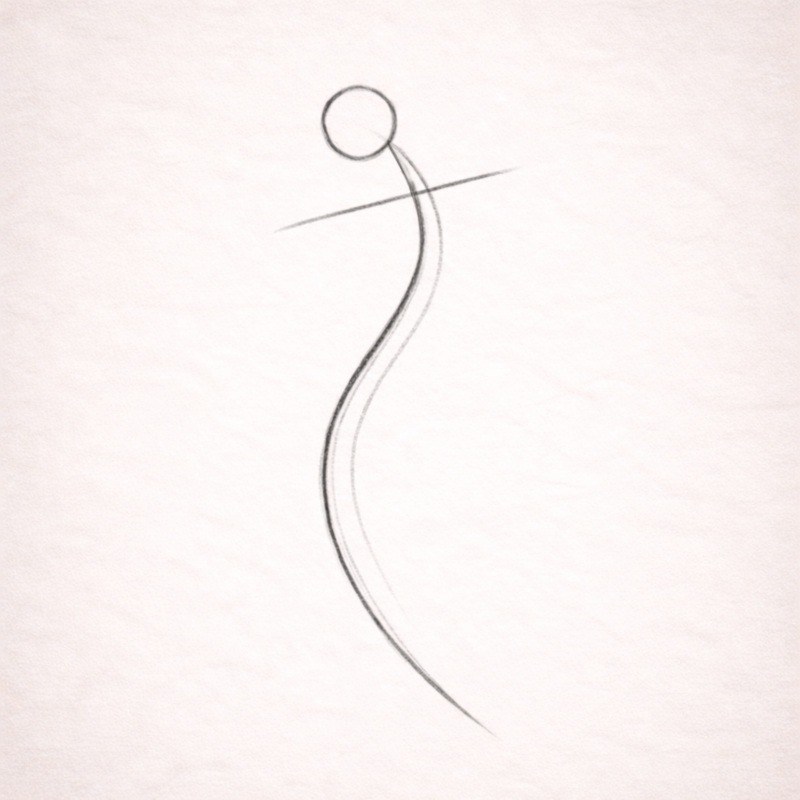
Draw a short line across the upper body to mark the shoulders.
This line:
- Shows shoulder width
- Indicates tilt
- Helps with arm placement later on
A useful horror tip: Perfectly level shoulders look calm and balanced.
Slightly tilted shoulders feel uneasy, tired, or off.
If your character looks too friendly, tilt the shoulders slightly. Instant downgrade. In the best way.
Step 4: Add the Hip Line
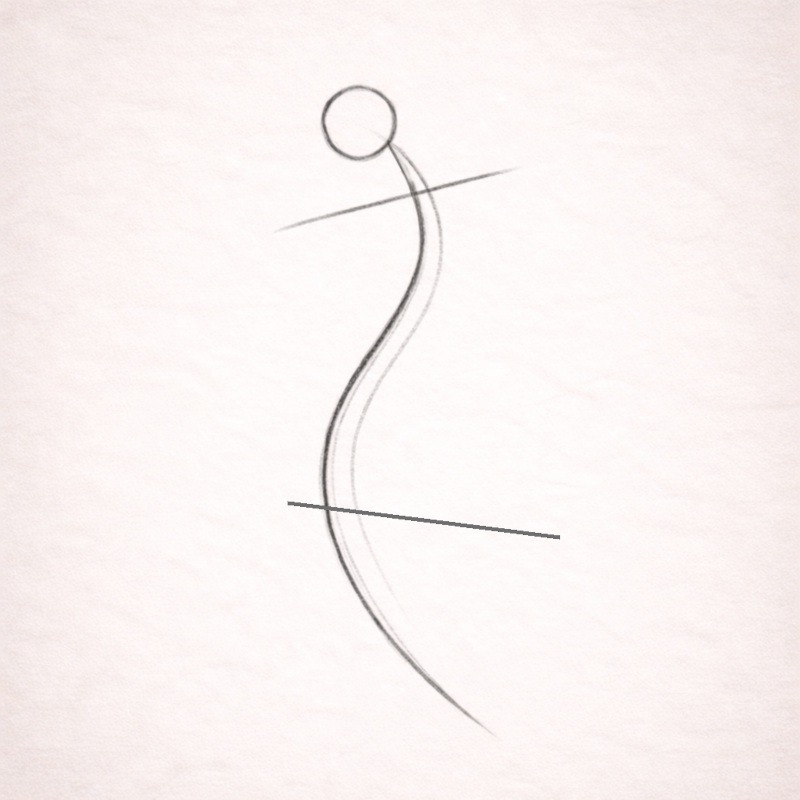
Below the shoulders, draw another horizontal line to mark the hips.
The hips:
- Usually tilt differently from the shoulders
- Help show how the weight is distributed
- Are key to balance
If both the shoulder and hip lines tilt the same way, the pose can look stiff.
Opposing angles create tension, which horror absolutely loves.
Step 5: Check Balance
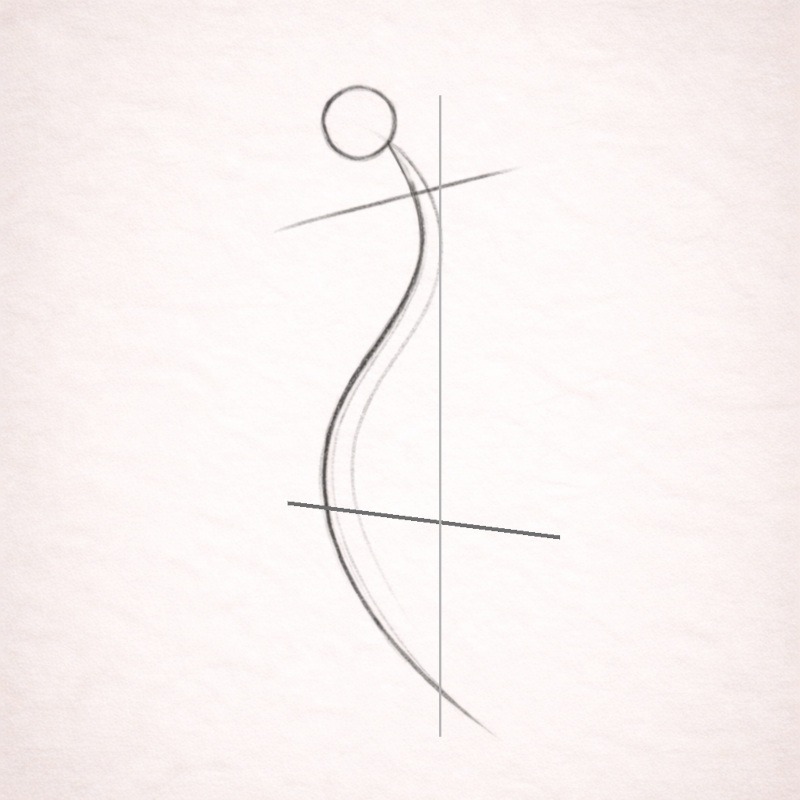
Before adding limbs, pause.
Ask yourself:
- Would this character realistically stay upright?
- Is the weight clearly over one leg, or centred?
- Does the line of action support the pose?
- If you drew a straight line down from the head, would it land near a supporting foot?
If the body looks like it might topple over, adjust now.
Fixing balance later is like trying to straighten a haunted house after it’s already built.
If this still feels awkward at first, that’s completely normal. Structure can look mechanical before it looks natural. Keep the lines light and keep adjusting. It smooths out quicker than you’d expect.
Step 6: Add Simple Limb Guidelines
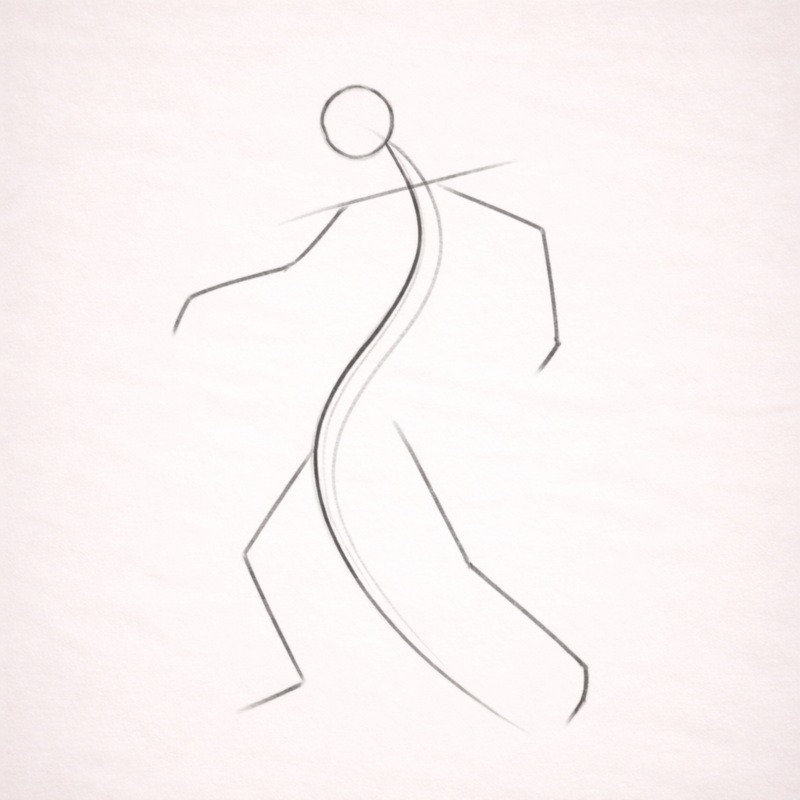
Now add arms and legs using simple lines.
At this stage:
- No muscles
- No hands yet
- No feet details
Just lines showing:
- Direction
- Length
- Where the joints bend
Bendy limbs look more unsettling than stiff ones. Even slight curves go a long way.
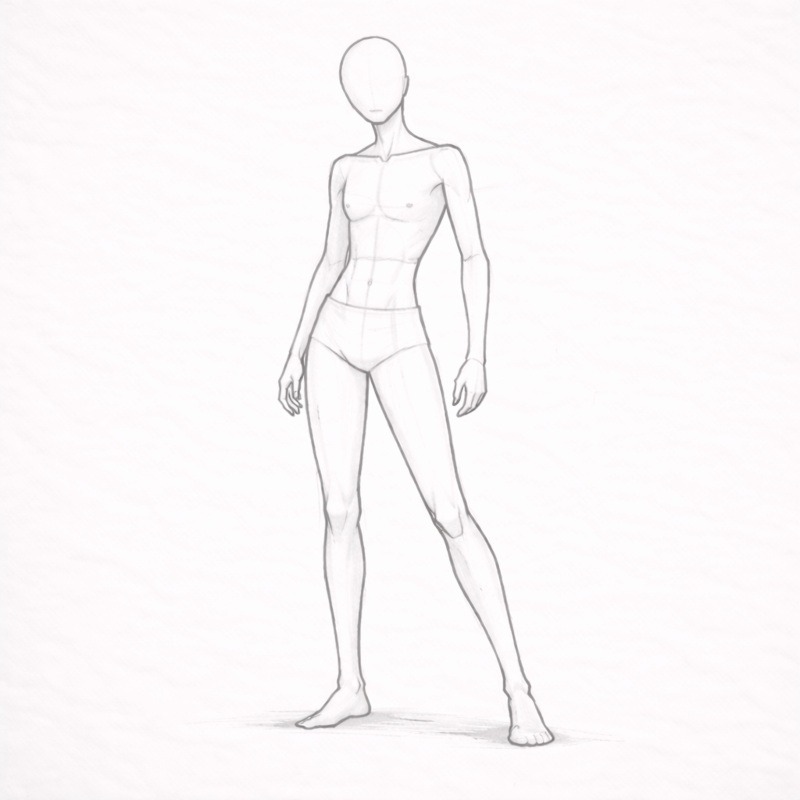
Step 7: Block in the Body With Simple Shapes
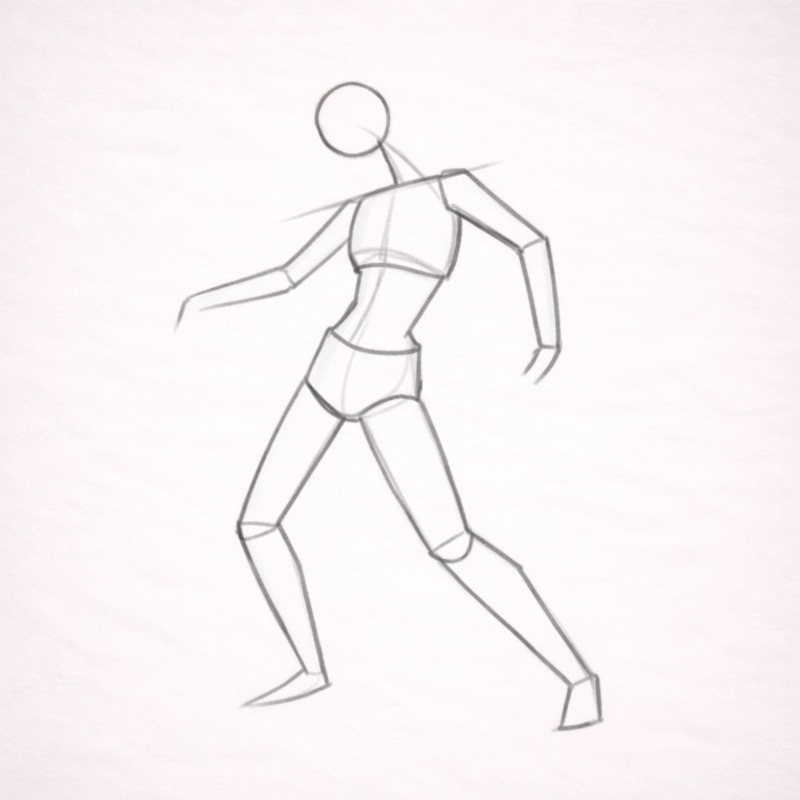
Once the guideline skeleton feels right, you can start adding simple shapes:
- A rough ribcage
- A simple pelvis shape
- Basic thickness of the limbs
Keep everything loose.
If you’re tempted to draw abs, stop. That’s future-you’s problem.
This is still structure, not detail. You are laying groundwork, not committing crimes.
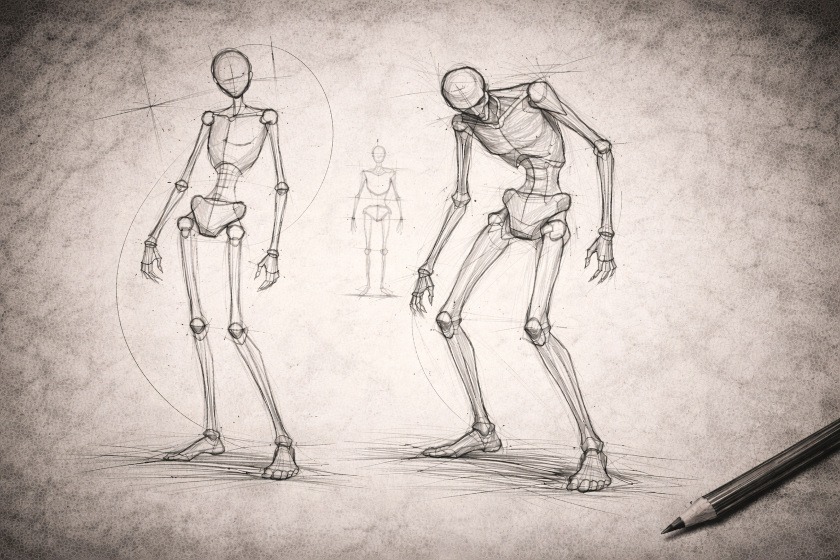
Where Horror Comes In
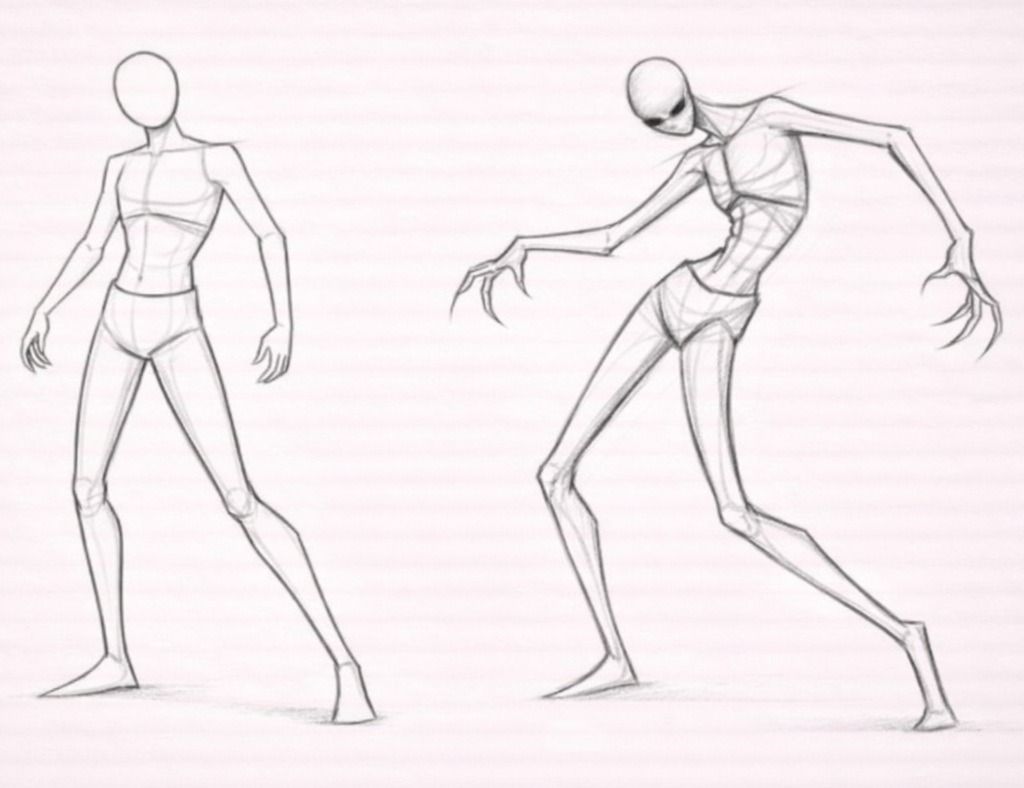
Once the body structure is solid, you can start to:
- Exaggerate limb length
- Hunch the spine
- Drop the shoulders
- Twist the torso
Because the base is stable, these distortions feel intentional rather than accidental.
An unstable structure creates awkward drawings.
A stable structure creates unsettling ones.
When the base structure feels balanced, you have permission to break it in unsettling ways.
Keep Everything Light and Flexible
All body guidelines should be:
- Light
- Adjustable
- Easy to erase
If you’re pressing hard, your pencil thinks this is the final version. It isn’t.
Five-Minute Practice Exercise
Try this without pressure or perfection:
1. Draw a curved line of action
2. Add head and spine
3. Add the shoulder and hip lines
4. Check balance
5. Add simple limb lines
6. Stop
Yes, again, stop early.
Stopping is part of learning. Overworking is how bodies turn into regret.
Conclusion: Bodies Behave Better With a Plan
If your horror characters used to look stiff, unbalanced, or unintentionally comedic, this is why. Bodies need structure before distortion can work.
Simple guidelines give you control over posture, balance, and movement, so when you exaggerate or twist the body, it looks purposeful rather than chaotic. You’re not aiming for realism. You’re aiming for believability just long enough to make things uncomfortable.
And if the pose still feels strange at first, perfect.
Horror should never look too comfortable.
What You Learned:
- The line of action sets the direction and mood of the pose
- The head and spine must follow that line to stay connected to the body
- Shoulders and hips tilt to show weight and tension
- Check balance before adding limbs
- Simple limb lines stop proportions from drifting
- Build structure first, then exaggerate for horror
- Give the body a backbone before you make it unsettling