Strategic Highlights for Maximum Horror Impact
Highlights are not just shiny finishing touches. In horror art, they are weapons. They decide where the viewer looks, what feels alive, and what feels like it might be watching them back.
Used well, highlights create tension, unease, and instant focus. Used badly, they can turn your undead ghoul into something strangely cheerful, which is probably not the goal unless your monster is trying to win a school photo award.
This post is all about using highlights on purpose, not everywhere and definitely not just because your white pencil is feeling lonely.
What Are Strategic Highlights?
Strategic highlights are deliberately placed lighter areas used to control attention and mood. They are not random bright spots.
They are:
- Small
- High contrast
- Placed where you want the viewer to look first
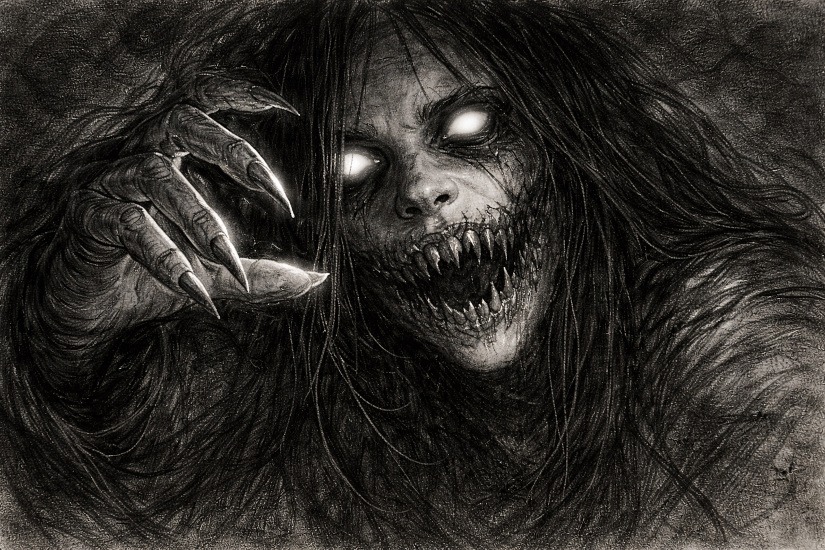
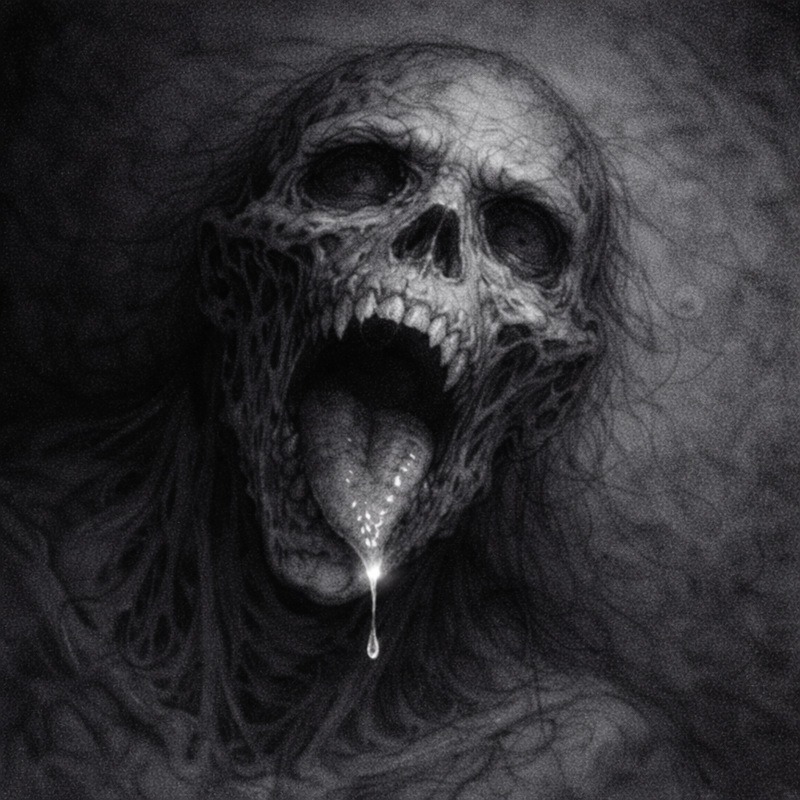
In horror art, highlights work best when most of the drawing is subdued or smothered in shadow. Less light equals more fear. A single sharp highlight can do far more than a dozen soft ones.
Think of them as tiny flashlights telling the viewer Psst… look here.
Why Highlights Matter So Much in Horror Art
The human eye is drawn to contrast.
When most of a drawing is dark, even a tiny highlight becomes powerful. It is like whispering in a silent room. Everyone hears it.
This is why highlights work so well for:
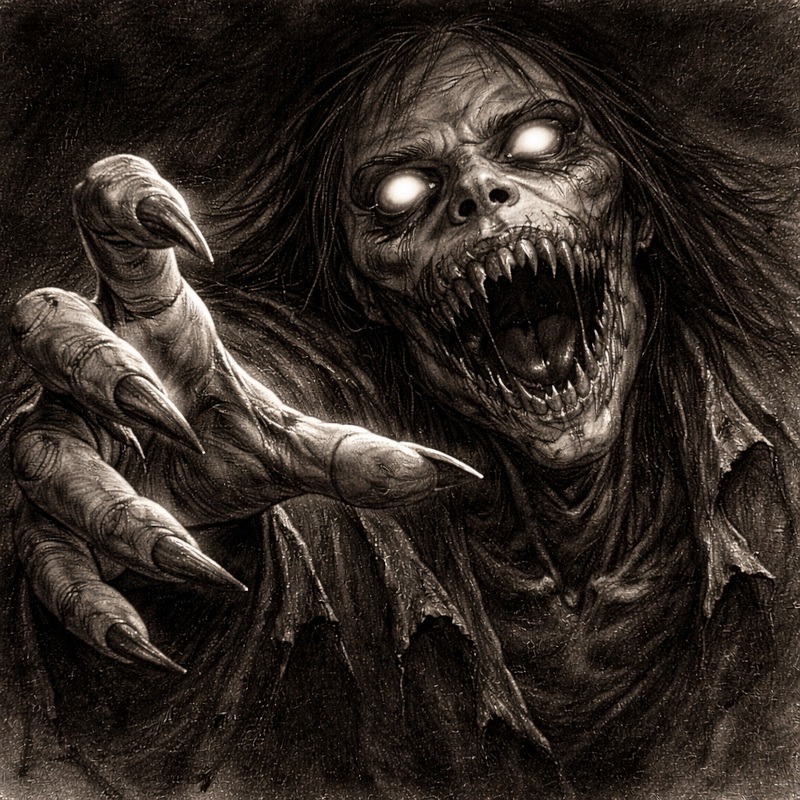
- Eyes
- Teeth
- Wet surfaces
- Sharp edges
- Anything you want to feel alert, alive, or threatening
A single bright highlight in the right place can make a creature feel conscious. Which is deeply uncomfortable.
When to Use Strategic Highlights
Strategic highlights work best when restraint is already in play.
They are especially effective for:
- Eyes in shadowed faces
- Teeth emerging from darkness
- Reflections on skin or bone
- Small details meant to feel unsettling
They are less effective when:
- Everything is bright
- Highlights are scattered everywhere
- The drawing is already very light
Highlights should feel intentional, not enthusiastic.
Tools You Will Need:
You do not need many tools, just control.
- Regular graphite pencils for sketching and general shading
- Kneaded eraser for soft, subtle highlights
- White pencil for gentle highlights
- White gel pen for sharp, intense accents
- Soft graphite or charcoal for deep shadows
Different tools give different effects. A kneaded eraser feels soft and moody. A white gel pen feels sharp and intense. Choose based on the atmosphere you want.
Step-by-Step: How to Practice Strategic Highlights
To practice, imagine a simple horror portrait, like a face in the dark. You can follow these steps with any creepy character.
Step 1: Finish the Shading First

1. Lightly sketch your character.
2. Shade the whole drawing so it already works without highlights.
- Add mid-tones, then deepen the shadows.
- Leave only a few small areas close to the paper white, but do not create bright highlights yet.
3. Ask yourself:
“If I could not use a white pencil at all, would this still read as a spooky drawing?”
Highlights should enhance the atmosphere, not rescue weak shading.
If the answer is yes, you are ready for highlights. If not, adjust the shading first.
Step 2: Decide Where the Focus Goes
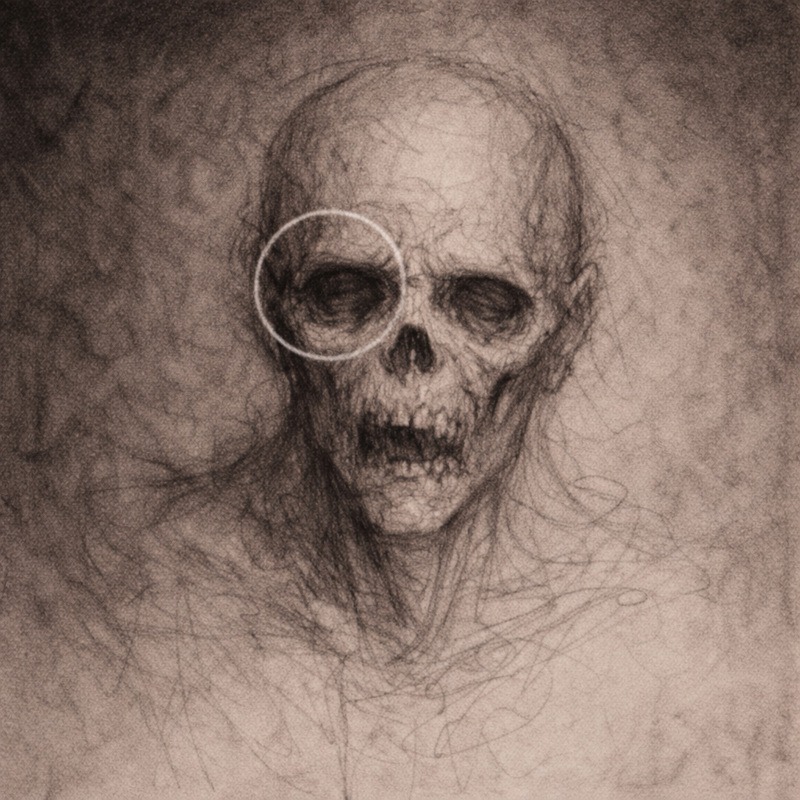
Choose one main place for the brightest highlight.
Think about the story of the drawing.
Common choices:
- One eye that looks most alert
- Teeth or part of the mouth
- A sharp edge or reflective surface, like a knife or bone
Circle or lightly mark this area so you remember this is the star of the show. Everything else will stay quieter.
Step 3: Add Highlights Sparingly
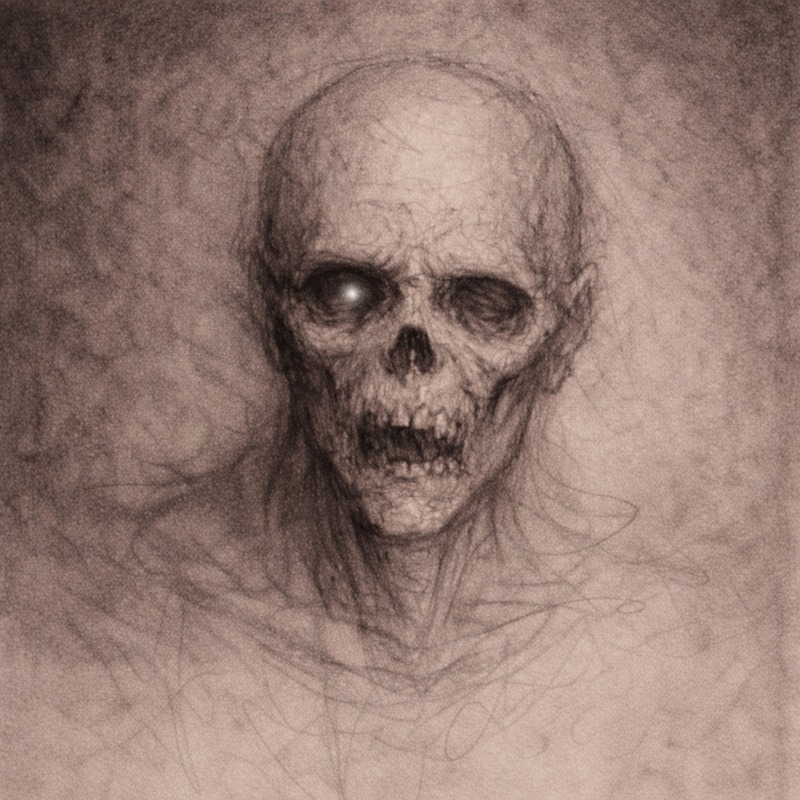
Now pick your tool:
- Use a white pencil or kneaded eraser for soft, hazy highlights.
- Use a white gel pen for tiny, sharp points of light.
Start with one very small highlight in your chosen focal point.
- For an eye, that might be a tiny dot or a short curved line.
- For teeth, a thin line along one edge.
Look at the drawing from arm’s length. If that one highlight already grabs your attention, you’re doing it right. You can add a second tiny highlight if needed, but only if it supports the same focal area.
Step 4: Strengthen Contrast Around Highlights
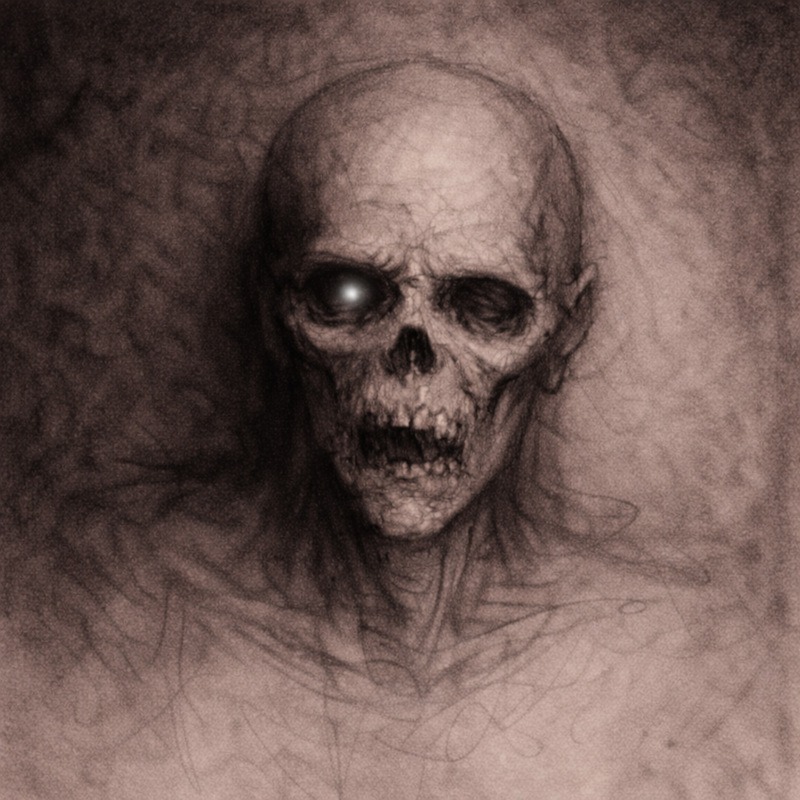
A highlight only looks bright because the area around it is dark.
1. Gently darken the shadows next to your highlight with graphite or charcoal.
Build the darks slowly so you don’t crush the paper.
2. Use a soft pencil and deepen the surrounding shadows so your highlight stands out clearly.
3. Squint at the drawing.
If the highlight still pops clearly while the rest feels more subdued, you have strong contrast. Think of it as turning the lights down in the room so that one candle feels brighter.
Strong highlights only work when they have deep shadows to push against. Without that balance, highlights lose their power.
Step 5: Stop Early
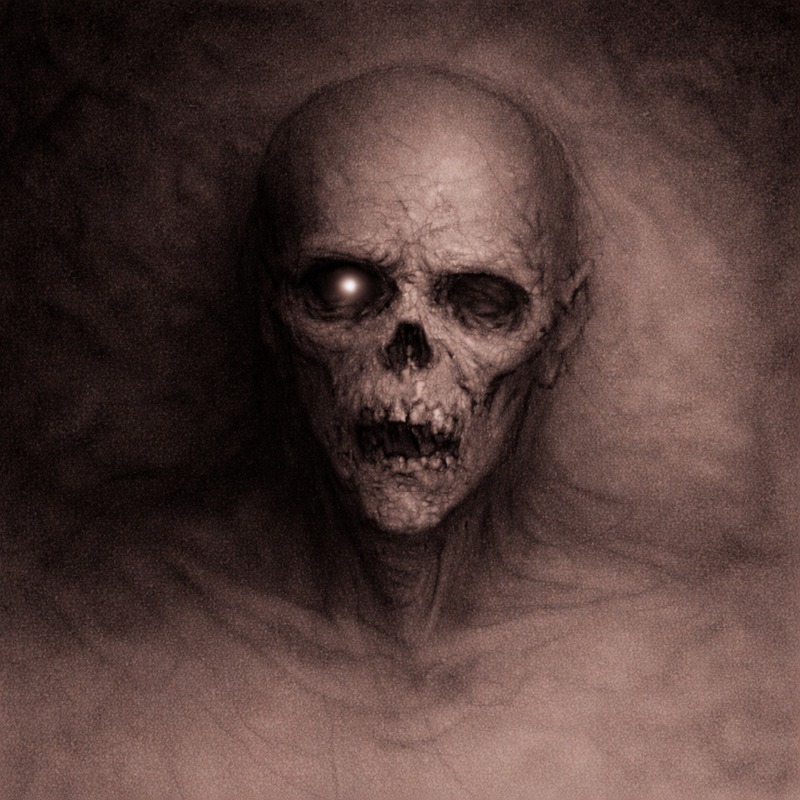
Check in with your drawing:
- Does your eye go straight to the chosen focal point?
- Does the rest of the drawing feel darker, quieter, and a bit unsettling?
If you catch yourself thinking “I might just add a few more tiny bits,” pause. That thought is usually your warning sign.
At this point, only add a new highlight if something important is completely unreadable. Otherwise, put the white pencil away and let the drawing keep its tension.
If you keep going until everything looks shiny, your monster will look like it moisturises twice a day instead of lurking in a basement. Strategic highlights work best when they feel slightly unsettling and incomplete.
Horror Tip:
One tiny white dot in a pitch black eye instantly suggests awareness.
It doesn’t need detail. It just needs to look like it knows you are there.
A tiny dot can also change the direction of a creature’s gaze, which makes the viewer feel watched. You don’t need detail for that effect, just a pinpoint of light.
Common Mistakes (And How to Fix Them)
1. Highlights feel flat or pointless
Your surrounding shadows are not dark enough. Increase contrast.
2. Everything looks shiny
Too many highlights make everything look shiny. Remove or soften most of them. If your drawing looks like it’s sweating, that is your sign that you added too many soft or scattered highlights. Remove or soften most of them until only one main bright spot remains.
3. The focus feels unclear
You added highlights in multiple areas. Choose one and let the rest stay quiet.
Practice Exercise
This exercise helps you master highlights in the easiest way possible: by controlling one bright area in a mostly dark drawing.
1. Draw a dark portrait or figure
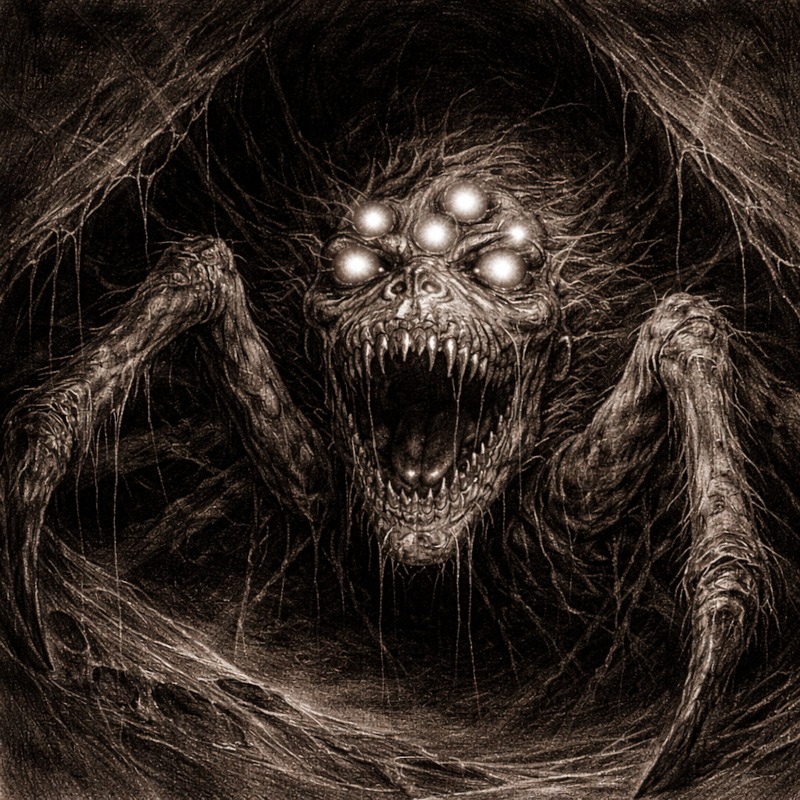
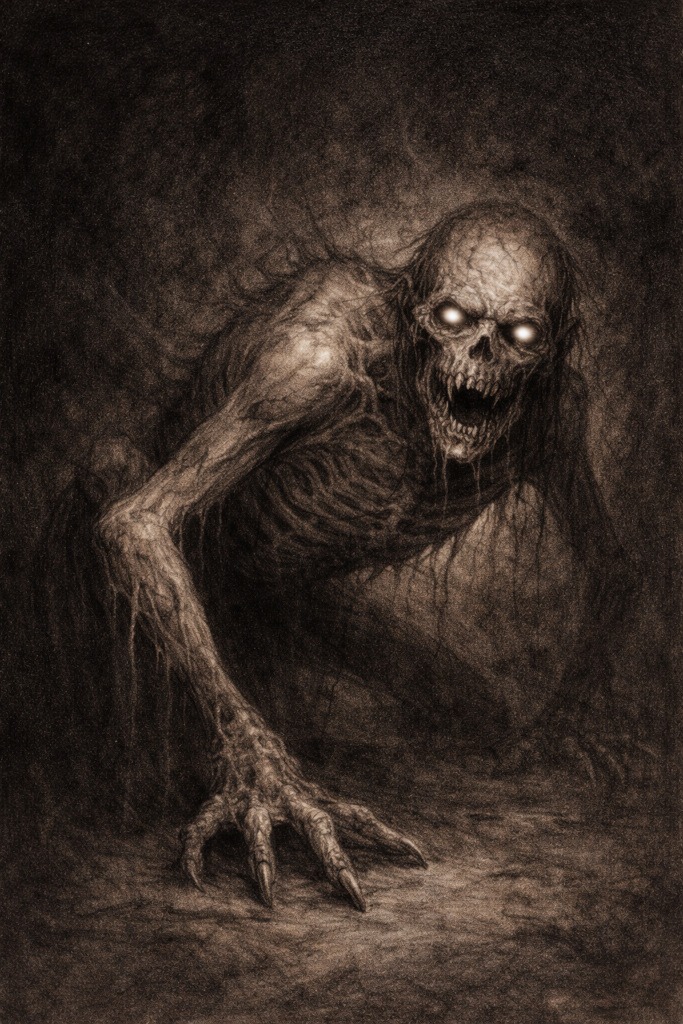
Choose something simple. A face, a skull, or a ghostly figure works well.
Keep the sketch light. You only need the basic shapes.
2. Shade the entire drawing first
Fill in all your mid-tones and shadows before thinking about highlights.
The drawing should look spooky and readable even without any bright accents.
Tip: If you squint at the drawing and it still makes sense, you are ready to add highlights.
3. Choose one focal point
Pick one place where your brightest highlight will go.
Good choices include:
- One eye
- A corner of the mouth
- A reflective surface like bone or metal
- A sharp edge of a dark object
Mark that area lightly so you know it is the star of the show.
4. Add one or two small highlights only
Start tiny.
Add a pinpoint highlight or a thin line with a white pencil or gel pen.
Ask yourself:
“Does this one highlight pull my attention instantly?”
If yes, stop there.
If not, you can add one more small highlight, but keep both within the same focal zone.
5. Strengthen shadows around them
To make the highlights stand out:
- Deepen shadows around your focus point
- Add subtle gradients so everything else feels softer and darker
- Leave the rest of the drawing subdued and quiet
This creates that cinematic horror effect where one small light source feels unnervingly bright.
6. Stop before it feels finished
Strategic highlights work best when they feel slightly unsettling and incomplete.
If you keep going until everything is shiny, your monster will look like it moisturises twice a day.
Let the drawing stay imperfect and moody. That is the entire point.
Final Thoughts
Strategic highlights are not about making a drawing look finished. They’re about making it feel intentional and uncomfortable in the best possible way.
When most of a piece is buried in shadow, even a tiny highlight suddenly carries a ridiculous amount of power. It decides where the viewer looks, what feels important, and what might be staring back.
The key is restraint. One well-placed highlight will always do more work than five enthusiastic ones. Let the highlight be the diva. Everything else is the backup dancers.
If you reach the point where you think, “Maybe just one more highlight,” stop immediately. That is your drawing screaming, “Put the white pencil down.” Walk away. You have already won.
What You Learned:
- Highlights control where the viewer looks
- Less light creates stronger tension
- Small highlights are more powerful than large ones
- Contrast makes highlights effective
- Restraint is key to horror impact
- Stop before your drawing sparkles like a disco vampire
Continue Exploring Advanced Shading Techniques
Strategic highlights bring focus and tension to a drawing, but they work best when supported by strong shadows and thoughtful restraint. If you want to see how everything fits together, these techniques form the backbone of effective horror shading:
- Layered Shadows for Extra Depth
Construct the shadow structure that provides highlights with something to push against. - Textured Shading for Skin, Decay & Surfaces
Add surface detail without overpowering the light and dark balance. - Blending Graphite and Charcoal for Extreme Contrast
Push darkness and atmosphere further so highlights feel sharper and more deliberate. - Negative Space Shading for Eerie, Ghostly Effects
Let highlights emerge from shadowed space instead of outlining everything. - Suggestion vs Detail in Horror Art: Knowing What to Leave Out
Learn how restraint makes a single highlight far more unsettling than a fully rendered scene.