Using Real-World Textures for Horror Art

How cracks, stains and everyday grime secretly carry horror on their backs
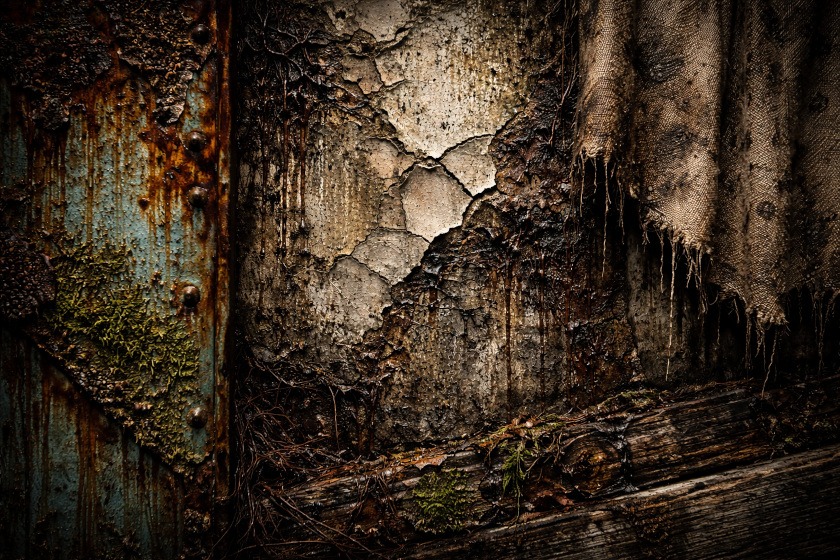
If you’ve ever stared at a peeling wall, rusty railing, or suspiciously crusty pavement and thought, “Wow. That would make incredible zombie skin,” congratulations. You are officially one of us.
Real-world textures are one of the easiest ways to make horror art feel believable, creepy, and slightly uncomfortable in the best way. And no, you don’t need fancy brushes, expensive texture packs, or a PhD in Advanced Grossness. You just need eyes, curiosity, and the ability to resist licking anything for reference purposes.
Why Real-World Textures Make Horror Art So Effective
Horror works best when it feels familiar but wrong. Our brains are very good at recognising textures like skin, rust, cracks, fabric, and decay. When those textures appear in the wrong place, like on a face, creature, or body part, the brain quietly panics. That is where the horror lives.
Cracks, rust, mould, bone, fabric wear, rot. These are things we see every day. When you apply them to a character, your viewer’s brain goes, “No thank you,” and horror is born.
Real-world textures help you:
- Add realism to monsters and creatures
- Avoid flat or plastic-looking drawings
- Create depth without overcomplicating shading
- Make viewers mildly uncomfortable, which is the goal.
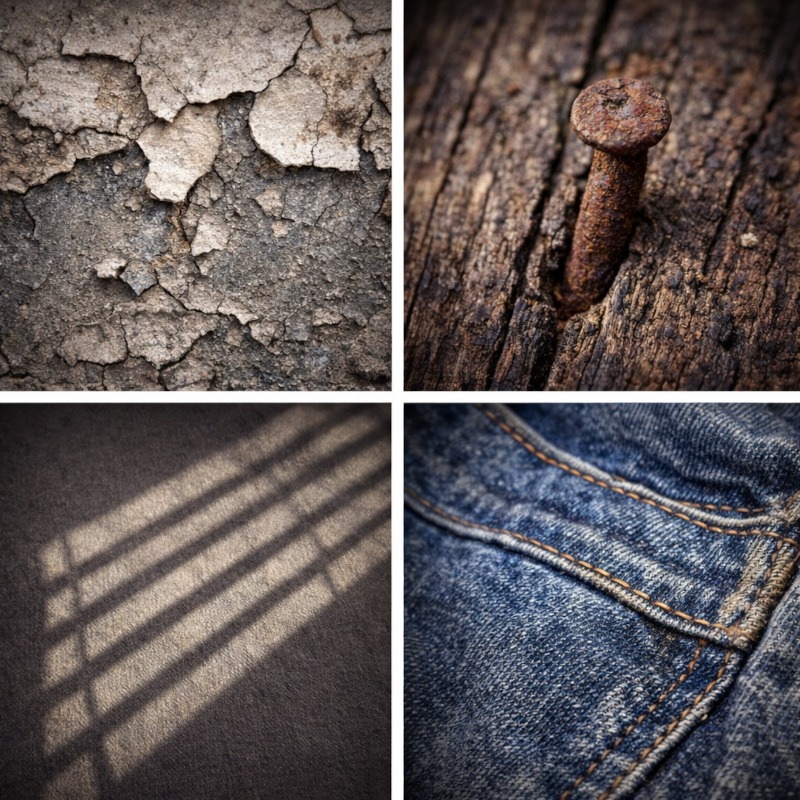
What Counts as a Real-World Texture

Real-world textures are everywhere, and once you start noticing them, it becomes very hard to stop. Ordinary, boring objects suddenly start screaming “horror reference” when you look at them a little too closely.
Common texture goldmines include:
- Peeling paint
- Rust and corrosion
- Cracked walls or pavement
- Tree bark
- Mud and dried dirt
- Old fabric and torn clothing
- Stone and concrete
- Weathered wood
- Wrinkles and scars on skin
Some of the best texture inspiration comes from things that are worn down, damaged, or past their prime. If it looks like it has survived several bad life choices and questionable weather conditions, it is probably useful.
How to Study Textures Without Overthinking It
You don’t need to draw every tiny detail. That way lies madness and sore hands.
When studying a texture, ask yourself:
- Is it rough or smooth?
- Are the shapes sharp or soft?
- Are the cracks random or patterned?
- Does it clump, spread, or fade out?
If your answer is “I must draw this perfectly,” pause immediately.
That is the texture talking lies to you.
Texture is suggestion, not documentation.
Breaking Textures Into Simple Shapes
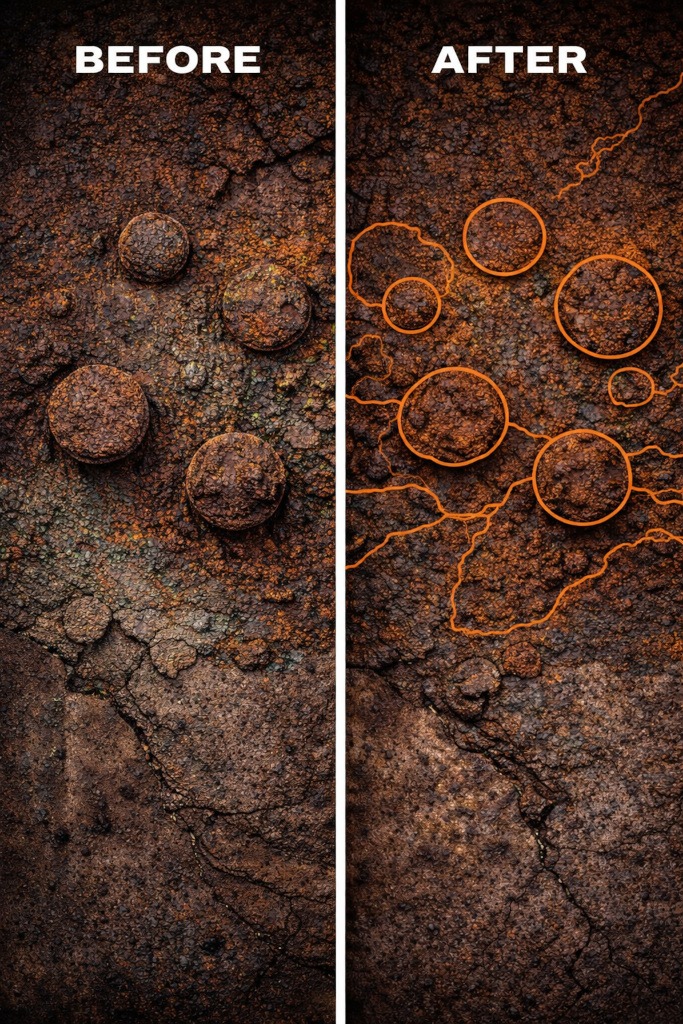
Textures are not chaos. They are organised mess.
Every texture can be broken down into simple shapes:
- Cracks become jagged or broken lines
- Rust becomes soft blotches and stains
- Peeling paint becomes overlapping shapes
- Wrinkles become curved lines that follow form
You are not drawing rust.
You are drawing shapes that suggest rust.
You are not drawing skin cracks.
You are drawing broken lines that follow the surface underneath.
Once you realise this, textures stop being scary and start being manageable.
Using Real-World Textures in Horror Art
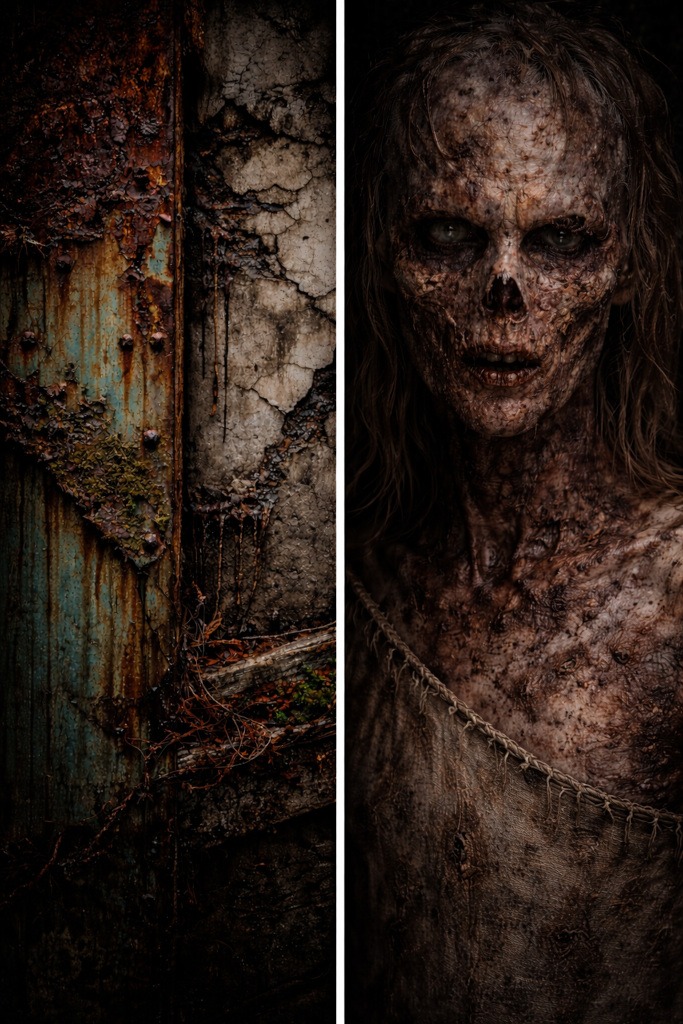
Skin and Flesh
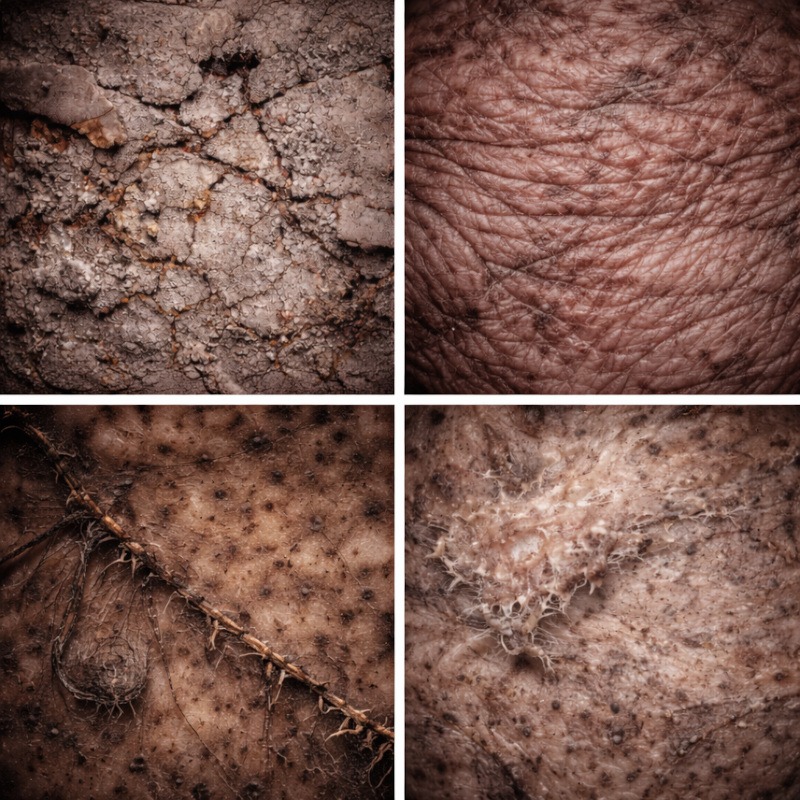
Perfect for zombies, possessed humans, creatures, and anything that clearly skipped skincare for several decades.
Use textures like:
- Cracked mud for dry or damaged skin
- Wrinkled fabric references for folds
- Tree bark patterns for aged or cursed flesh
- Light, irregular shading for uneven surfaces
Less is more. A few well-placed texture marks will look far creepier than covering the entire face in chaos.
Decay and Corruption
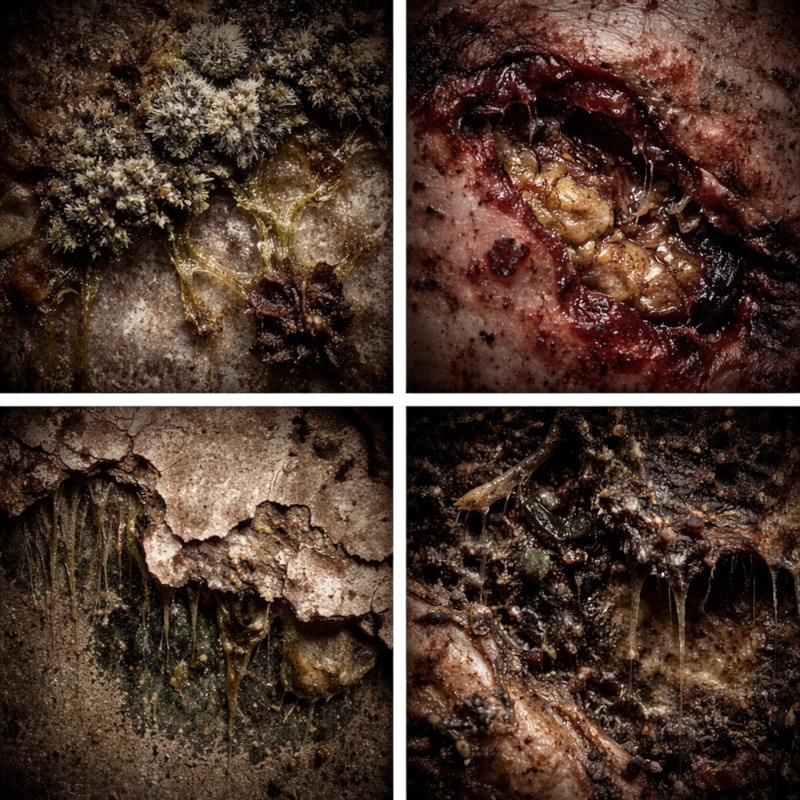
Decay doesn’t behave politely. It’s messy, uneven, and rude.
Look for:
- Rust patterns for rot
- Peeling paint for flaking skin
- Mould or stain references for infection areas
Focus on uneven edges and patchy shading. Decay doesn’t spread evenly. It does whatever it wants.
Organic Horror Elements
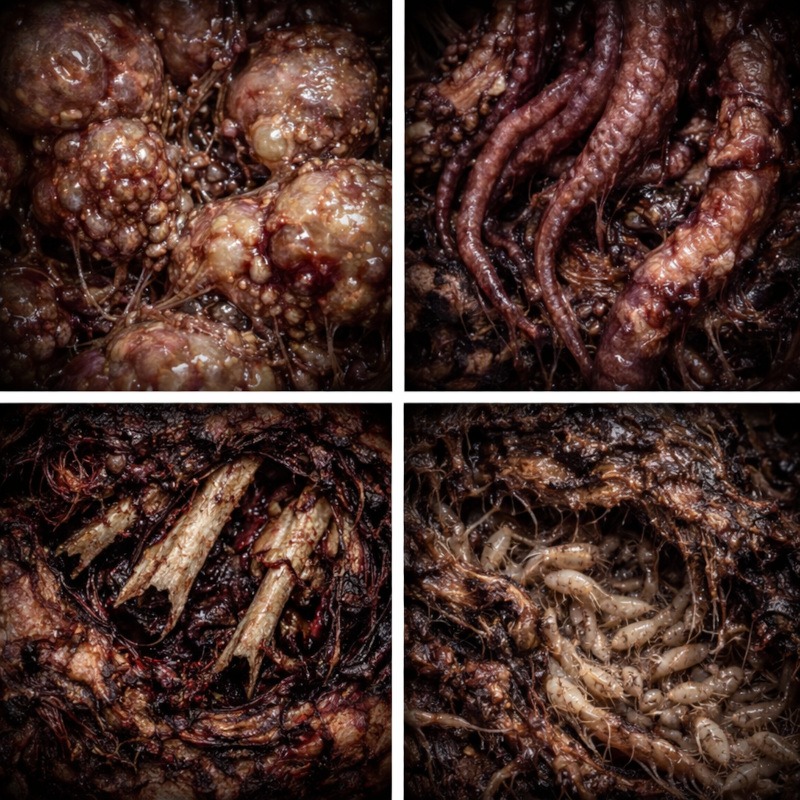
Textures work beautifully on:
- Bones
- Claws
- Tentacles
- Mutated growths
Mix soft and hard textures together. Smooth next to rough always feels uncomfortable, which is excellent news for horror art.
Photographing Your Own Texture References
(No trespassing required, please behave)
Yes, you can absolutely make your own texture references.
Things you can safely photograph:
- Walls in your home
- Old furniture
- Garden soil
- Tree bark
- Cracked paint
- Shadows on fabric
Use your phone and natural lighting when possible. You’re not creating fine art photography. You’re collecting nightmare ingredients.
If something looks dangerous, sharp, mouldy, or like it might bite back, admire it from a distance. Fingers are useful. Keep them.
If you enjoy collecting your own references, my Photographing Real-World Textures for Horror Art post breaks down how to capture useful texture photos.
Turning Photos Into Drawing References
When using photos:
- Don’t copy line for line
- Simplify the shapes
- Focus on light and dark areas
- Borrow patterns, not placement
- Apply the texture to your drawing’s form
A crack on a wall behaves very differently from a crack on a cheekbone. Same idea. Very different trauma.
Common Texture Mistakes
Texture everywhere:
Not every inch needs detail. Let your drawing breathe or it will look noisy.
Copying photos exactly:
That leads to stiff, awkward results. Texture should support the form, not fight it.
Ignoring lighting:
Texture without light direction looks flat. Shadows give texture its power.
Overthinking everything:
You are allowed to experiment. Even spooky art is allowed to be messy.
Final Thoughts
Real-world textures are one of the easiest ways to add depth, realism, and unease to horror art without overcomplicating your process.
You do not need perfection.
You do not need every crack.
You need intention.
Once you start noticing textures in everyday life, walls, pavement, trees, rusted metal, and old fabric will all become quiet teachers.
And if your creature starts looking unsettling in a way you cannot quite explain, you’re probably doing it right.
What You Learned
- Real-world textures make horror art feel believable
- You don’t need to copy every detail
- Texture works best when simplified and intentional
- Everyday objects are full of horror inspiration
- Weird results are not failure, they’re progress
Explore More Texture & Reference Guides
If you want to build on what you learned here, these posts fit perfectly alongside this guide:
- Websites for Horror Reference and Inspiration
Explore reliable online sources for creepy visuals, textures, and horror inspiration. - Real-World Texture Reference Photos for Horror Art
Browse organic texture photos you can study and use as reference for your own artwork. - How to Use Art References Effectively (Without Killing Your Creativity)
A practical guide to using art references without guilt, avoiding copying, and building stronger horror designs through observation.