How to Draw a Realistic Zombie (Intermediate Graphite Tutorial)
Skill level:
Intermediate – Ideal for artists confident with basic shading and proportions who want to push their depth and realism even further.
Medium:
Graphite pencils on textured drawing paper.
You’ve drawn cute ghosts. You’ve shaded moody pumpkins. But now it’s time for something with a little more… rot.
In this intermediate graphite tutorial, we’re drawing a zombie that’s the perfect blend of realistic, horrifying, and slightly disappointed to be awake. You’ll learn how to add convincing bone structure, eerie lighting, and those centuries-old wrinkles that say, “I’ve been undead for a while, and it shows.”
No pressure, no panic – just pencils, paper, and the quiet satisfaction of knowing you’ve given a corpse better cheekbones than most living people.
Materials You’ll Need:
Before you bring your zombie to life (again), make sure you’ve got the essentials ready. This project leans on precision, layering, and texture; the right tools make all the difference.
- Graphite pencils: 2H, HB, 2B, 4B, and 6B
- Blending tools: Blending stump, tissue, or cotton swab to smooth out the decay.
- Erasers: A kneaded eraser for lifting highlights and a precision eraser for the tiny “whoops” moments.
- Sharpener: Keep those tips fresh and pointed; blunt tools will only smudge your masterpiece into oblivion.
- Paper: Medium to heavy weight with a bit of texture, smooth paper hides the gritty, undead charm.
Tip: Zombies may be undead, but your pencils shouldn’t be. Keep them sharp and ready.
Step 1: The Basic Head Shape & Guidelines
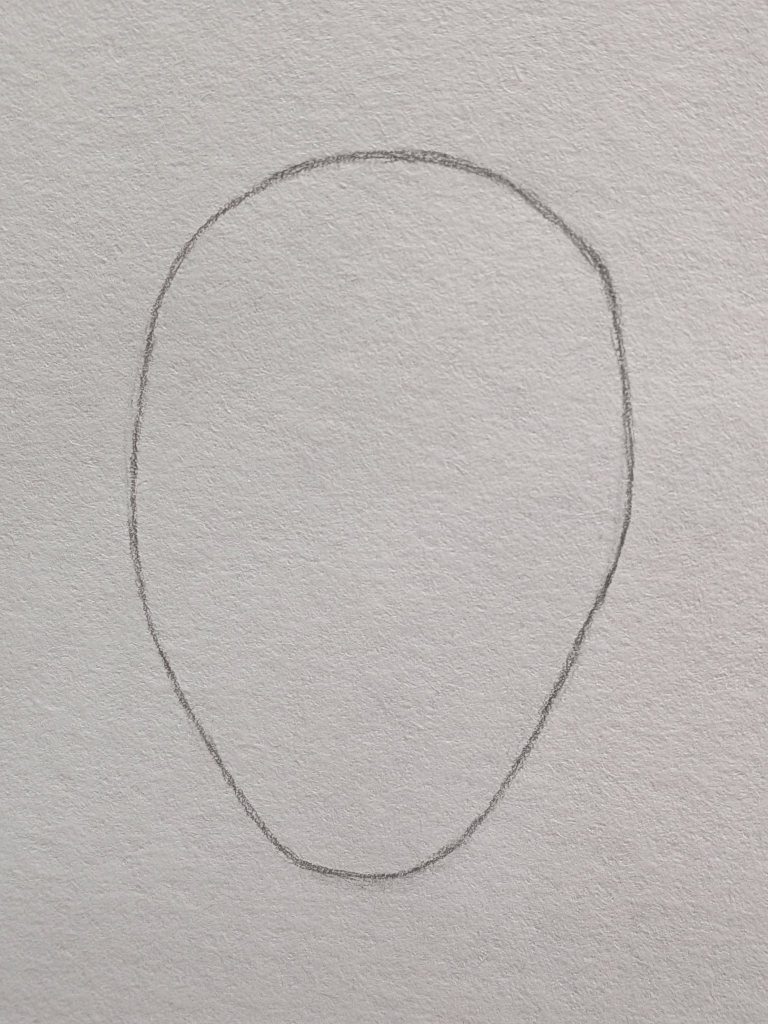
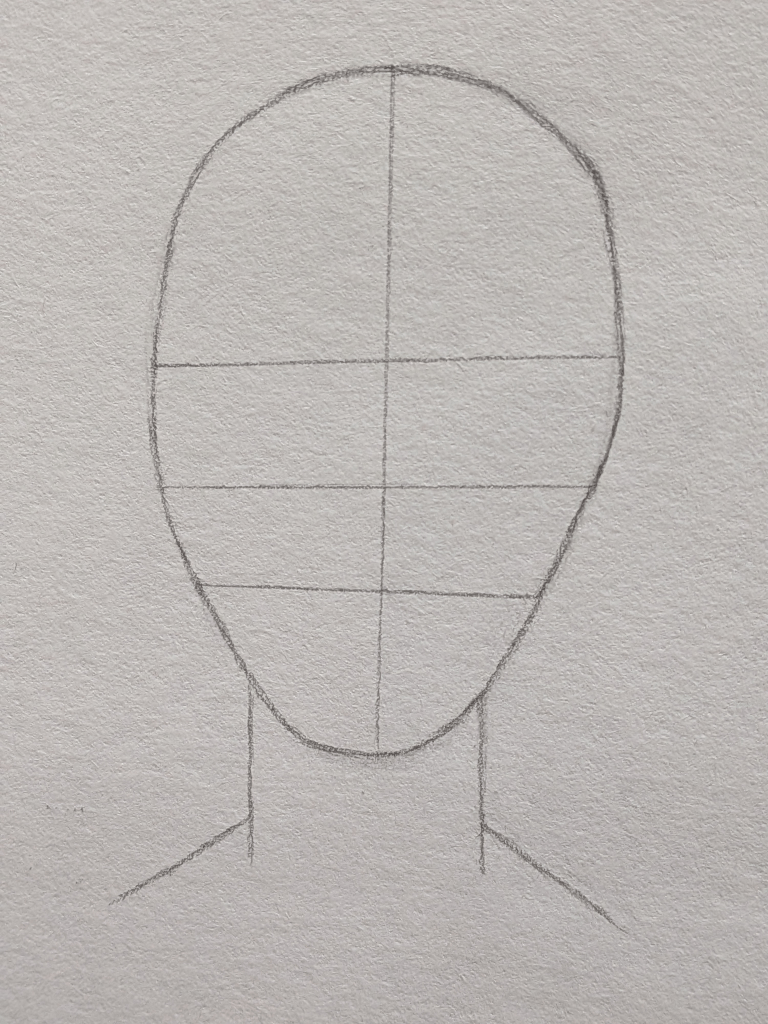
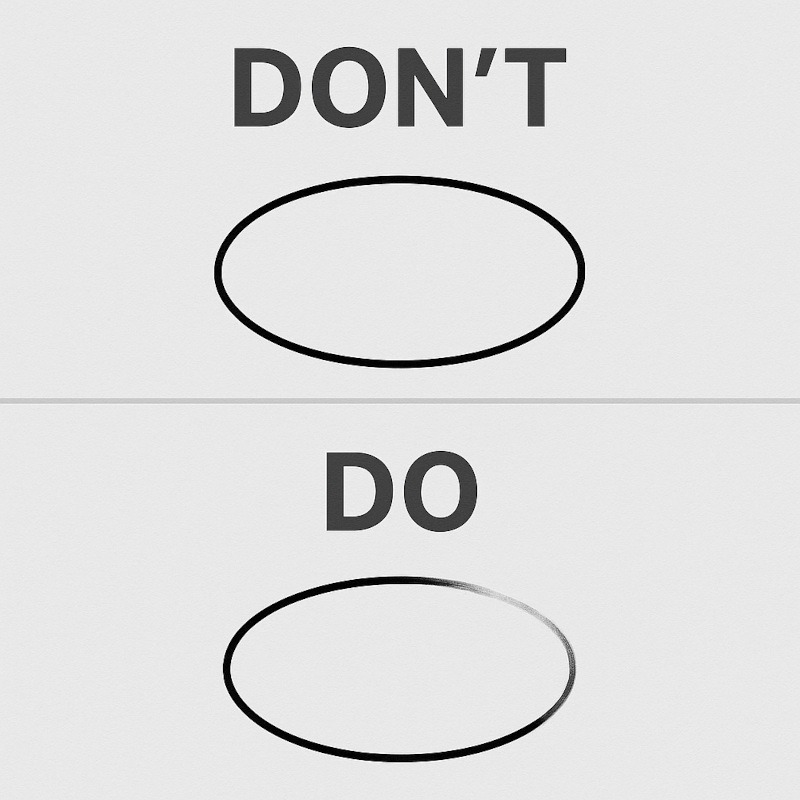
1.) Draw a Soft Oval (Lightly)
- Use an HB pencil and sketch a tall oval shape.
- What you’re doing: building a super-light “map” for the zombie’s head so the features are easy to place later.
- Keep every line whisper-light; we’ll darken things in future steps.
- If it tilts or goes wobbly: perfect. Zombies are not known for symmetry.
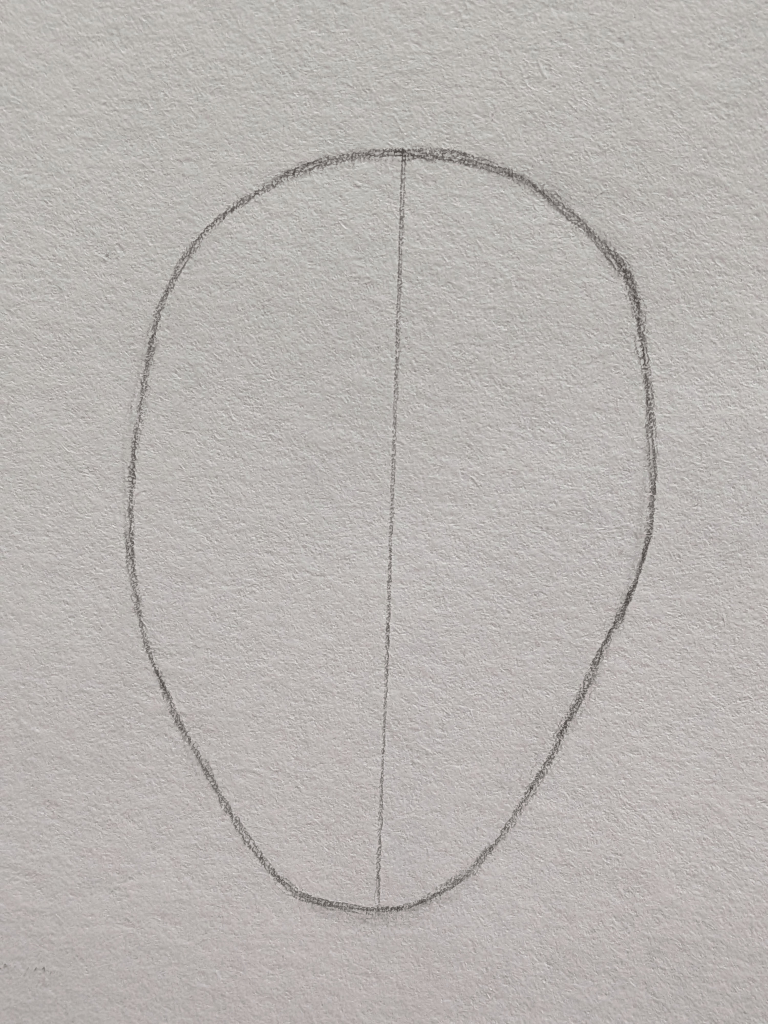
2.) Add a Centre Line (Nose-to-Chin Helper)
- Draw a vertical line lightly down the middle of the face.
- This keeps the features centred so your zombie doesn’t drift off like it spotted snacks.
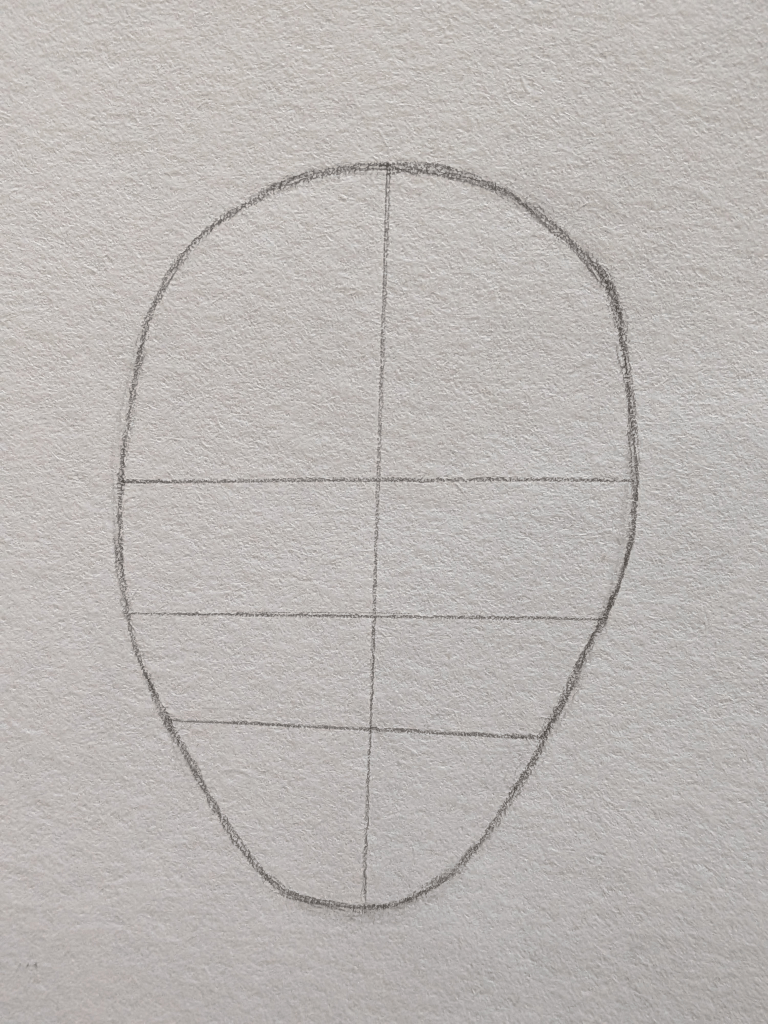
3.) Add Three Simple Guides
Now it’s time to give our zombie a bit of structure; we’ll lightly add guides for the eyes, nose, and mouth.
These aren’t features yet, just handy markers so everything lands in the right spot later.
- Eye line: Draw a horizontal line slightly above halfway down the oval. This keeps the forehead tall enough for all the creepy details ahead.
- Nose line: Add another horizontal line about halfway between the eye line and the chin. This marks the bottom of the nose.
- Mouth line: Add one more line a little above halfway between the nose and the chin.
These are just soft guidelines, no pressure for perfection. They’ll mostly fade under shading later, but for now, they’re your road map through the rot.
4.) Neck and Shoulders
- From under the head, draw two straight lines down for a thin neck (undead = gaunt).
- Add gentle shoulder slopes to prevent the head from floating awkwardly.
Step 2: Facial Features (Eyes, Nose, and Mouth)
Now that your zombie’s head shape, neck, and guides are in place, it’s time to add the basic features.
This part isn’t about perfect anatomy; it’s about believable creepiness.
Keep every line whisper-light and relaxed.
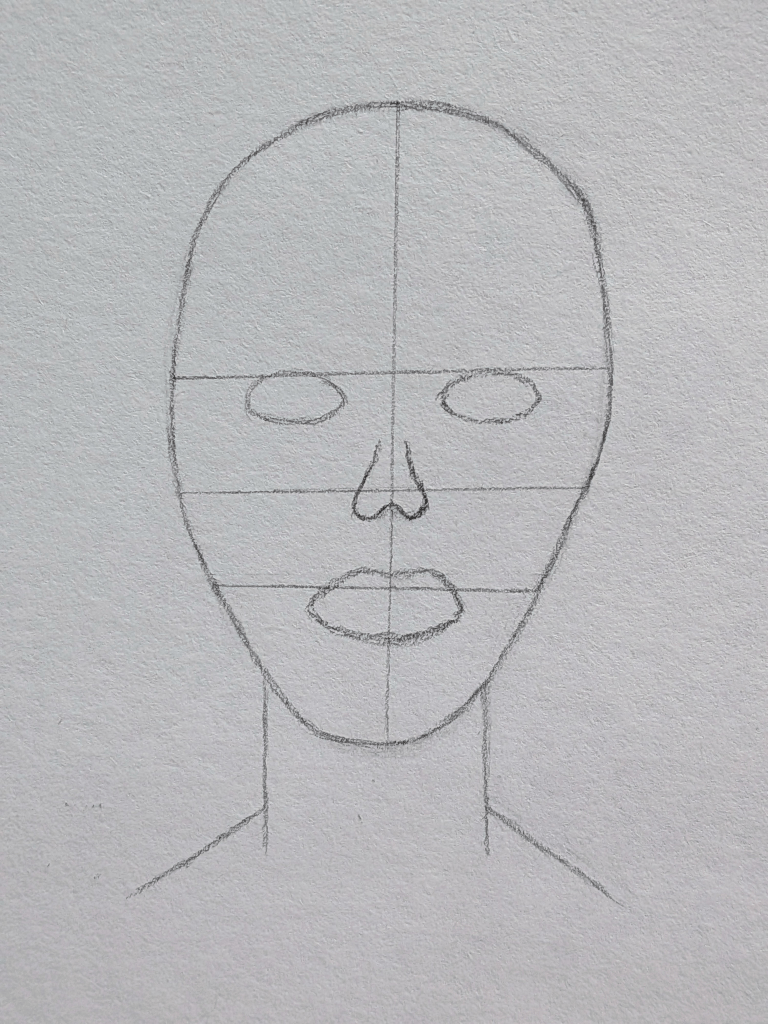
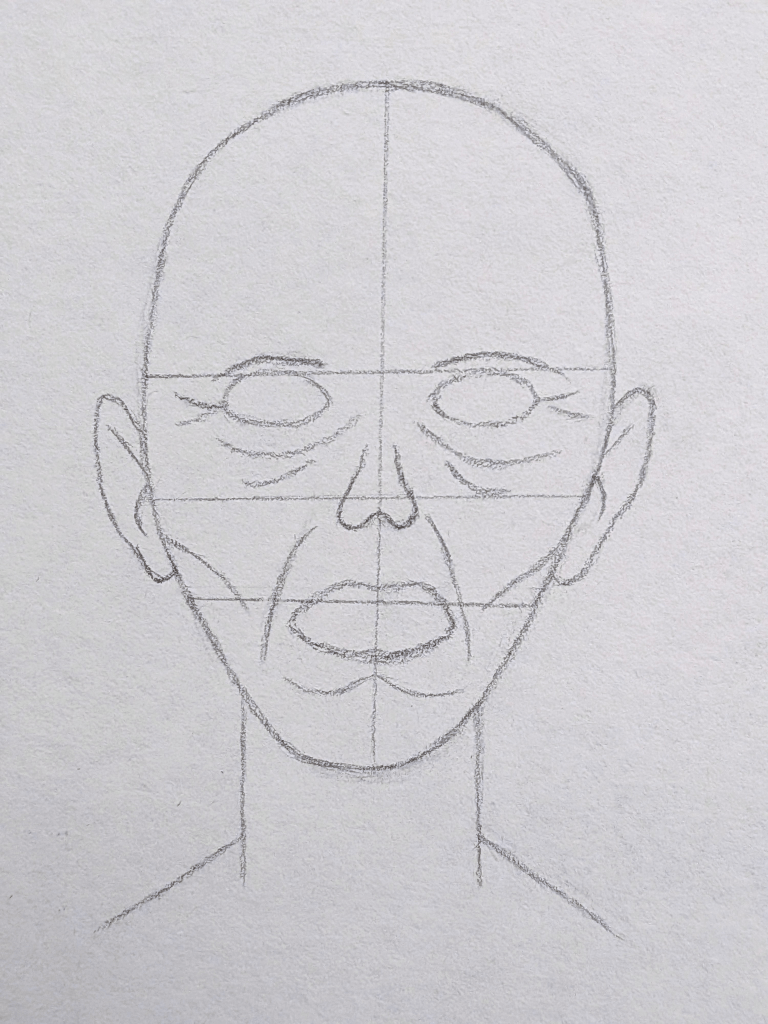
1.) Eyes – The Windows to the Lack of Soul
- On your eye line, sketch two almond-shaped ovals, one on each side of the centre line.
- Leave a small gap between them, about the width of one eye.
- Keep them slightly uneven; zombies and symmetry aren’t on speaking terms.
Tips for Beginners:
Don’t worry about expression yet! These are simple placement lines. You’ll add character (and a few good wrinkles) later.
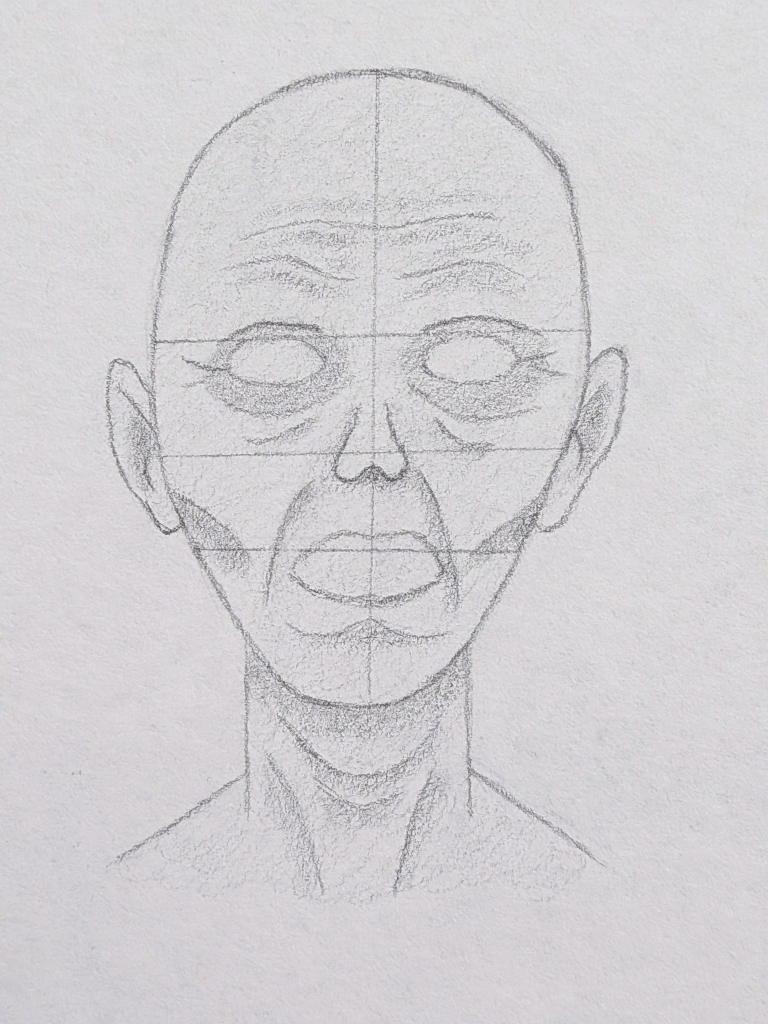
2.) Nose – Small, Shadowy, and Barely There
- On the nose line, draw a short, rounded triangle shape to mark the base of the nose.
- From the sides of that triangle, add two gentle curved lines that lift upward toward the eye line – these suggest the nostrils.
- Keep it soft and faint, we’re going for “hint of a nose,” not “detective-grade sense of smell.”
3.) Mouth – Droopy Is the New Beautiful
- Draw a curved line on your mouth line; let the corners dip slightly downward.
- Add a second curve just underneath to mark the lower lip.
- Keep the lips loose and uneven; undead lips are not known for their skincare routine.
Step 3: Adding the Ears
Your zombie’s face is coming together beautifully, but right now it’s probably giving off strong “floating head” energy.
Let’s fix that by adding a quick pair of ears, nothing fancy, just enough to make it look less like it’s mid-teleportation.
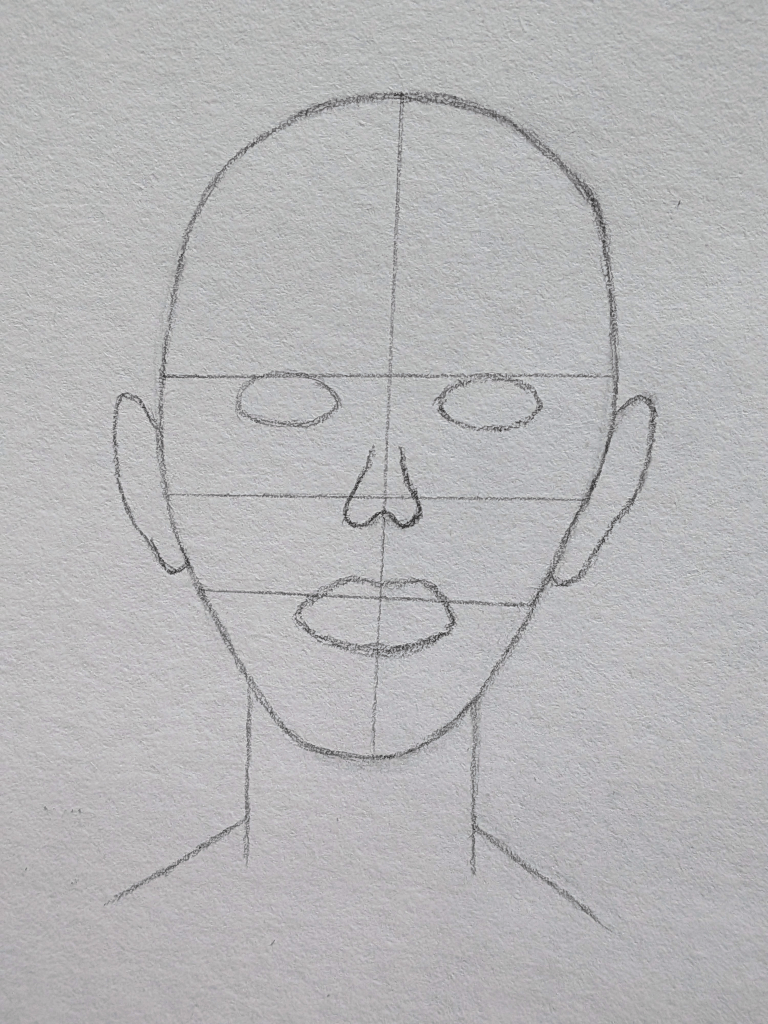
1.) Ear Placement
- The top of the ear should sit just below the eye line.
- The bottom of each ear should be placed slightly above the mouth line.
This gives the head a more natural, slightly drooping look, perfect for the undead vibe.
2.) Ear Shape
- Sketch a soft C-shape (and a backward C on the other side).
- Keep them narrow and subtle; zombies rarely have perky ears.
- Keep your lines light; we’ll add rough edges of decay later if you want that extra realism.
Optional Creepy Touch:
Once you start adding details, you can notch the tops or fray the edges to show wear and tear. For now, keep them smooth; we’re still in the “freshly reanimated” stage.
Step 4: Adding Details & Wrinkles
Now it’s time to give your zombie some life experience (or you know, afterlife experience).
Think of this step as sketching in all the places where gravity, stress, and maybe a touch of decay have left their mark.
Use an HB pencil and light pressure, keep your lines gentle and sketchy, not carved in stone. These are guidelines for age, not full-blown cracks in a tombstone.
1.) Around the Eyes
Start by adding light curved lines above and below each eye to show the thin, sagging skin. Keep the wrinkles soft, think “tired zombie who hasn’t slept in 80 years,” not “cracked porcelain doll.”
- Use an HB pencil with light pressure; you want the lines faint and buildable.
- Draw one or two small arcs above each eye to form a loose brow crease.
- Under the eyes, add a few curved lines that follow the shape of the eyeball. These should get lighter as they move outward.
- Add a faint set of lines reaching toward the bridge of the nose to suggest tension and age.
Tip: Don’t press too hard with your pencil. Wrinkles look more realistic when they’re built up softly rather than etched in like scars.
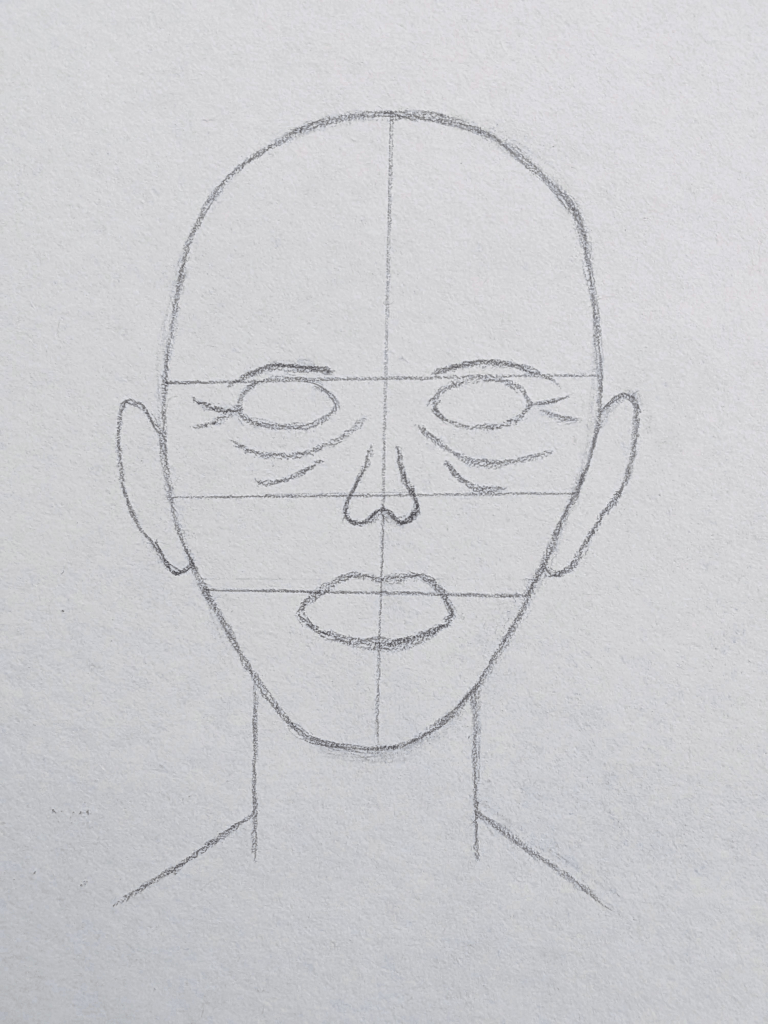
2.) Cheek Lines & Ears
Now let’s add some definition to those sunken zombie cheeks – because no one looks freshly undead without a little facial collapse.
- Draw two light, curved lines starting just below the ears and angling downward toward the corners of the mouth.
These features will define the hollow cheeks, creating a more gaunt facial appearance. - Inside each ear, lightly sketch a couple of small curved lines; these hint at folds without making the ears look too detailed yet.
Tip: Keep these lines soft and subtle.

3.) Mouth & Chin Lines
Now let’s shape those telltale zombie lines that make the face look wonderfully worn-out.
- From each side of the nose, draw a slight curved line that runs down toward the corners of the mouth – these are your classic “laugh lines,” though in this case, it’s more eternally exhausted lines.
- Add a gentle crease just below the lower lip to suggest a bit of weight or sagging in the chin area.
- You can lightly curve that chin line downward at the edges for a more gaunt effect.
Tip: Use an HB pencil and keep your strokes soft and sketchy; these lines should look like sunken folds of skin, not carved grooves.
If your zombie starts resembling a raisin, you’ve gone too hard.
4.) Neck & Forehead Wrinkles
We’re almost done with the face foundations – now it’s time to give your zombie that “been dead for decades” kind of charm.
- On the forehead, draw two slightly curved horizontal lines across the upper head area. Keep them light and uneven; zombies aren’t big on skincare routines.
- For the neck, sketch a few soft, curved lines that follow the shape of the throat. These should slope gently downward and slightly curve with the neck; they show loose, aged skin (or, let’s be honest, what’s left of it).
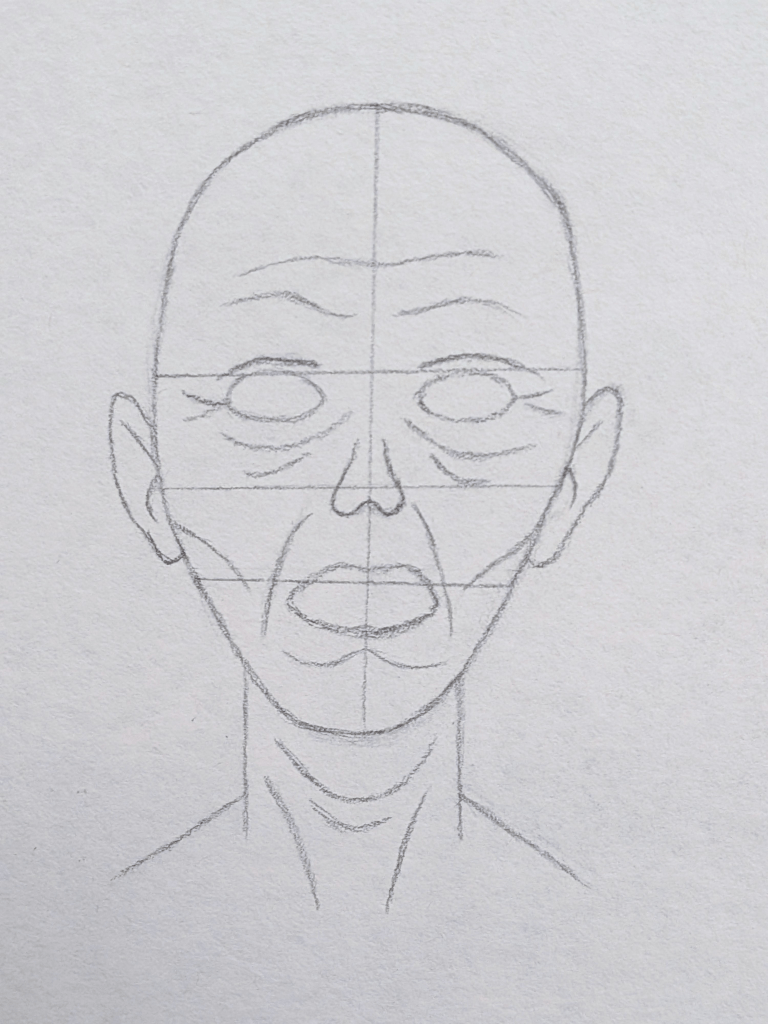
Tip: Stick with an HB pencil here; it keeps the wrinkles soft and realistic, ready for darker shading layers later.
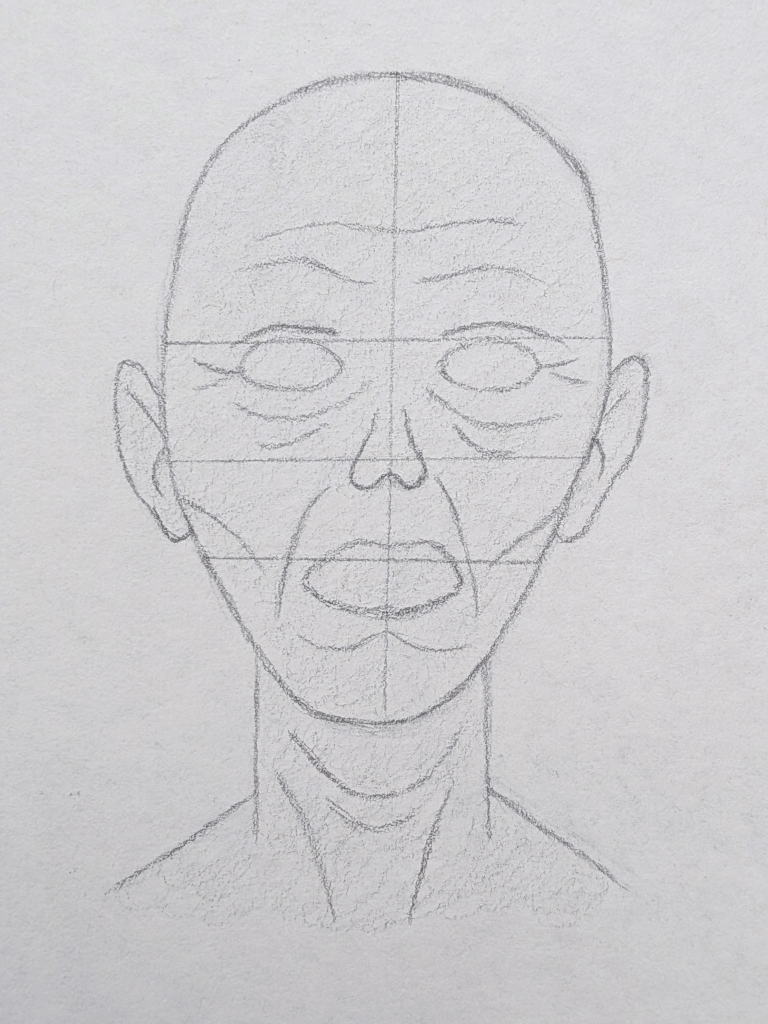
Step 5: Light Base Shading
Now that your zombie has all its wrinkles and features mapped out, it’s time to give them a little unlife – just enough to make them look recently reanimated, not fully decomposed.
- Grab a 2H pencil and start adding a very light, even tone across the entire face and neck.
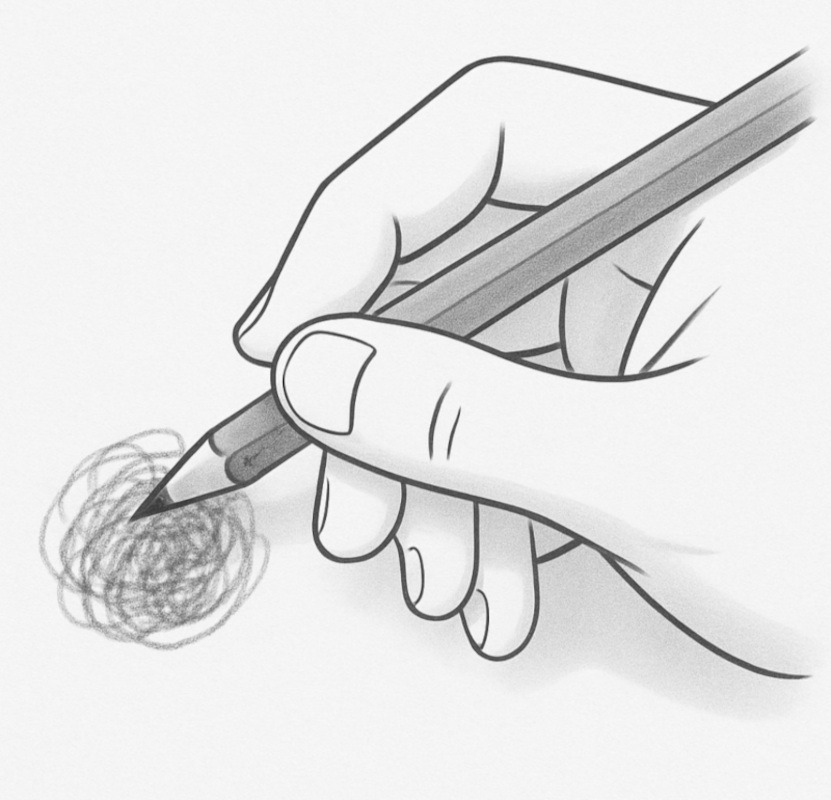
- Use soft, circular motions (you’re not colouring in like a kid with new crayons – you’re building a gentle, misty base layer).
- Keep the pressure light and consistent so that you don’t crush the paper’s texture.
At this stage, you only want a subtle grey film over the skin. This pale layer gives your zombie’s skin a smoother look and makes later shadows blend beautifully.
Tip: If you can still clearly see your guidelines and wrinkles through the shading, you’ve nailed it.
Step 6: Start Building Depth with HB Shading
Now it’s time to add some early shadows. Switch to your HB pencil and gently darken the areas that naturally fall into shade, around and under the eyes, along the sides of the nose, beneath the cheekbones, across the laughter lines, under the lips, and right beneath the chin.
- Add a touch of shading in the ears (especially the inner folds) and softly build tone under the neck wrinkles to create depth.
- On the forehead, avoid shading directly on the wrinkle lines. Instead, shade just above and below them to help those creases stand out without looking harsh.
- Keep your strokes soft and circular. You’re not colouring the whole face, just building up the areas that need depth.
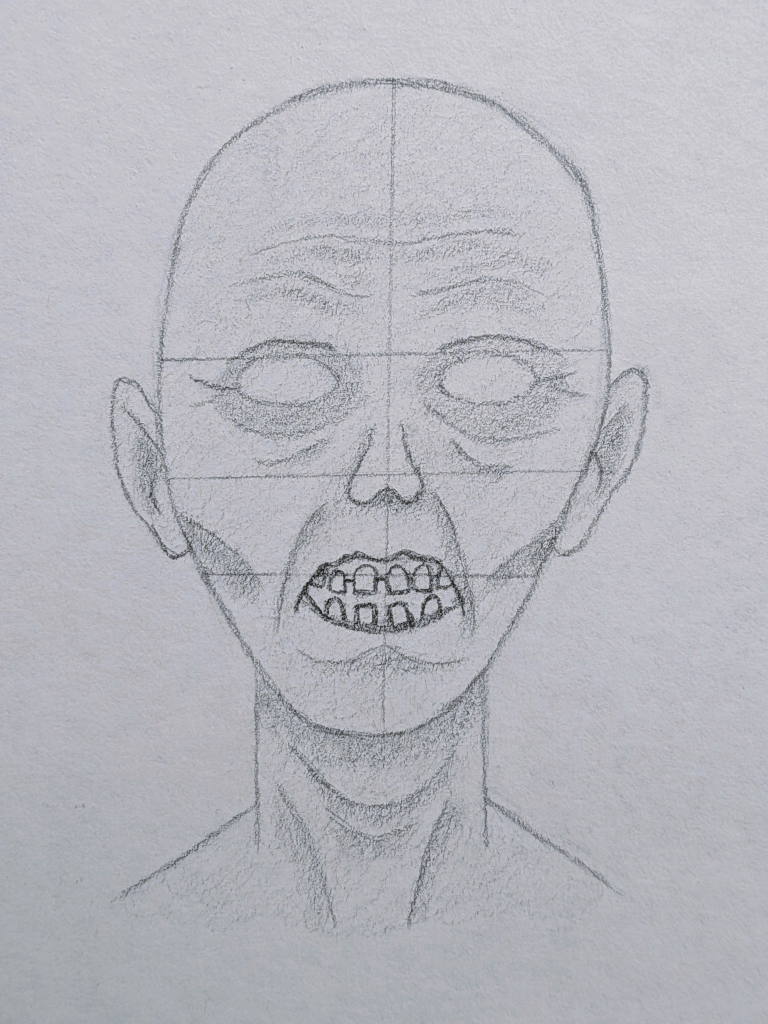
Step 7: Sketch the Teeth
Now for the fun part – giving your zombie some bite. Using your HB pencil, lightly sketch in the teeth. Keep them uneven and a little misshapen, zombies aren’t exactly known for great dental hygiene.
Focus on just the outlines here – no shading inside the mouth yet. You’re simply mapping where each tooth sits so they follow the curve of the mouth. Don’t worry if they look a bit awkward; that’s part of the charm. Gaps and crooked edges make your zombie even creepier (and more believable).
Keep your pressure light so you can adjust shapes easily later. You’ll add shadows and texture in the next step.
For now, think of this as setting the stage for that terrifying grin.
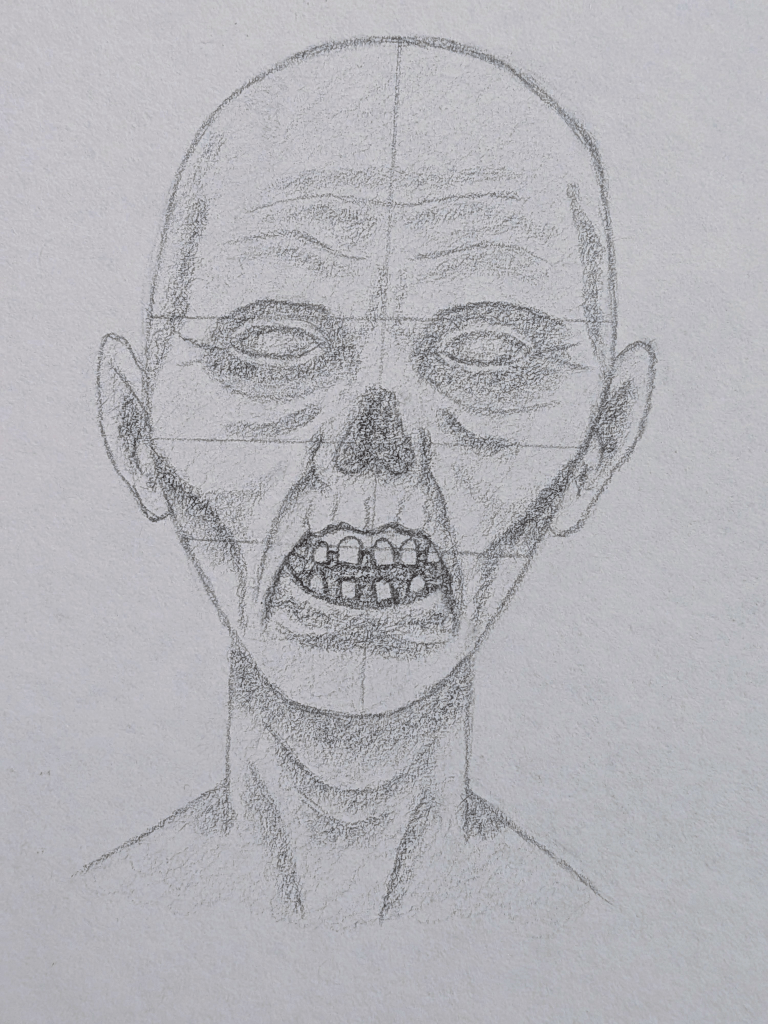
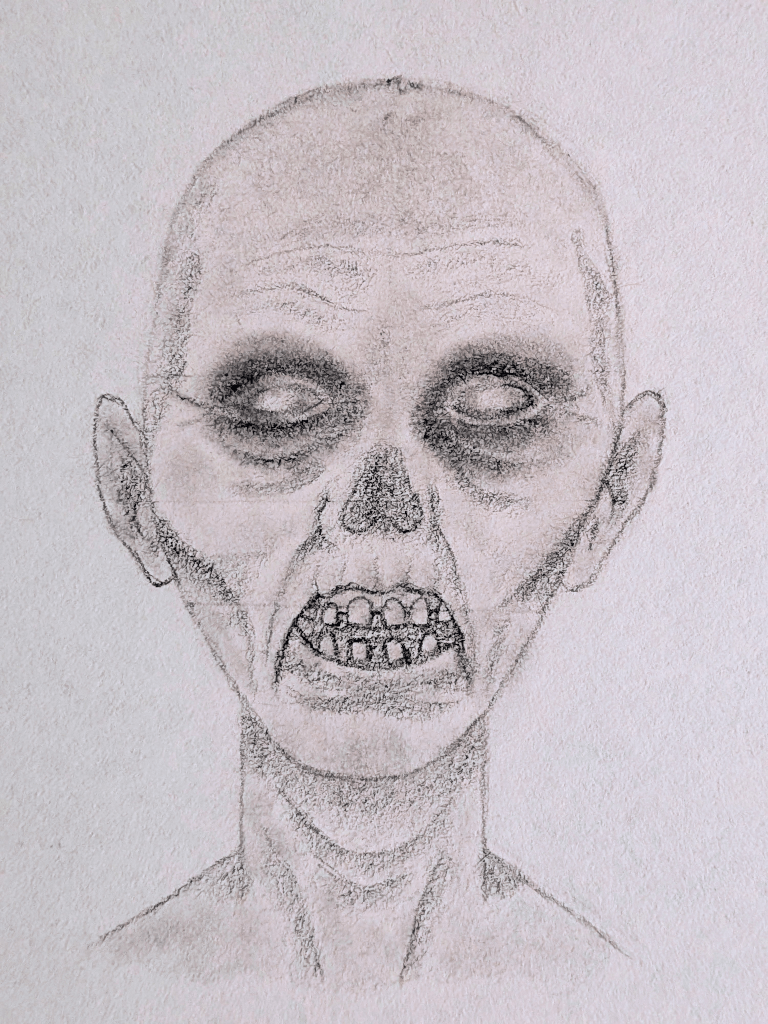
Step 8: Deepening the Shadows
Grab your 2B pencil, it’s time to give your zombie some real depth and character.
Start by deepening the eye sockets, the nose cavity, and the inside of the mouth. Use small, soft circular motions to slowly build up the tone. Keep your hand light and steady – you’re layering life (well, un-life) into the drawing one gentle shade at a time.
Next, darken the cheek hollows, laughter lines, and the shadows around the sides of the forehead. Keep those circular strokes going, making them tighter for smoother transitions. Add subtle shading above the mouth to hint at dry, thinning skin, and deepen the neck folds and under the chin to anchor the head naturally.
For the forehead wrinkles, shade above and below each line, not directly on them, so the creases appear raised rather than flattened.
Finally, lightly shade inside and around the ears. When you step back, your zombie should look satisfyingly three-dimensional – the kind of face that tells a story without saying a word (because, well… it can’t).
Step 9: Blending the Light Areas
Now it’s time to smooth things out, but only in the lighter areas.
Before you start, grab a kneaded eraser or precision eraser and gently remove any remaining guidelines. This keeps your shading clean and stops pencil lines from muddying the face later.
Once your drawing’s tidy, pick your blending stump, tissue, or cotton swab (whatever you prefer) and start gently blending only the lighter areas, the forehead, cheeks, and neck.
Work in small, soft circular motions, keeping your touch light.
Tip: Don’t press too hard, you’re blending, not scrubbing!
Avoid the darker spots for now, like under the eyes, around the nose and mouth, and inside the neck creases. You’ll handle those next with a cleaner part of your blending tool to keep dark graphite from sneaking into your highlights.
When you’re done, your drawing should look softer, smoother, and slightly more alive – well, undead.
This is where your zombie’s skin starts to look like it’s really clinging to those bones.
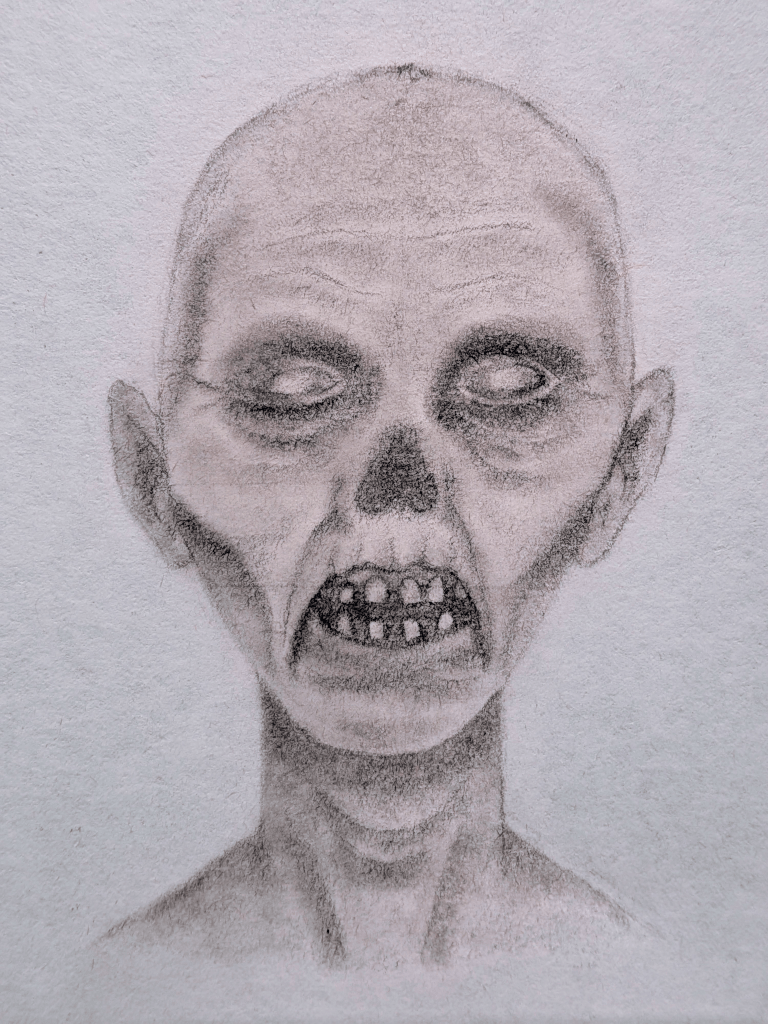
Step 10: Shading the Eyes
Now let’s finish those creepy, empty eyes. You already have a light base of shading around the eye sockets, so we’ll build on that.
- Darken the upper edges: Gently use your HB pencil to outline the top edge of each eye socket and the upper eyelids. This adds depth and makes the eyes appear sunken. Keep your pressure light; you’re not outlining, just deepening the shadows.
- Add the inner shadows: Lightly shade inside each eye, leaving the very centre a little lighter. This creates that cloudy, lifeless “undead” look instead of solid, cartoon-style eyes.
- Deepen the outer corners: With a 2B pencil, softly darken the corners of the eyes and under the eyelids. This makes them look tired and hollow, perfect for a zombie which hasn’t slept since the apocalypse.
- Blend softly: Use a blending stump or cotton bud to smooth the graphite. Blend outward from the centre so the eyes fade naturally into the surrounding skin. Don’t press too hard; you want a smoky transition, not a smudge-fest.
- Check your contrast: If the eyes look too pale after blending, lightly go back over the darkest areas with your 4B pencil to bring back a bit of depth.
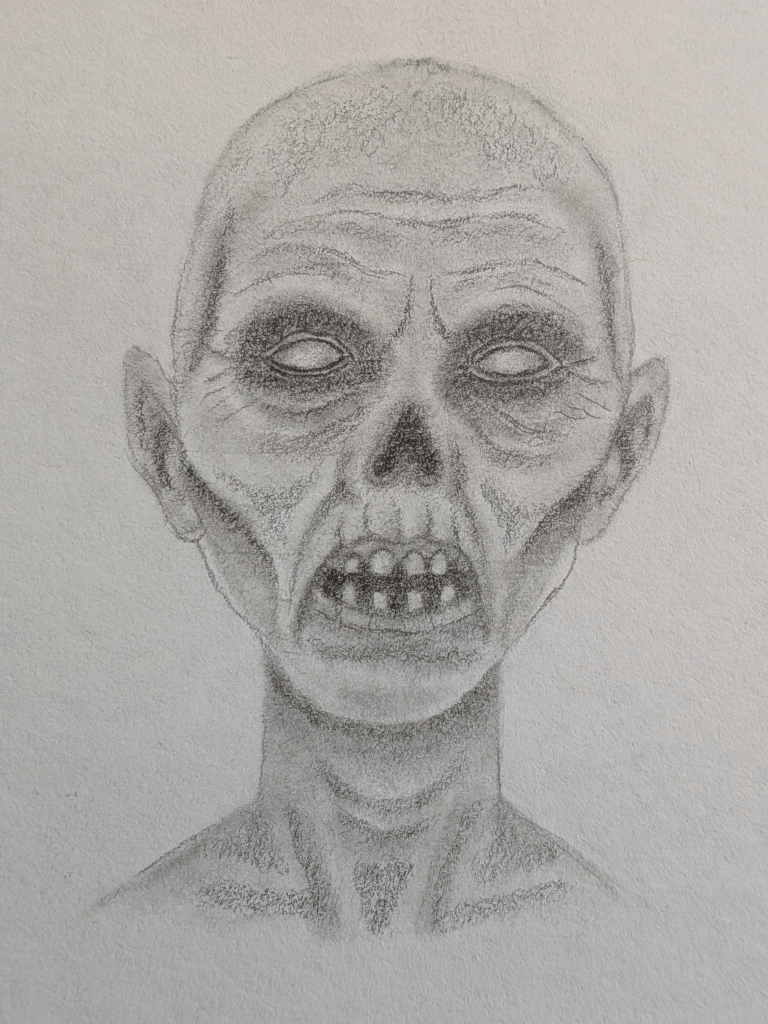
Step 11: Blend the Darker Areas
Now that the lighter parts are smooth and ghostly soft, it’s time to tackle the darker areas.
Grab a clean blending stump, cotton swab, or bit of tissue (whichever you’ve been using), and start gently blending the shadows around the eyes, nose, mouth, and neck.
Use small, light circular motions just like before, and take your time. You’re not trying to make everything one flat tone; the goal is to smooth the edges of the darker spots while keeping that delicious depth and gloom intact.
Think “undead, but still has cheekbones.”
Avoid pressing too hard! Let the graphite move naturally so you don’t lose the texture you’ve built. Once the face and neck are blended, use a kneaded or precision eraser to soften or lift any harsh outlines around the head and shoulders. This helps the zombie feel more realistic, like it’s fading out of the page (or creeping toward you, depending on your lighting).
By the end of this step, your zombie should start looking more alive in the undead sense – smoother, creepier, and ready for the final layers of detail.
Step 12: Deepening the Shadows
Now it’s time to give your zombie some real presence (and maybe a few extra sleepless nights). Grab your 4B and 6B pencils; these are your heavy lifters for depth and drama.
Start by darkening the existing shaded areas: the eye sockets, the nose cavity, the mouth, and the neck creases. Use small, controlled strokes to build up the shadows gradually. Don’t press too hard right away.
Next, define the lines around the eyes and eyelids to make them stand out. Add a few subtle wrinkles just below the eyes – they’ll give your zombie that perfectly tired “I’ve been undead since Tuesday” look.
Deepen the cheek hollows and under the chin to strengthen the structure and enhance the mood. If any outlines still look harsh (especially around the head and neck), gently erase or soften them so your zombie blends naturally into the paper.
Tip: Avoid pressing too hard; the graphite should move naturally so you don’t lose the lovely texture you’ve built. The goal is to enhance contrast while keeping transitions smooth and atmospheric.
At this stage, your drawing should look more defined and atmospheric – a little rough around the edges, but in that beautifully creepy way.
Step 13: Final Blending – Leave Some Roughness
This is your last round of blending, the step that ties everything together while keeping that gritty, undead texture.
Use your blending stump, cotton bud, or tissue to gently smooth most of the face and neck, but avoid blending the nose, the skin close to the eyes, and the inside of the mouth.
Leaving those areas slightly rough keeps your contrast strong and gives your zombie that eerie, raw look.
On the lighter areas, like the forehead, cheeks, and chin, do very gentle blending with soft circular motions.
Keep your pressure super light so you don’t lose the paper texture or highlights. This helps everything feel unified without making it too polished.
Tip: The goal is to soften without over-smoothing. A little unevenness adds realism and keeps your drawing expressive.
By the end of this stage, your zombie should look eerily lifelike – textured, shadowed, and just unsettling enough to make you proud.
Once you’re happy with the blend, it’s time for the final detailing step – the stage where your drawing goes from pretty creepy to full nightmare fuel.
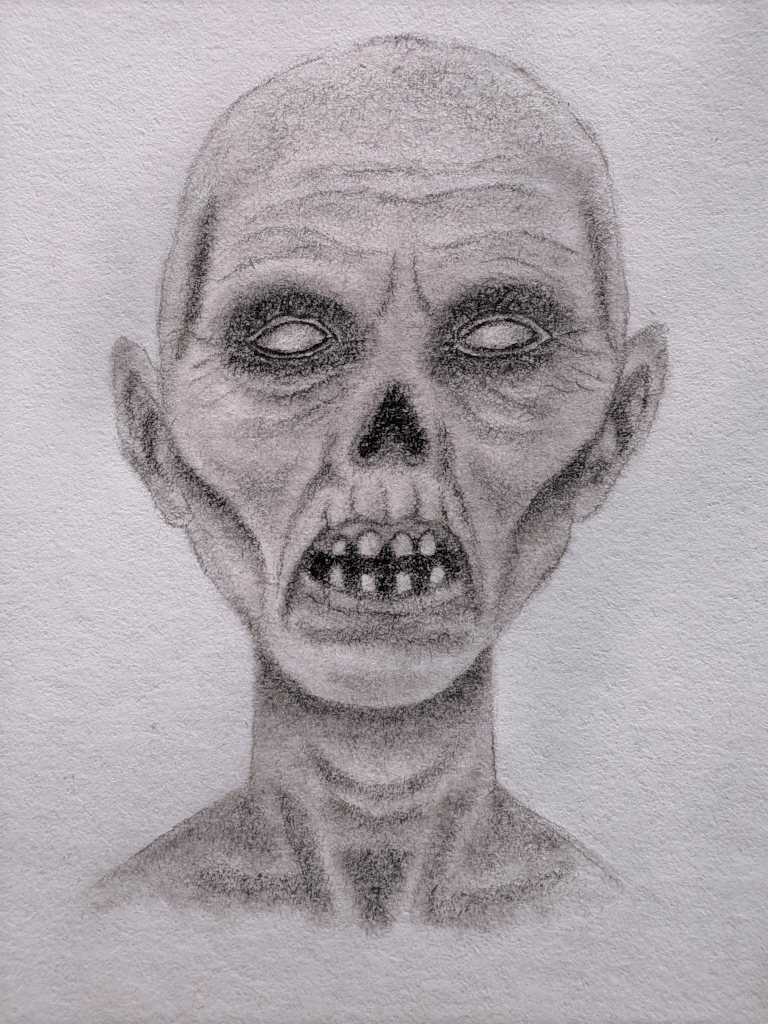
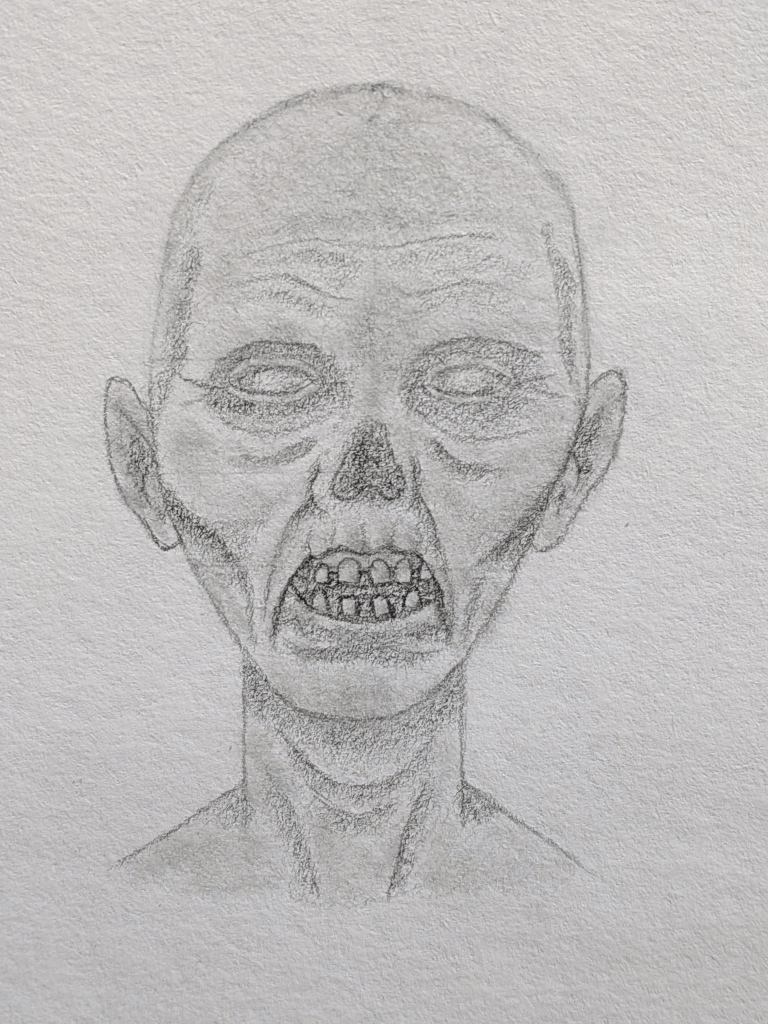
Step 14: Highlights, Outlines & Finishing Touches
You’ve reached the final stage – the moment your zombie truly crawls out of the sketchbook (metaphorically… hopefully).
Now’s your chance to add structure and polish without losing that grimy undead charm. Start by checking your shading; if any areas feel a bit too soft or washed out, use a 4B or 6B pencil to deepen the darkest shadows. Focus on the eye sockets, neck folds, and the corners of the mouth to give them a sunken, eerie depth.
Next up – the outlines:
This is where you bring everything together. Using a sharpened HB pencil, gently outline around the zombie’s head, ears, neck, and shoulders.
Keep your pressure light; you’re aiming for definition, not comic book boldness. Let some sections fade slightly or break the line where natural shadows would fall. Think of it like guiding the viewer’s eye, not drawing a fence around your zombie.
Once your outlines are in, blend gently over any transitions that look too harsh, especially where the shadows meet lighter areas. Use your blending stump or tissue very lightly; this step is about softening, not smudging everything into zombie soup.
Finally, add subtle highlights:
Use your eraser on raised areas – the forehead, cheekbones, and nose. Don’t overdo it; we’re talking the faint, ghostly touches, like the echoes of good skin days past.
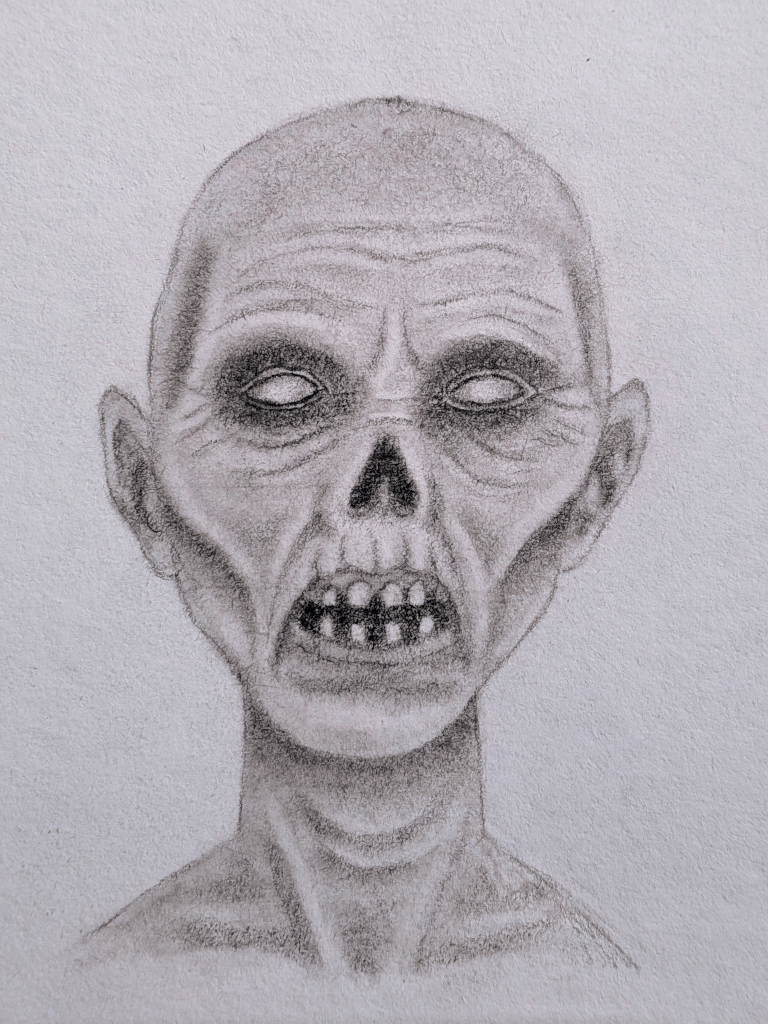
Take a step back, and you’ll see it: your zombie looks complete: eerie, expressive, and just polished enough to show off your growing skill.
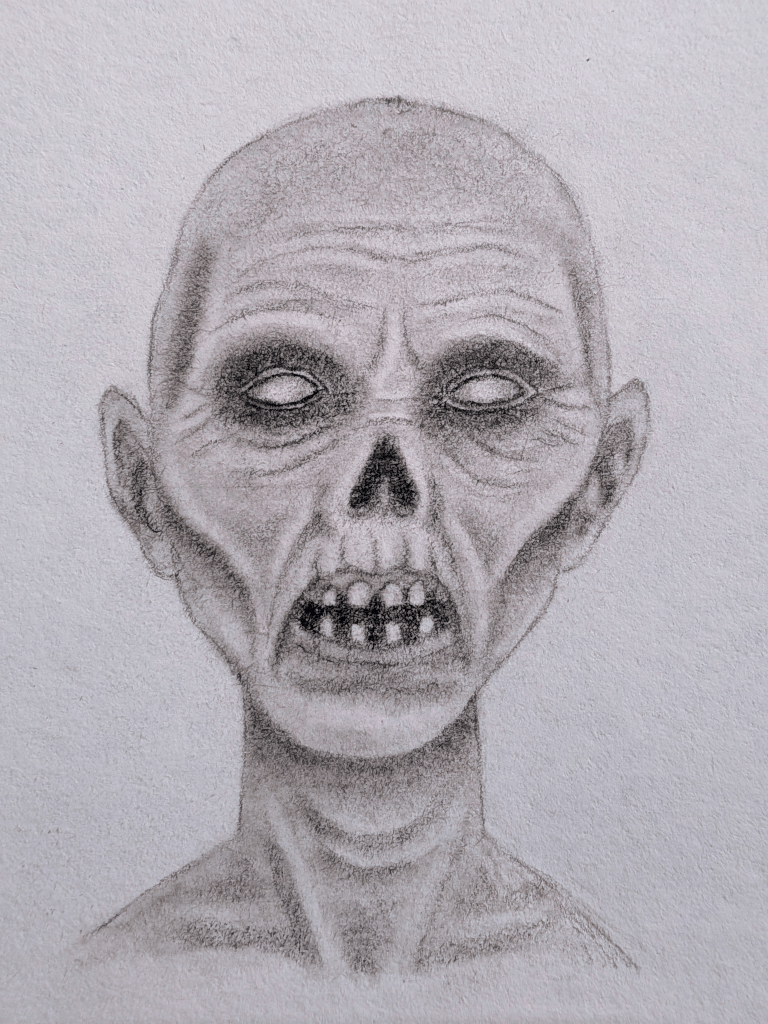
You didn’t just draw a zombie… You resurrected one.
Haunted Masterpiece: You Did It!
You’ve reached the end – and what a hauntingly good job you’ve done. Creating a realistic zombie takes focus, patience, and more graphite than most sketchbooks are emotionally prepared for.
Take a step back and really look at what you’ve built – texture, light, character. You didn’t just draw a zombie; you gave it personality. That’s no small thing.
Even if parts didn’t turn out how you expected, don’t stress – that’s exactly how artists grow. Every line, every smudge, every shadow is progress. Keep those pencils moving and your curiosity alive (even if your subject isn’t).