Basic Shading Techniques for Beginners
Shading is essential for making your drawings appear three-dimensional, adding depth, shape, and realism.
Whether you’re just starting out or refining your skills, these fundamental techniques will help you build a strong, confident foundation in shading.
This beginner’s guide introduces the core shading techniques every artist should understand. Each section also links to a deeper tutorial, so that you can explore every technique in more detail at your own pace.
What You’ll Learn:
In this guide, you’ll build a strong foundation in shading by learning how to:
- Understand how light and shadow work together to create depth and form
- Use essential techniques like hatching, cross-hatching, blending, stippling, and scumbling
- Control your shading with pencil pressure and different graphite grades
- Create smooth, realistic transitions using layering and gradual build-up
- Avoid common mistakes that can flatten or muddy your shading
- Choose the right tools to achieve clean, controlled, and effective results
- Practice simple exercises that improve confidence, consistency, and control
1. Understanding Light and Shadow
Before diving straight into shading, it’s important to understand how light interacts with objects.
Learn about light sources, shadow types, and how to create realistic depth in your drawings in the full guide, Lighting and Shading in Horror Art: A Complete Guide, where everything is broken down step by step.
2. Shading Techniques for Creepy Drawings
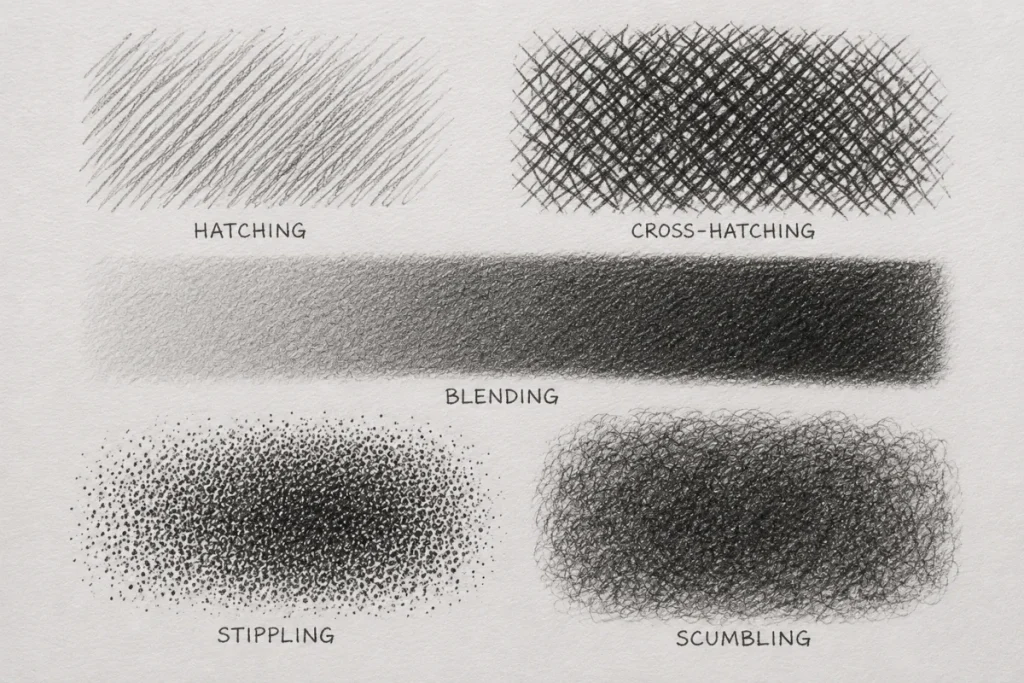
Shading isn’t just about making things darker; it’s about how you apply the darkness.
These fundamental techniques each create different textures, moods, and levels of control. Whether you’re aiming for gritty horror or smooth realism, mastering these will help you create convincing depth and bring your drawings to life.
- Hatching – Parallel lines used to create tone and texture.
- Cross-Hatching – Overlapping lines that create deeper shadows and stronger contrast.
- Blending – Using tools like tissue, blending stumps, or even fingers to create smooth, gradual transitions.
- Stippling – Tiny dots placed close together for controlled, gradual shading.
- Scumbling – Loose, circular strokes that create a soft, textured effect.
Ready to push these further? Explore the full Shading Techniques for Creepy Drawings guide for detailed breakdowns, examples, and step-by-step practice.
3. Mastering Pencil Pressure and Grades for Creepy Drawings
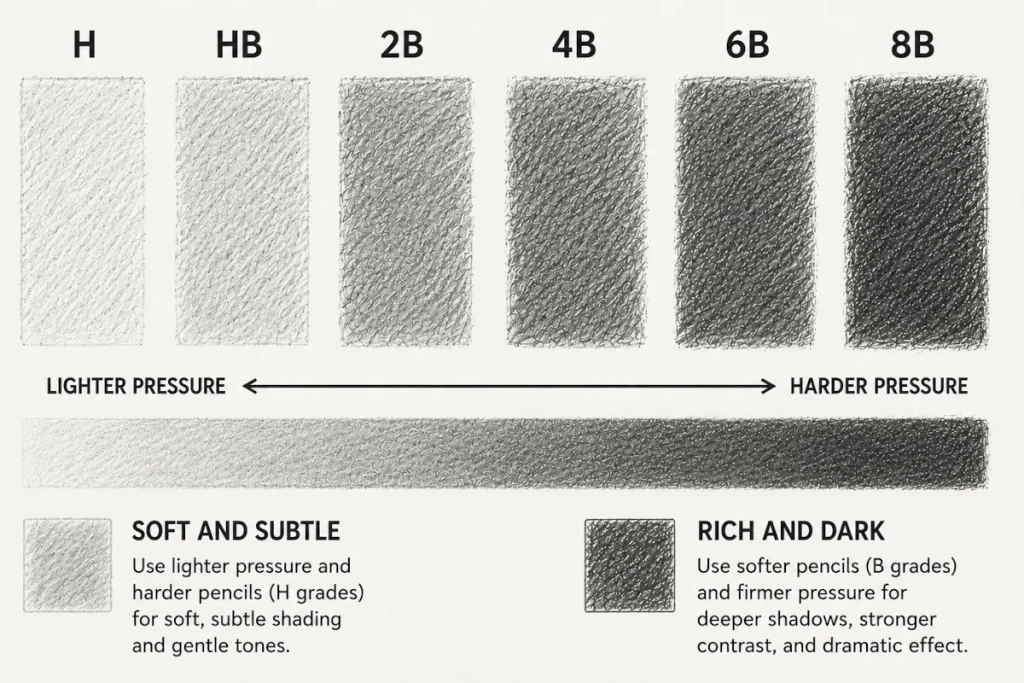
Lighter pressure and harder pencils (H grades) create soft, subtle shading, while softer pencils (B grades) produce rich, dark shadows.
Experimenting with different pencil grades helps you find the right balance for your piece and gives you far more control over your final result.
Understanding how pressure and pencil grade affect value is key to controlling mood and contrast in your drawings. Light pressure with an H pencil creates a ghostly softness, while firm pressure with a B pencil adds bold, attention-grabbing shadows.
Try swatching each grade using both light and heavy pressure, and pay attention to how the tones shift. It’s a quick way to understand your tools before jumping into detailed work.
Think of H pencils as the introverts of the pencil world, quiet, controlled, and subtle.
B pencils, on the other hand, are the extroverts, bold, dramatic, and impossible to ignore.
Want to take this further? Explore the full Mastering Pencil Pressure and Grades for Creepy Drawings guide to see how pressure transforms shading, from eerie softness to deep, dramatic contrast.
4. Layering Pencil Shading for Smooth Gradients (And Creepy Realism)
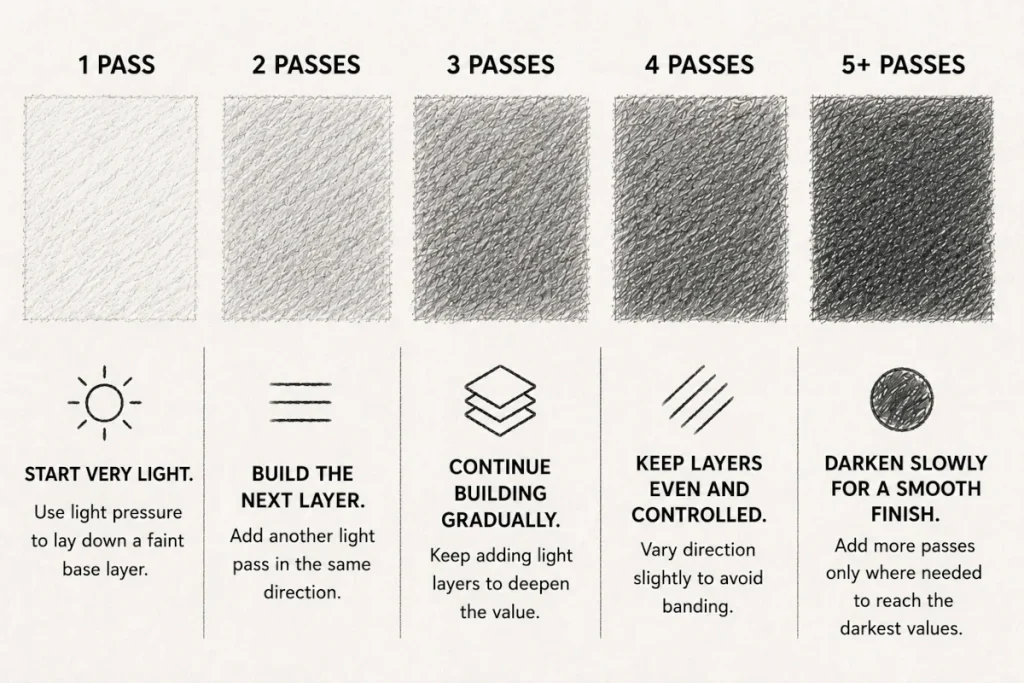
Instead of pressing hard, build up layers gradually.
Light strokes in multiple passes create smoother shading and a more natural transition between values.
Think of it like building fog in a horror scene. Start light, then let the darkness creep in layer by layer.
This method gives you far more control, helps prevent unintentional dark patches, and makes blending feel much more natural over time.
Want to see how layering transforms into ghostly-smooth gradients?
Take a deeper look at the full Layering Pencil Shading for Smooth Gradients (And Creepy Realism) guide, where you’ll find step-by-step techniques and examples that make your shading melt together like midnight fog.
5. Avoiding Smudging and Keeping It Clean
Smudging might work for ghosts, but in pencil shading, it can leave your work looking messy and unfocused.
Use a spare sheet of paper under your drawing hand to prevent accidental smudging and keep your shading clean.
When it comes to blending, tools like blending stumps, tissues, or cotton swabs give you far more control than using your fingers.
Fingers transfer natural oils onto the paper, which can stain the surface and make blending unpredictable.
Keeping your workspace clean helps your shadows stay crisp, controlled, and intentional… which is exactly what you want when you’re aiming for eerie, atmospheric results.
6. Quick Shading Exercises

Practice builds control, confidence, and consistency.
These simple exercises will strengthen your shading skills quickly:
- Gradient Bar – Draw a rectangle and shade from light to dark using smooth transitions.
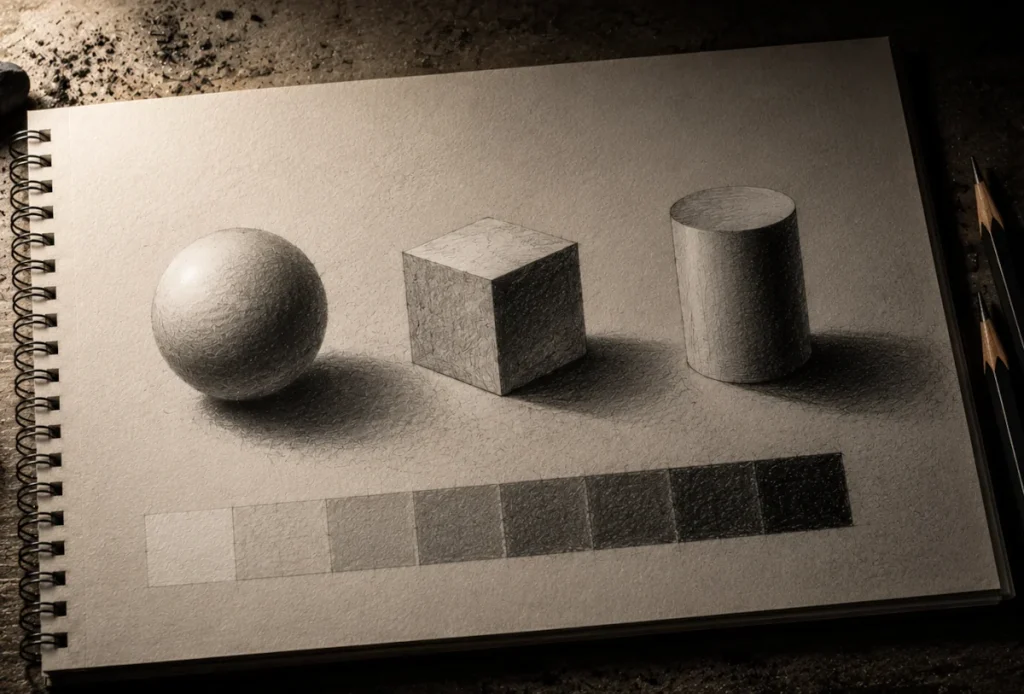
Experiment with different techniques like blending, hatching, and stippling to compare how each affects the result. - Shading Shapes – Practice shading a sphere, cube, and cylinder to understand how light behaves across different forms.
Focus on highlights, mid-tones, and shadows. - Pressure Control – Using a single pencil, shade a small area while gradually increasing pressure from the lightest touch to the darkest mark.
This builds precision and helps you control your values more intentionally.
Think of these as your daily drills. Not glamorous, but this is where your control gets scary good.
7. Best Tools for Shading
Using the right tools can make shading easier, smoother, and far more controlled.
Here are the essentials worth having in your toolkit:
Pencils
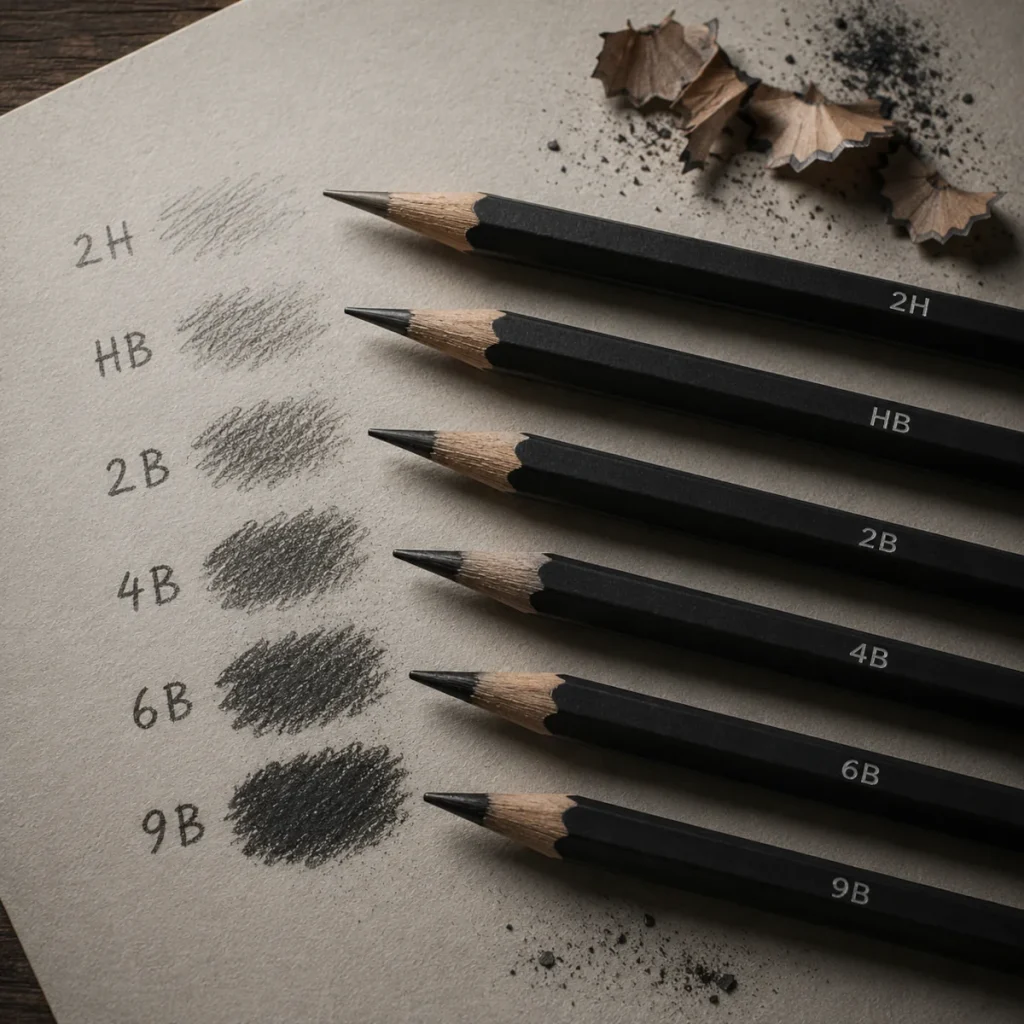
Graphite pencils come in a range of hardness levels (typically 2H to 9B), and each one plays a different role in your shading.
- Harder pencils (H grades) produce fine light lines, making them perfect for subtle shading, sketching, and soft transitions.
- Softer pencils (B grades) produce darker, richer tones, ideal for deep shadows and strong contrast.
Using a mix of both allows you to build a full value range, from faint ghostly greys to heavy, dramatic darkness.
Blending Stumps & Tissues
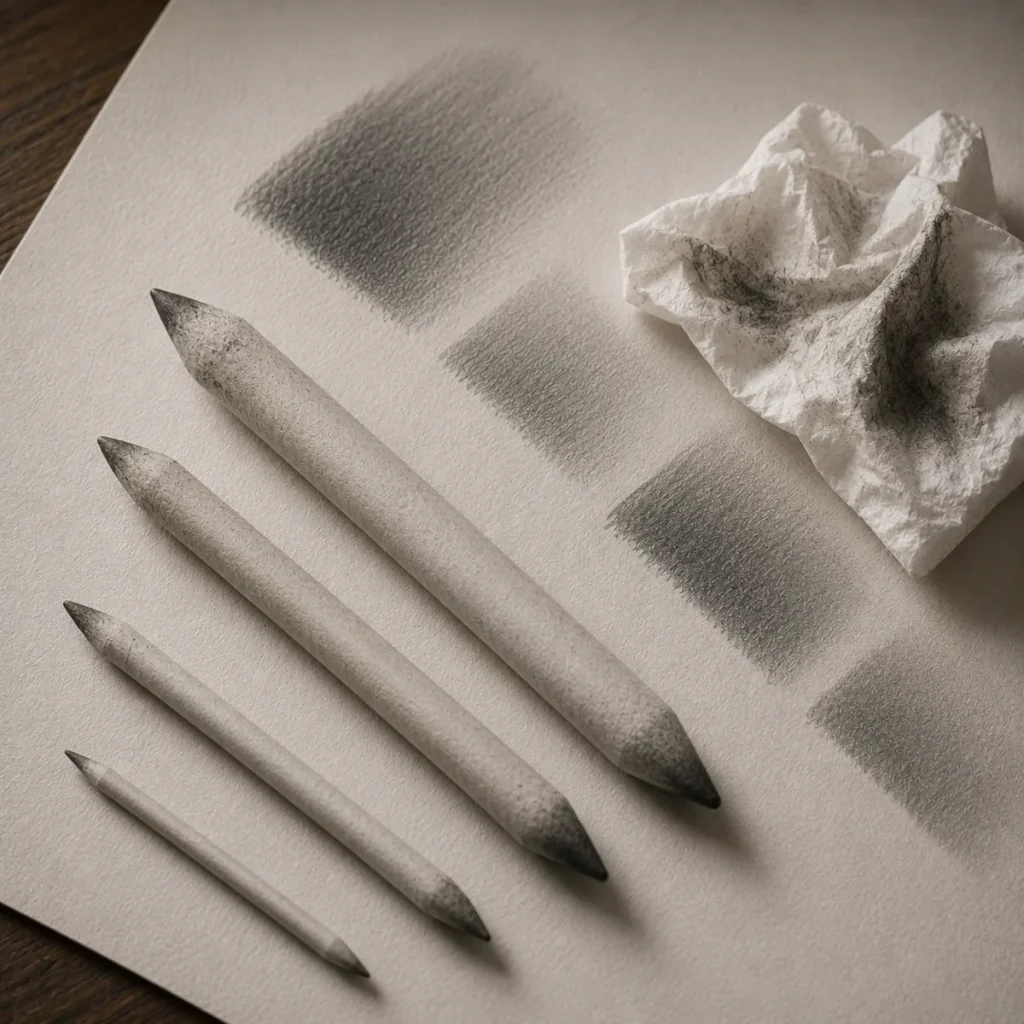
These tools are essential for softening shading and creating smooth transitions between light and dark.
- Blending stumps offer precision and control, making them perfect for tight areas and fine details where you want clean, controlled gradients.
- Tissues are better for larger areas, helping you create soft, subtle gradients quickly and evenly.
Using both gives you flexibility, allowing you to switch between detailed refinement and broad atmospheric shading depending on what your drawing needs.
Avoid using your fingers for blending, as natural oils can stain the paper and make your shading harder to control.
Kneaded Eraser
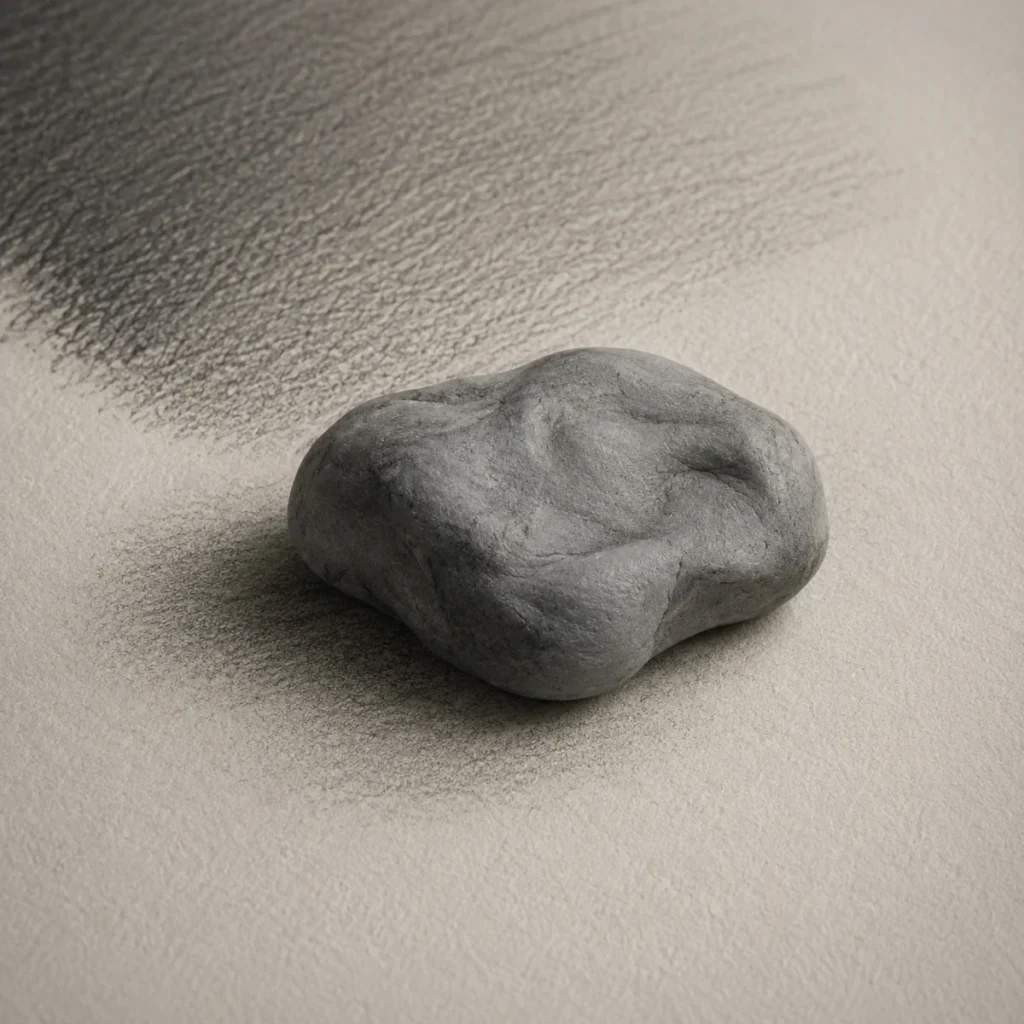
A kneaded eraser is perfect for lifting highlights and softening edges without damaging the paper.
You can shape it into fine points for precise detail work or stretch and press it to lift graphite from larger areas. This makes it incredibly useful for subtle corrections and gradually bringing light back into shaded regions.
Unlike regular erasers, it doesn’t leave harsh marks, allowing you to refine your shading while keeping transitions smooth and natural.
Regular Eraser
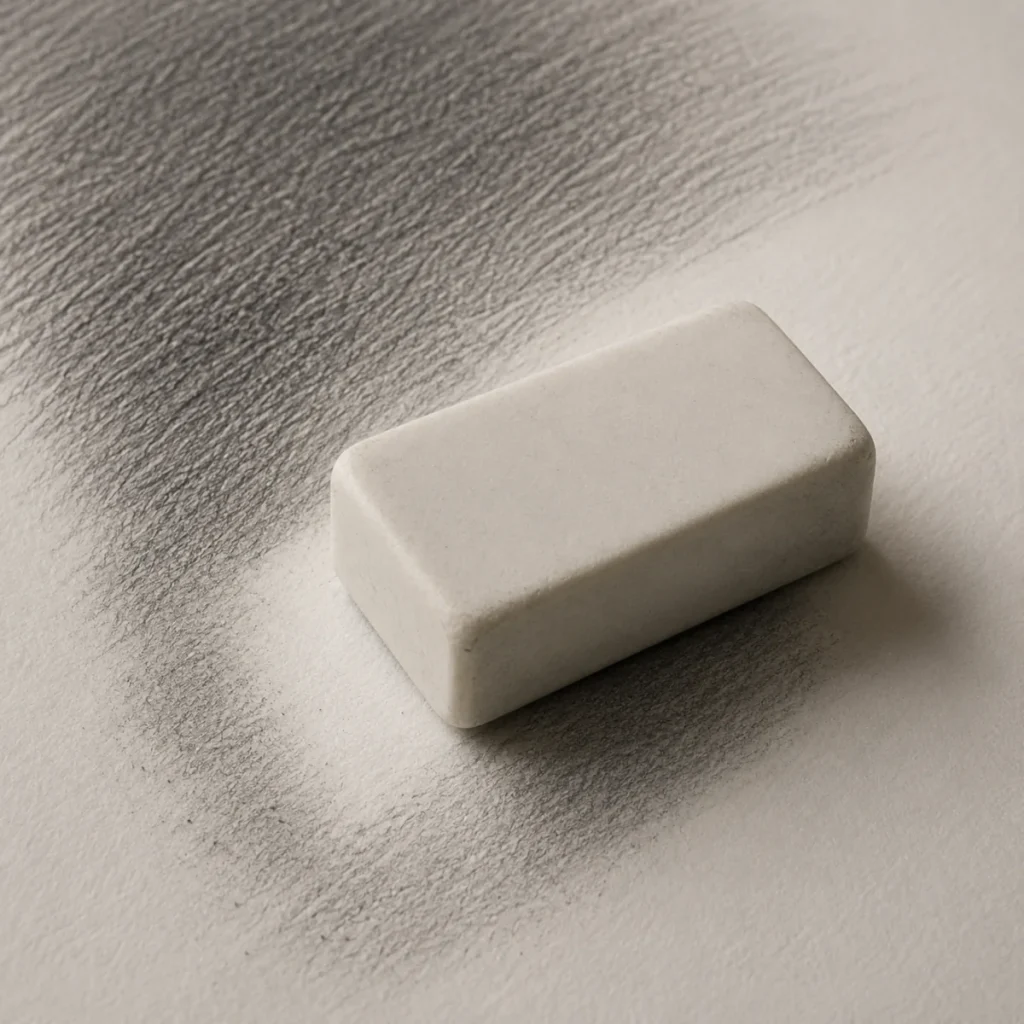
A regular eraser is ideal for cleaning up edges, fixing mistakes, and creating sharp, clean highlights.
- Vinyl or plastic erasers are best for shading, as they lift graphite cleanly without damaging the paper.
- They’re perfect for erasing larger areas or adding crisp contrast in detailed sections.
Avoid rubber erasers, as they tend to smear graphite rather than remove it cleanly, leaving your work looking muddy.
Cotton Swabs & Brushes
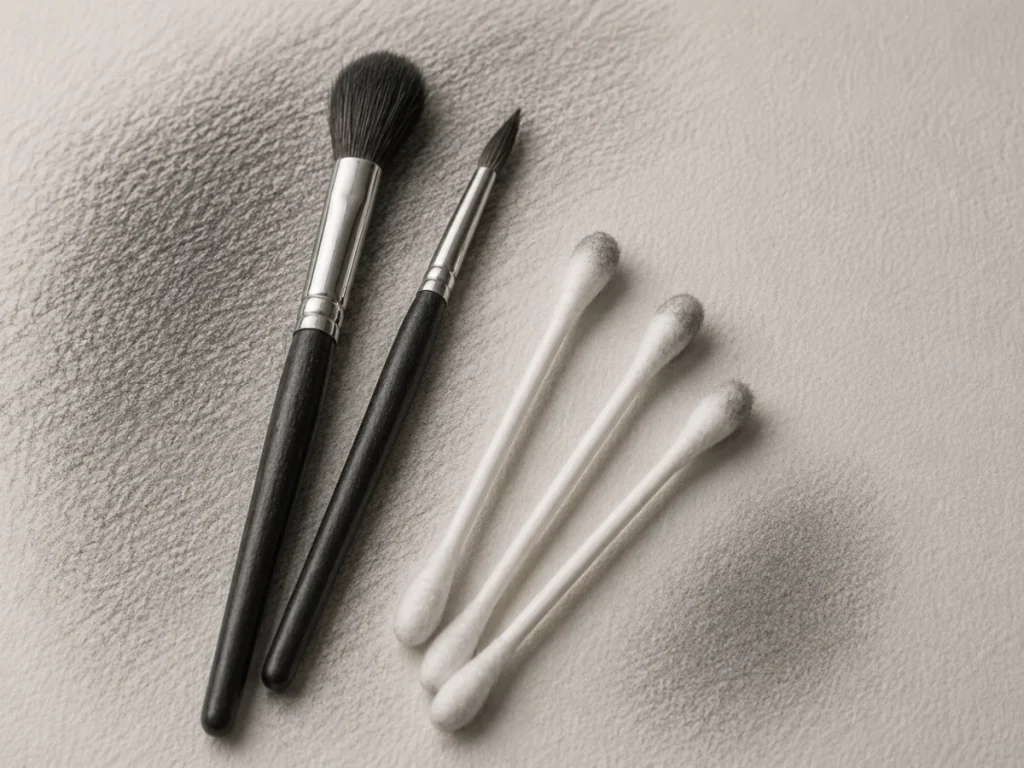
These tools are perfect for creating soft, subtle shading and atmospheric effects.
- Cotton swabs are great for blending small areas with precision, making them useful for controlled smoothing in tighter spaces.
- Brushes are ideal for larger areas, helping you create a soft, airy finish without disturbing the graphite too much.
Together, they allow you to shift between controlled blending and gentle, hazy transitions, which is especially useful for creating misty, eerie effects in horror art.
Pencil Sharpener or Sandpaper Block
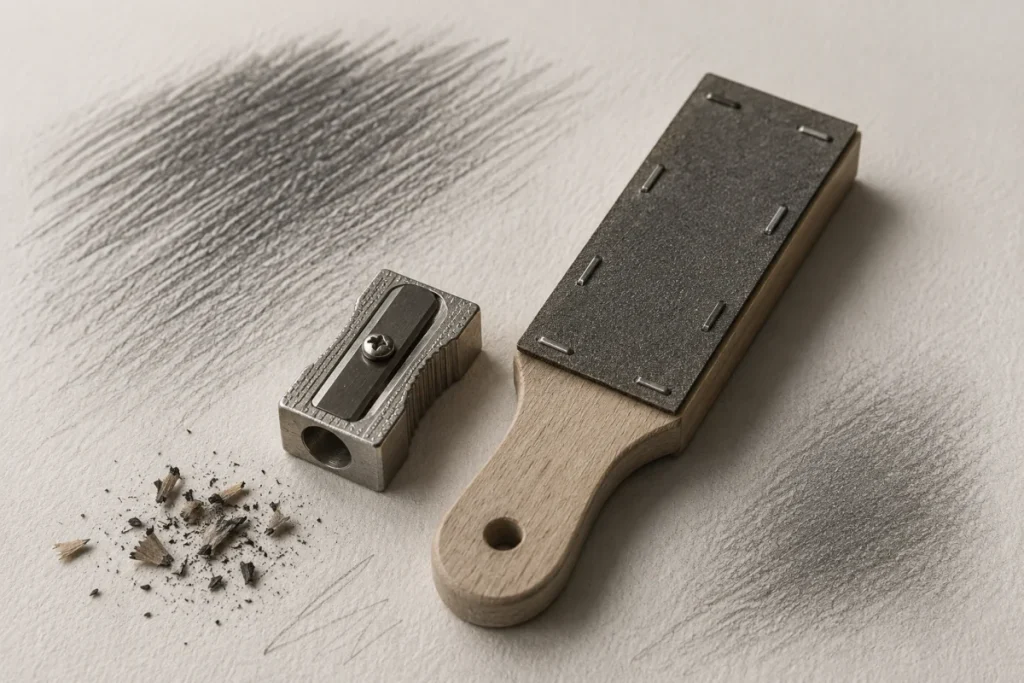
A sharp pencil gives you better control, cleaner lines, and more precise shading.
- A regular sharpener is ideal for quick, convenient sharpening during general drawing.
- A sandpaper block offers more control, allowing you to refine the tip exactly as you want, which is especially useful for detailed shading and fine textures.
Keeping your pencil sharp helps you maintain consistent line quality and smooth shading, rather than fighting against dull, unpredictable marks.
Paper
The texture of your paper has a huge impact on how your shading looks and behaves.
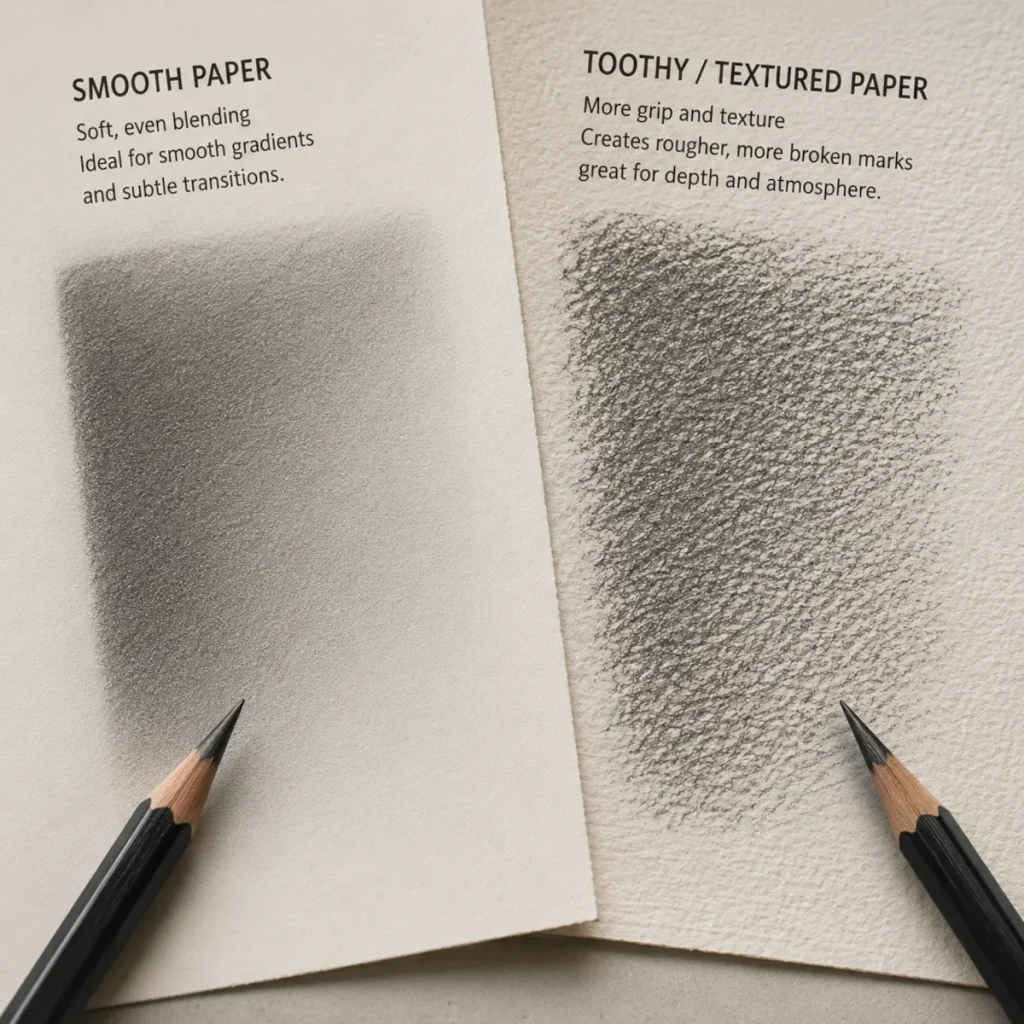
- Smooth paper is ideal for blending and clean gradients, making it perfect for soft, realistic shading and subtle transitions.
- Toothy or textured paper grips the graphite more, creating rougher, more broken marks that are great for gritty, dramatic, or eerie effects.
Choosing the right paper helps you control whether your shading feels silky and refined or raw and atmospheric.
Experiment with different surfaces to find what works best for your style, whether you’re aiming for smooth realism or haunted, textured grit.
8. Common Beginner Shading Mistakes (And How to Fix Them)

Even the best monsters-in-the-making can trip over the basics. Whether it’s pressing too hard, ignoring your light source, or relying on a single pencil, these common slip-ups can flatten your shading faster than a vampire at sunrise.
Here are a few mistakes you might recognise:
- Uneven or Patchy Shading – when your tones look blotchy instead of smooth and controlled.
- Ignoring the Light Source – shadows go rogue, and your drawing loses realism fast.
- Using Only One Pencil – limited contrast = flat, lifeless results.
Sink your fangs into the full guide:
Common Shading Mistakes in Drawing (And How to Fix Them) is packed with practical fixes, clear examples, and simple techniques to help you clean up your shading fast.
Next Up: Texture and Depth in Shading (Drawing Techniques)
Now that you’ve conquered the basics of shading, it’s time to go deeper, literally. In the next post, you’ll learn how to add texture and depth to your drawings, making them feel more realistic, dimensional, and fully alive (or delightfully undead).
Discover how different shading techniques can bring atmosphere, realism, and character into your work.
Continue to Texture and Depth in Shading (Drawing Techniques)