Shading Techniques for Creepy Drawings
Bring your monsters to life – one pencil stroke at a time.
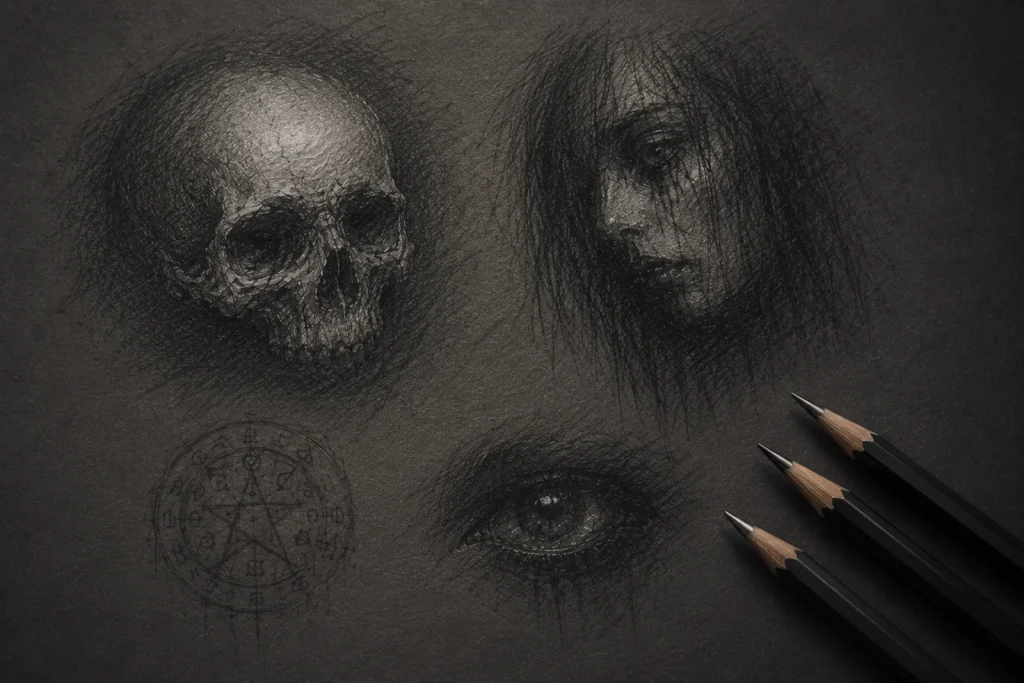
Shading is what gives horror drawings depth, atmosphere, and realism. It transforms flat sketches into eerie artwork filled with shadow, texture, and mood. Whether you’re drawing skulls, haunted objects, creepy creatures, or dark environments, strong shading helps bring them off the page.
Even if you’re completely new to shading, this guide will walk you through the basics step by step. You’ll learn how to build smooth gradients, create dramatic shadows, and add depth without overworking your drawing into a muddy mess.
What You’ll Learn:
Learn how different pencil shading techniques can create depth, texture, atmosphere, and realism in horror artwork.
By the end of this post, you’ll understand:
- How to use hatching, cross-hatching, stippling, scumbling, and blending techniques.
- Why different shading styles create different textures, moods, and levels of realism.
- How to create smoother gradients, deeper shadows, and stronger contrast.
- Ways to make horror drawings feel more atmospheric, eerie, and dramatic.
- How to combine multiple techniques for richer and more realistic artwork.
- Simple shading drills that improve pencil control, lighting awareness, and confidence.
- How texture and imperfect shading can help add grit, decay, and unsettling realism to horror art.
What Shading Really Does
Shading isn’t just about adding darkness – it’s how you create form, atmosphere, and emotion. By controlling your pencil pressure, direction, and tone, you decide how light interacts with the shapes you draw.
Quick note:
In drawing, “tone” simply means how light or dark something appears. It’s all about value rather than colour. When artists talk about creating tone, they’re really building the illusion of light and shadow using graphite alone.
In horror art, shading does a huge amount of the storytelling. It builds tension, creates mystery, and adds realism to shadows, textures, and unsettling details. Good shading can make even a simple object feel eerie or atmospheric.
Pro Tip:
Start with light layers and build the shading gradually. It’s much easier to darken an area later than it is to fix shading that’s become too heavy too early.
1. Hatching – Lining Your Way to Shadows
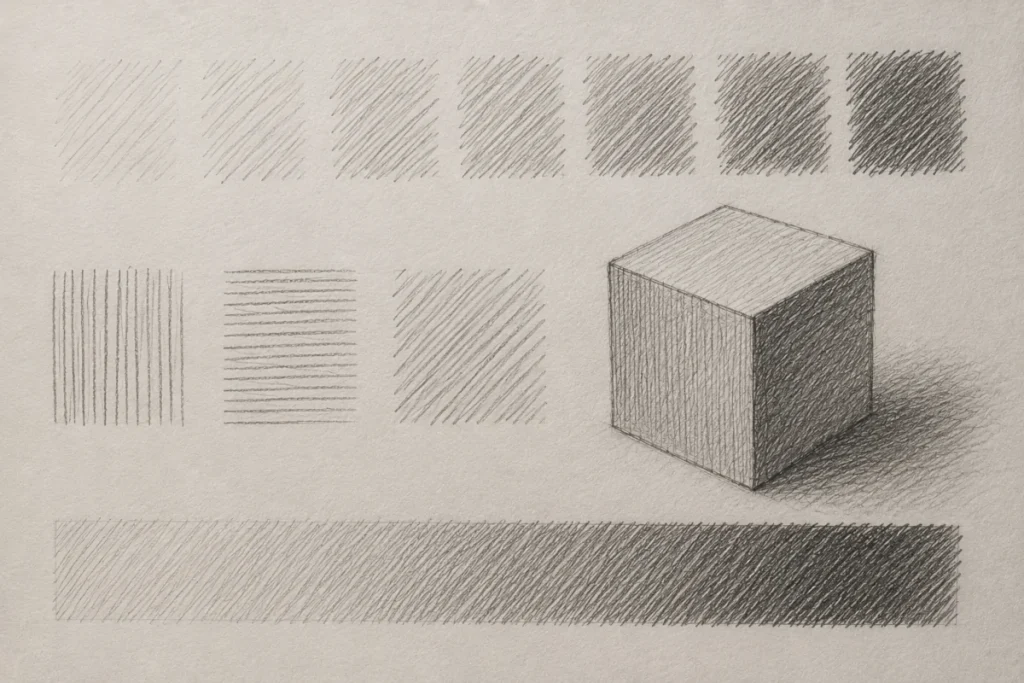
Hatching uses parallel lines to build tone and create the illusion of form. It’s simple, beginner-friendly, and one of the fastest ways to add depth and atmosphere to your drawings.
How to do it:
1. Choose a direction for your lines (diagonal, vertical, horizontal, etc.) and keep them consistent.
2. Draw light, evenly spaced lines using relaxed pencil pressure.
3. To darken an area, add more lines between the existing ones so the spacing becomes tighter.
4. Build the shading gradually, starting lightly and increasing the line density in darker areas.
In horror art:
Hatching works especially well for creating dry, cracked, stretched, or aged textures. It’s perfect for mummified skin, gaunt faces, dead trees, torn fabric, or anything that should feel worn and unsettling.
Exercise:
Shade a small sphere or cube using only hatching. Focus on keeping your line direction consistent and your spacing smooth.
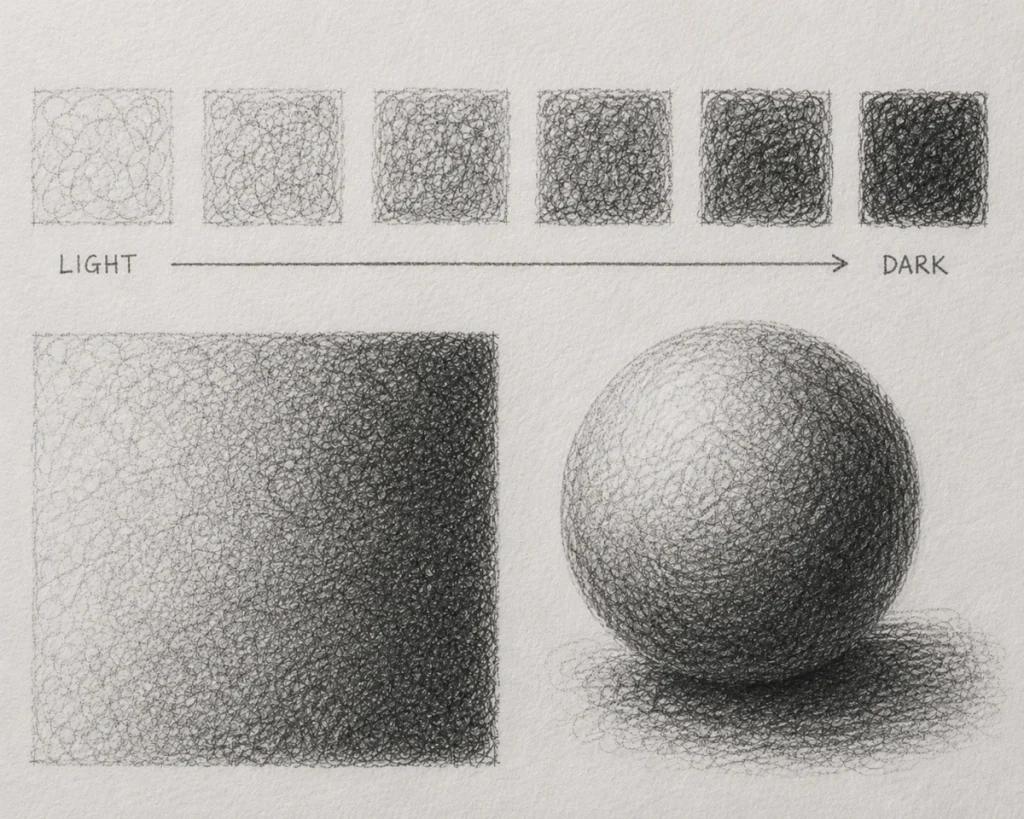
2. Cross-Hatching – Controlled Chaos
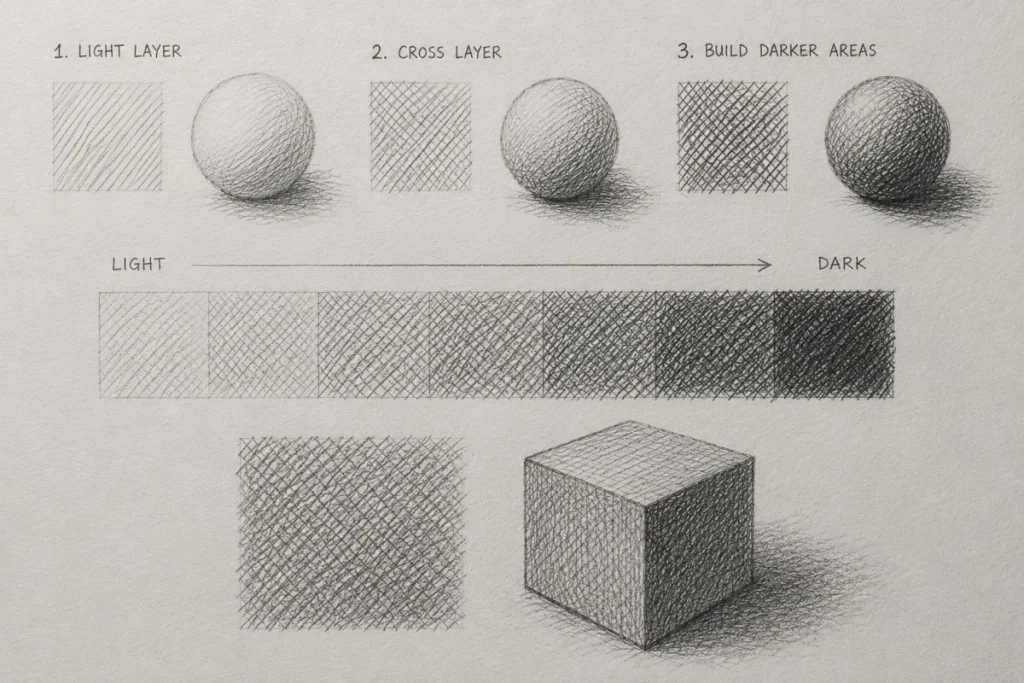
Cross-hatching creates richer shadows by layering lines at different angles. Each new angle deepens the shadows and adds tension, texture, and that “this thing hasn’t slept in 400 years” look.
How to do it:
1. Start with a light layer of hatching in one direction using soft, evenly spaced lines.
2. Add a second layer of lines crossing over the first at a different angle.
3. Build darker areas gradually by adding extra layers at new gentle angles instead of pressing harder immediately.
4. Keep your pencil pressure light and controlled so the shading stays textured rather than muddy.
5. Leave small gaps in lighter areas to help create contrast and stop the drawing from becoming too flat.
In horror art:
Cross-hatching is excellent for creating gritty, decayed textures like rotting wood, cracked bone, hollow eye sockets, worn bandages, or aged skin. The rough layered lines naturally create an uneasy, distressed look that works perfectly in creepy drawings.
Exercise:
Draw a small square or sphere and shade it using three stages of cross-hatching: light, medium, and dark. Focus on gradually increasing the line density while keeping the angles clean and controlled.
3. Stippling – The Patient Artist’s Curse
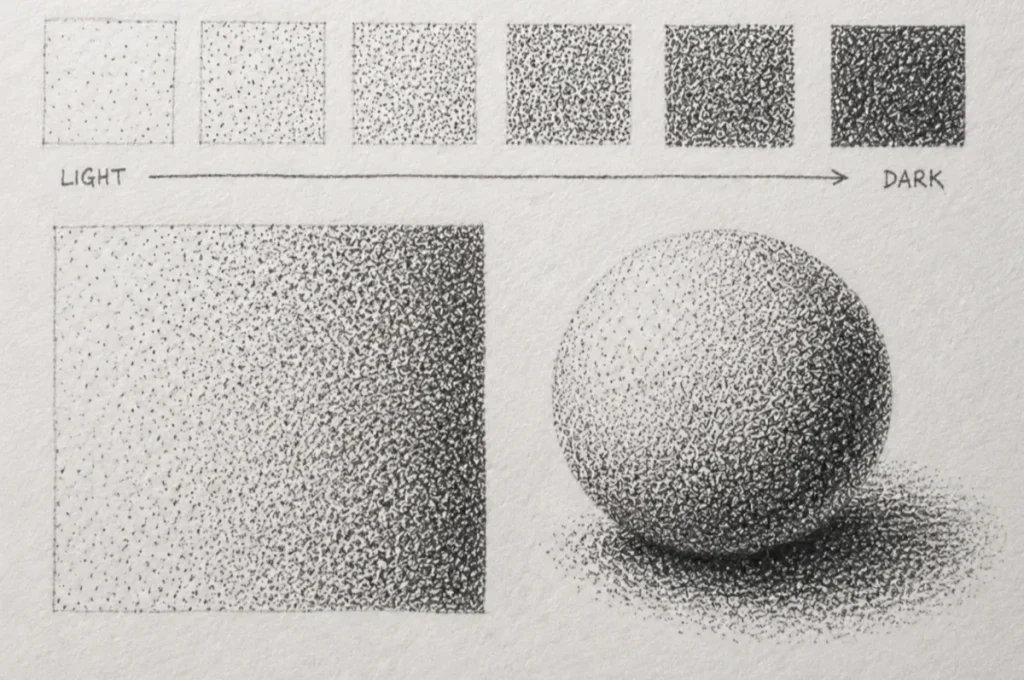
Stippling uses tiny dots to build tone and texture. It’s slow, strangely calming, and perfect for creating eerie surfaces that look organic, aged, and unsettling.
How to do it:
1. Create small dots by gently tapping your pencil against the paper – no circles, dragging, or scribbling.
2. Keep the dots spread apart in lighter areas to create soft tones.
3. Add more dots closer together to gradually darken the shadow.
4. Build the gradient slowly and keep the dots unevenly spaced so the texture feels natural rather than patterned.
5. Use a sharp pencil for cleaner, crisper dots and better texture control.
In horror art:
Stippling works brilliantly for bone texture, mould, decayed skin, dust, pores, rot, and rough organic surfaces. The uneven texture naturally creates that uncomfortable “something is definitely wrong here” feeling.
Exercise:
Create a stippling gradient from light to dark by slowly increasing the number of dots across the page. Keep one side airy and sparse, then gradually tighten the dot density as the shadows deepen.
4. Scumbling – Controlled Scribbles
Scumbling uses loose, overlapping circular marks to create soft, uneven texture. It’s expressive, forgiving, and perfect for building natural-looking tone without harsh lines or rigid shading.
How to do it:
1. Use small, loose circular motions with your pencil – think soft overlapping scribbles rather than tight patterns.
2. Layer the circular marks gradually to build texture and tone.
3. Increase the pressure or add extra layers to darken shadowed areas.
4. Keep your hand relaxed and the motions uneven so the texture stays organic instead of stiff or repetitive.
5. Blend lightly between layers if needed to soften transitions while keeping some texture visible.
In horror art:
Scumbling works brilliantly for foggy textures, bruised skin, smoky shadows, rough flesh, under-eye darkness, mist, and eerie atmospheric backgrounds. The uneven texture helps create soft, unsettling surfaces that feel organic and slightly decayed.
Exercise:
Shade a small area using only scumbling and build three levels of tone: light, medium, and dark. Focus on gradually layering the texture without pressing too hard too quickly.
5. Blending – Soft Shadows and Eerie Realism
Blending smooths graphite into soft transitions and atmospheric shadows. It’s ideal for creating misty textures, subtle skin tones, ghostly lighting, and smooth gradients that feel hauntingly realistic.
How to do it:
1. Lay down a light base layer of graphite using soft shading, hatching, or tiny circular motions.
2. Use a blending stump, soft tissue, or brush to gently smooth the graphite in one consistent direction.
3. Build darker areas gradually by adding more graphite, then blending again if needed.
4. Keep the lightest areas clean to preserve highlights and contrast.
5. Work in thin layers rather than heavy pressure to avoid muddy or overly shiny graphite.
Extra clarity for beginners:
Avoid over-blending. If everything becomes too soft and blurry, your drawing can lose structure and start looking flat. Keeping a few sharper edges between shadows and midtones helps the forms stay believable.
In horror art:
Blending is perfect for sunken eyes, candlelit faces, drifting fog, ghostly skin, smoky shadows, eerie portraits, and soft atmospheric backgrounds. It helps create smooth transitions that feel cinematic and unsettling.
Exercise:
Create a simple light-to-dark gradient using graphite, then blend it gradually to soften the transition while keeping the darkest shadows visible.
Want to explore the best tools for smooth, atmospheric shading? Check out my Blending Tools for Graphite and Charcoal guide.
6. Combining Techniques
Realistic horror art rarely relies on just one shading method. Combining techniques helps you create drawings that feel more natural, detailed, and atmospheric by mixing soft shadows with rough textures and sharp details.
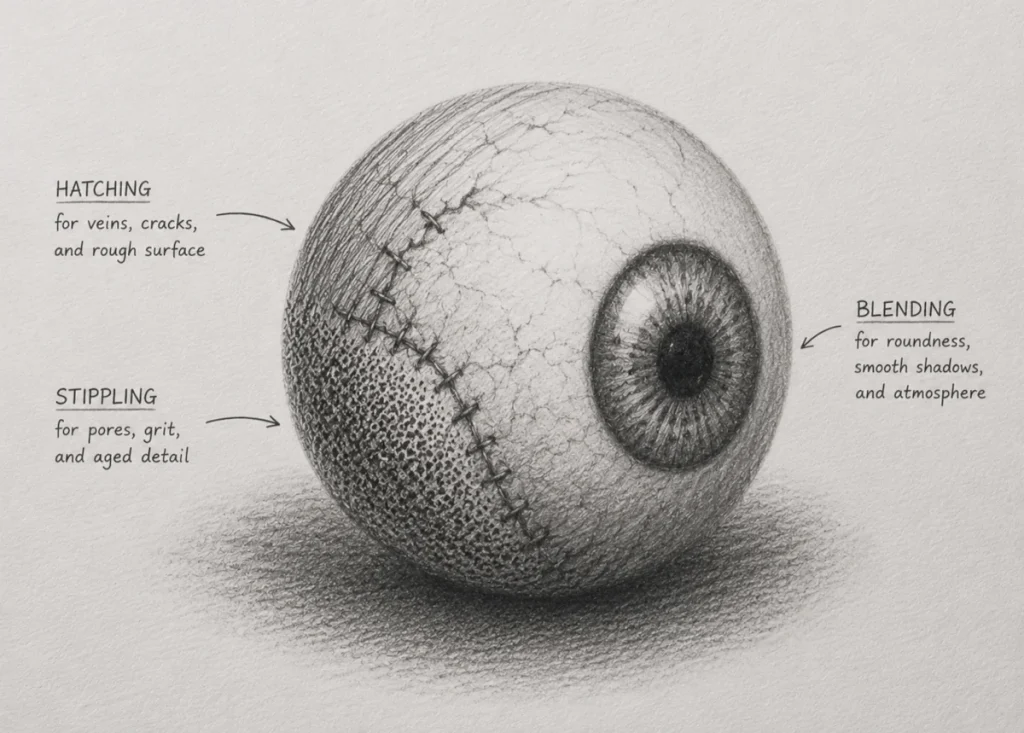
Try this combo:
- Hatching for texture (wrinkles, stretched skin, cracks)
- Blending for smooth shadows (soft transitions and depth)
- Stippling for organic detail (pores, decay, dust, and gritty surfaces)
Why this works:
Different textures react to light in different ways. Smooth blending creates soft form and atmosphere, while rough techniques like hatching and stippling add texture, age, and realism. Using them together stops drawings from looking flat or overly polished.
Mixing textures gives your drawings that extra layer of unsettling realism – the kind that makes viewers stare a little too long before realising why the image feels uncomfortable.
If you’re still building your toolkit and want to know which traditional tools actually help with shading, blending, and texture work like this, check out my Essential Horror Drawing Tools for Beginners guide.
Exercise:
Draw one small creepy object – like a stitched eyeball, cracked skull fragment, or rotting fruit – and combine at least three different shading techniques within the same drawing. Focus on making some areas smooth and others rough or textured.
Pro Tips for Creepy Contrast
- Use darker tones around the eyes, mouth, and deep cracks to make features feel heavier and more intense.
- Keep raised areas lighter, such as cheekbones, scars, or stretched skin, so the form stands out clearly.
- Let some outlines fade or disappear completely instead of drawing every edge sharply. This creates a more natural, eerie look.
- Avoid over-blending. A little rough texture helps your drawings feel gritty, aged, and unsettling rather than overly polished.
- Save your darkest darks for the main focal points so the viewer’s eye is drawn exactly where you want it.
Practice Drills
These quick exercises will help you improve pencil control, build smoother shading, and train your eye to see tone more accurately before tackling full horror illustrations.
Most of these drills only take 10-15 minutes, making them perfect warm-ups before working on larger or more detailed drawings.
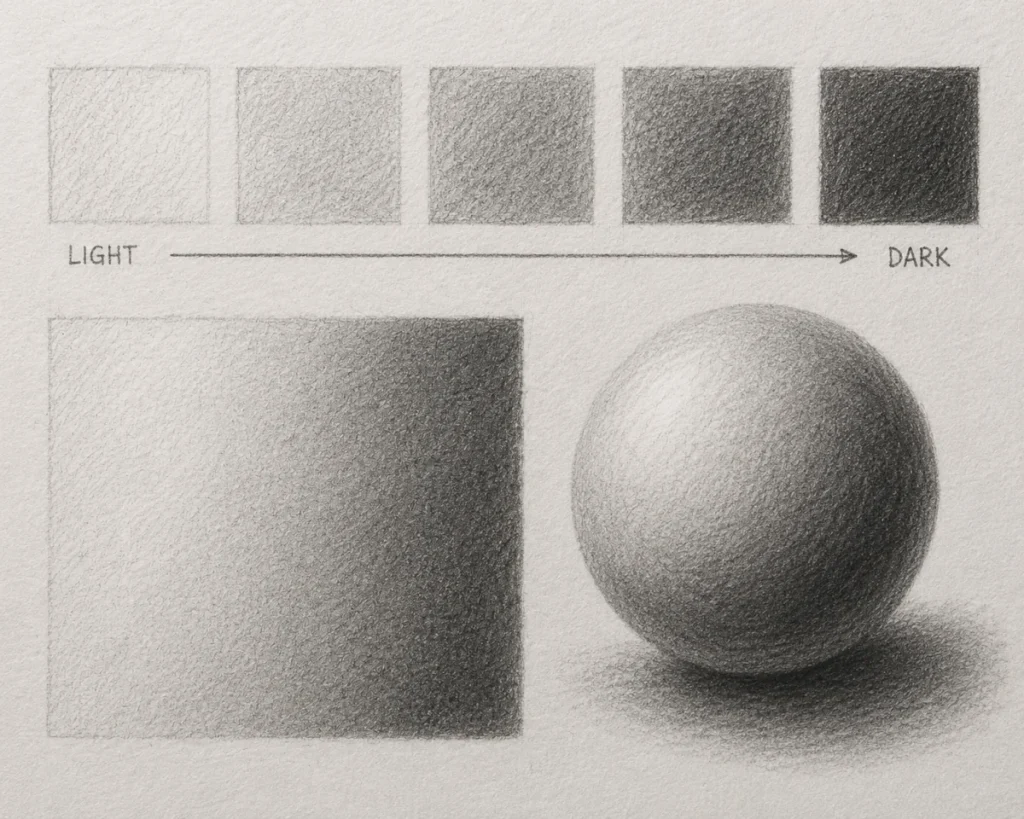
1. Gradient Bars – Smooth Transitions
Draw a long rectangle and divide it into 4-5 smaller sections.
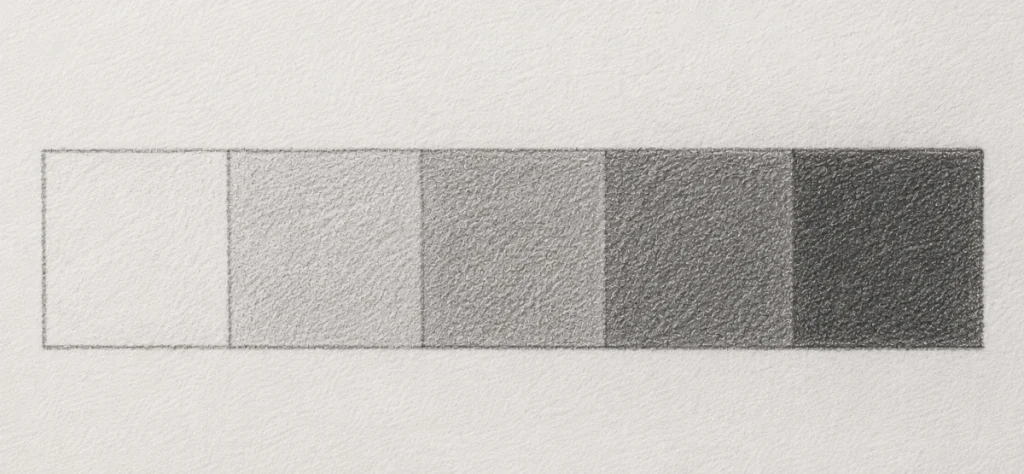
Start shading from one end using light pressure, then gradually build darker tones as you move across the bar.
Goal:
Create a smooth transition from light to dark without obvious lines, streaks, or sudden jumps in tone. Try this exercise with different pencils – HB, 2B, 4B, and 6B – so you can understand how each grade behaves.
Tip: If your shading looks patchy, lightly overlap your pencil strokes using small circular motions or soft diagonal layers before gently blending.
Bonus challenge:
Try creating an even gradient without blending tools using only pencil control and pressure changes.
2. Shading Simple Shapes – The Classic Drill
Draw a few basic shapes – a sphere, a cube, and a cylinder.
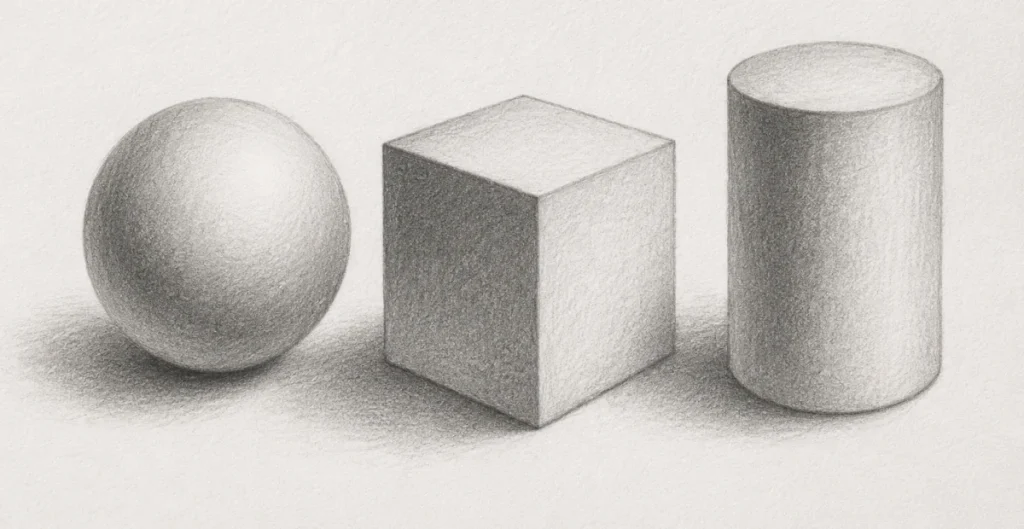
Choose a single light source (top left works well for beginners) and shade each shape based on where the light is hitting it.
- Sphere: Focus on smooth transitions and gradual shading.
- Cube: Keep each plane clear and the edges well defined.
- Cylinder: Use curved shading strokes to emphasise its round form.
Goal:
Train your eye to see form, depth, and light direction instead of relying only on outlines.
If it helps, lightly sketch small arrows to show where the light is coming from before you start shading. It makes placing shadows much easier.
Quick reminder:
If your sphere looks slightly wonky at first, that’s completely normal. Shading simple forms is how artists build the foundation for more realistic drawings later on.
3. Texture Tests – Creepy Surface Studies
This is where your shading practice starts becoming more atmospheric and horror-focused.
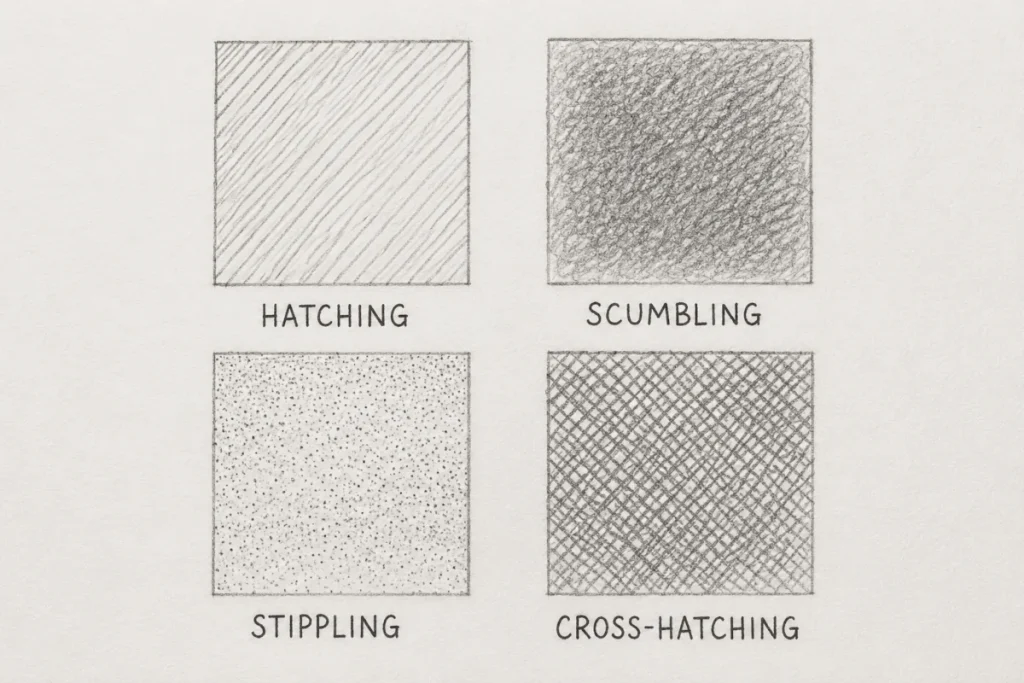
Pick a few small squares or circles and practise different shading techniques inside each one:
- Hatching: fine lines for stretched or aged skin
- Stippling: pitted, mouldy, or porous surfaces
- Scumbling: rough decay, grime, or dirt
- Cross-hatching: cloth folds, wrinkles, cracked bone, or deep texture
Keep each texture patch roughly the size of a coin and label them clearly.
Over time, you’ll build a useful library of creepy textures you can reuse for zombies, skulls, monsters, torn fabric, or anything unsettlingly organic.
Think of it as building your own little graveyard of textures.
4. Mini Horror Challenge – Candlelit Object
Now for something more atmospheric – choose a small horror-themed object, such as an eyeball, skull fragment, candle, key, or cracked mask, and imagine it being lit by a single candle from one side.
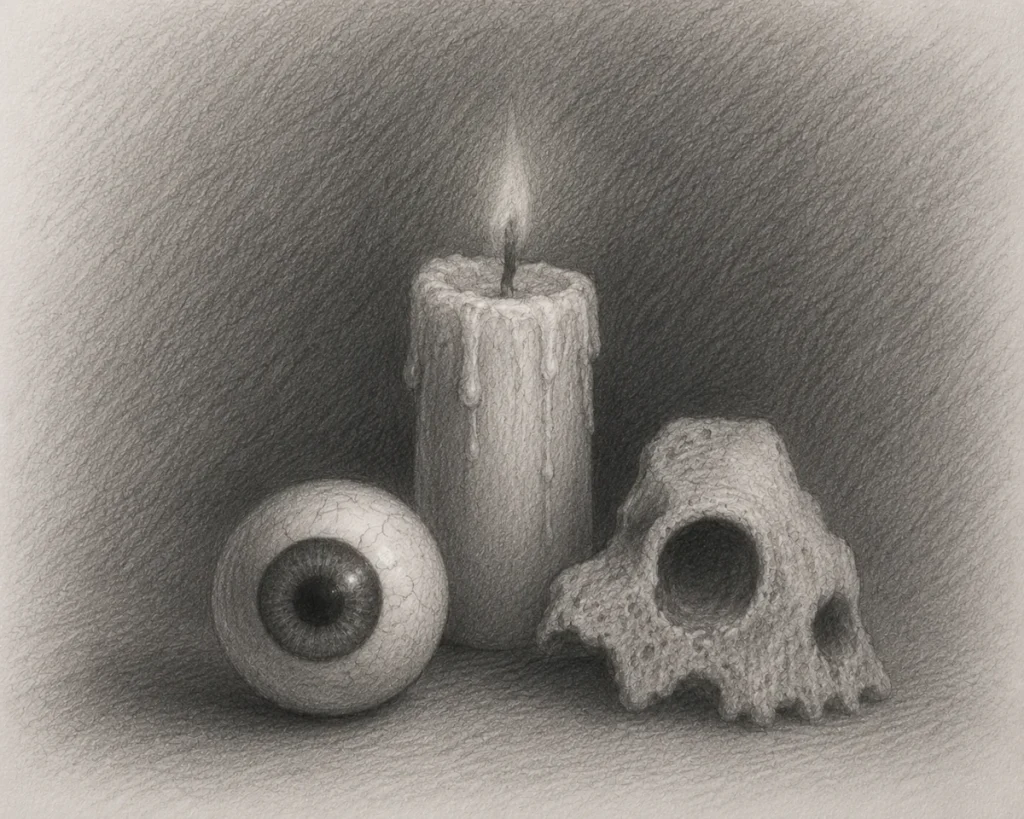
Sketch the object lightly to begin with. Keep your lines soft and loose at first – you can strengthen the details later once the shadows are in place.
Use any combination of the shading techniques you’ve practised to build strong contrast between light and shadow. Push your darkest tones close to your brightest highlights to create a dramatic focal point.
Leave a thin strip of midtone between the lightest and darkest areas so the transitions still feel smooth and natural.
Goal:
Practise using contrast and lighting to create atmosphere and visual storytelling. The stronger the contrast, the more dramatic and eerie the drawing will feel.
Pro Tip:
Don’t worry too much about perfect lines or flawless blending. In horror art, a little roughness often adds atmosphere, texture, and character.
How to Use These Drills
- Do one or two drills before each drawing session to warm up your hand and eye.
- Rotate between them – one day focus on gradients, another day on texture or contrast.
- Keep your exercises together in a sketchbook so you can clearly track your improvement over time.
- Revisit older drills occasionally and redraw them using better pencil control or stronger lighting.
Every horror artist starts somewhere – usually with messy spheres, uneven shadows, and far too much graphite on their hands.
Final Thoughts
Shading is one of the most important skills an artist can learn because it brings form, depth, atmosphere, and emotion into your drawings. Once you begin understanding light and shadow, you’ll start noticing them everywhere.
Whether you’re drawing a ghostly portrait, a cursed object, or a full zombie apocalypse scene, the more you practise tone, texture, and contrast, the more believable and atmospheric your artwork will become.
Don’t be afraid to experiment with different techniques, lighting styles, and textures. Some of the most interesting horror art comes from imperfect marks, rough shadows, and unexpected details.
Keep practising, keep experimenting, and, most importantly, enjoy creating creepy art that feels alive.
What You Learned:
- Different shading techniques create completely different moods and textures, which is why horror artists rarely rely on just one method.
- Hatching and cross-hatching help build structure and depth, making forms feel more solid, rough, and dramatic.
- Stippling creates organic, uneven textures that work especially well for decay, pores, mould, dust, and unsettling surfaces.
- Scumbling adds softness and unpredictability, helping shadows feel dirty, foggy, bruised, or naturally worn.
- Blending smooths transitions between tones, making shadows feel softer, more realistic, and more atmospheric.
- Strong contrast between light and dark instantly makes drawings feel more dramatic and eerie, especially when using a single light source.
- Texture is just as important as shading in horror art because rough, imperfect surfaces help create realism and atmosphere.
- Combining multiple shading techniques creates richer, more believable drawings than relying on smooth shading alone.
- Studying basic forms like spheres and cylinders helps you understand how light behaves, making complex horror subjects much easier to shade later.
- Slightly rough or imperfect shading can actually improve horror artwork, adding grit, age, decay, and unsettling realism.
Related Posts
Want to improve your shading, lighting, and creepy drawing skills even further? These guides will help you build smoother shading, stronger contrast, and more atmospheric horror artwork:
- Basic Shading Techniques for Beginners Overview
Learn the core shading fundamentals every beginner artist should understand before moving into more advanced horror artwork. - Shading and Lighting Techniques for Horror Art (Complete Guide)
Explore how lighting direction, shadows, and contrast can completely change the mood of your creepy drawings. - Mastering Pencil Pressure and Grades for Creepy Drawings
Understand how different pencil grades and pressure control affect texture, depth, and dramatic shading. - Layering Pencil Shading for Smooth Gradients (And Creepy Realism)
Discover how layering graphite gradually can create smoother gradients, deeper shadows, and more polished horror drawings.