Shading Practice Exercises for Improving Your Drawing
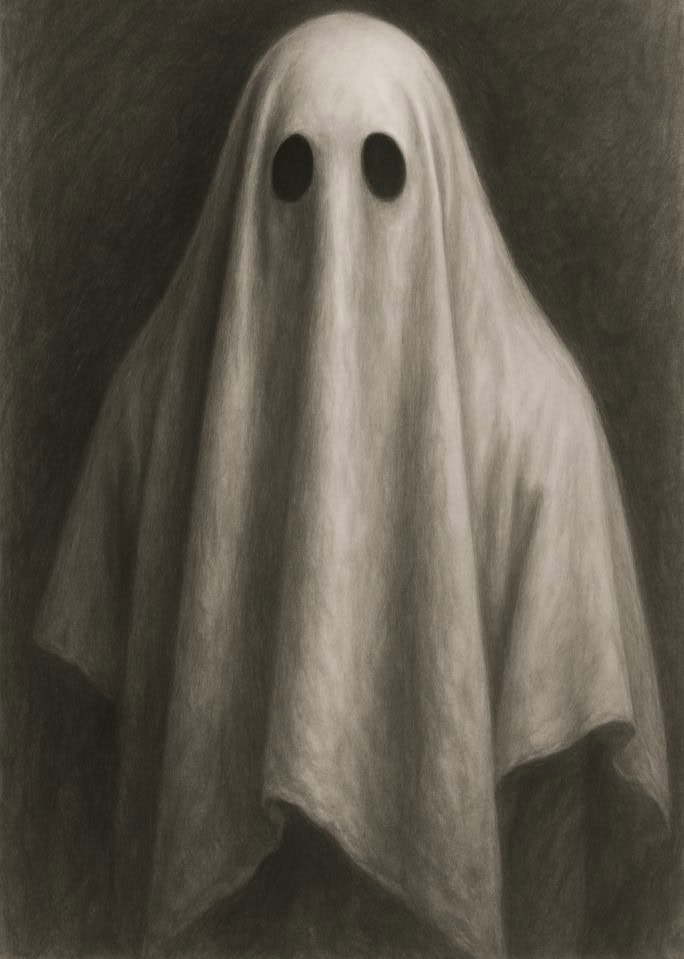
Shading is the magic ingredient that takes a flat, lifeless sketch and turns it into something with depth, drama, and delicious creepiness. Without shading, your terrifying monster just looks like a doodle with anger issues. With shading? Suddenly, it’s lurking in the corner, breathing heavily, and making you wonder if you locked the door.
Whether you’re brand-new to drawing or you’ve been sketching shadows for years, practising shading is essential. These exercises are designed to train your hand, sharpen your eye, and give you the confidence to control light and darkness like a true horror artist.
1. Value Scales & Smooth Gradients
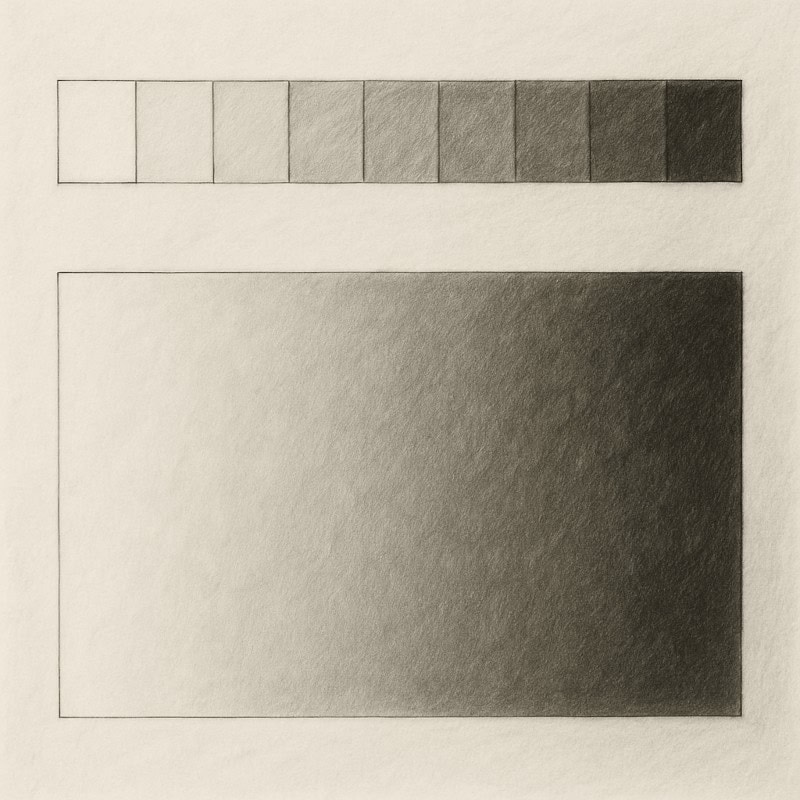
Why this matters: Value scales are the backbone of shading. If you can smoothly transition from light to dark, you’ll have control over every shadow in your artwork. Think of it as the difference between “ghost hiding in the mist” and “oops, smudged pencil blob.”
Exercise:
- Draw a row of 9 small boxes. Shade them from pure white (leave blank) to solid black, with each box a step darker than the last.
- Next, draw a long rectangle and create a gradient strip that shifts seamlessly from white to black.
- Focus on keeping the transitions smooth – no harsh lines between values.
This is one of the best practice shading exercises for beginners because it teaches control.
2. Shading Basic Forms (Sphere, Cube, Cone, Cylinder)
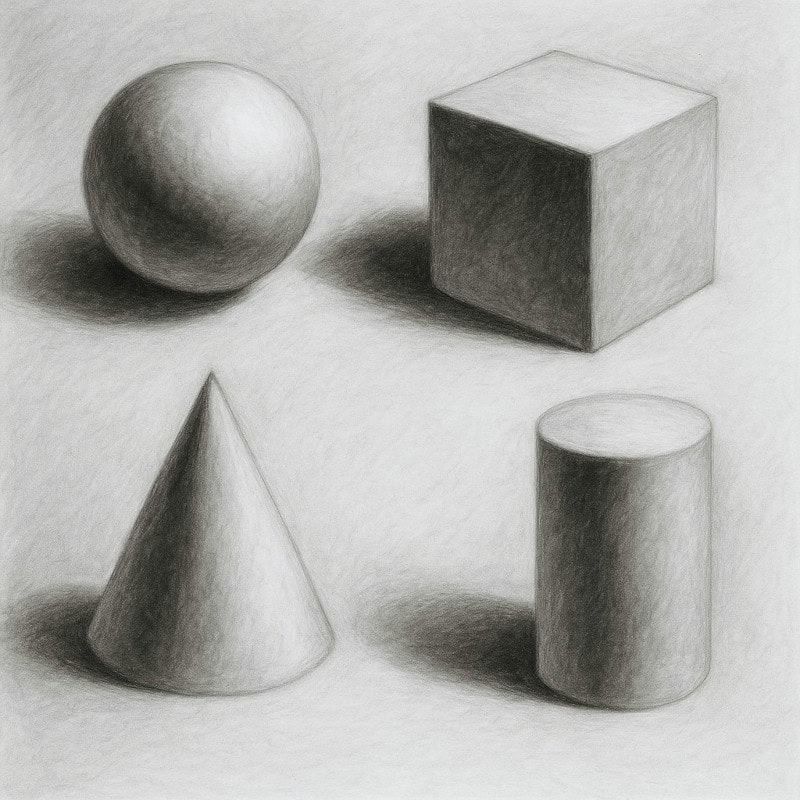
Why this matters: Every monster, creepy prop, or haunted corridor is made up of simple shapes. Learn to shade these, and you can shade anything from a zombie’s cheekbones to the flickering glow of a coffin candle.
Exercise:
- Sketch a sphere, cube, cone, and cylinder.
- Choose a light source (like a lamp) and shade each form to show highlights, mid-tones, core shadows, and cast shadows.
- Move the lamp around and repeat – see how the shadow changes when light comes from above, below, or the side.
3. Cross-Hatching, Stippling & Other Techniques
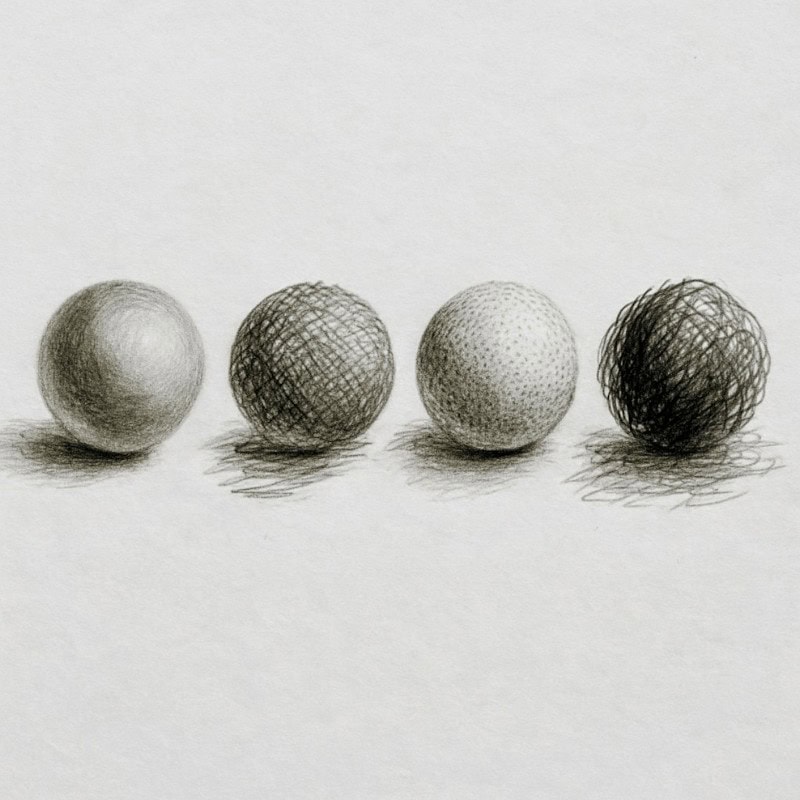
Why this matters: Blending is great, but sometimes you need texture. Cross-hatching adds texture, stippling conveys a sense of decay, and scribble shading creates chaotic energy. Each technique produces a distinct mood. Cross-hatching works well for depicting ragged clothes or splintered wood, while stippling effectively captures the appearance of diseased, rotting skin. Scribbles, on the other hand, evoke pure chaos – ideal for illustrating tangled hair, twisted shadows, or when your creature is having a particularly bad day.
Exercise:
- Shade one sphere with smooth blending.
- Shade another with cross-hatching (lines layered in different directions).
- Shade another with stippling (dots).
- Shade one last sphere with scribbles or chaotic marks.
4. Shadow Mapping Practice
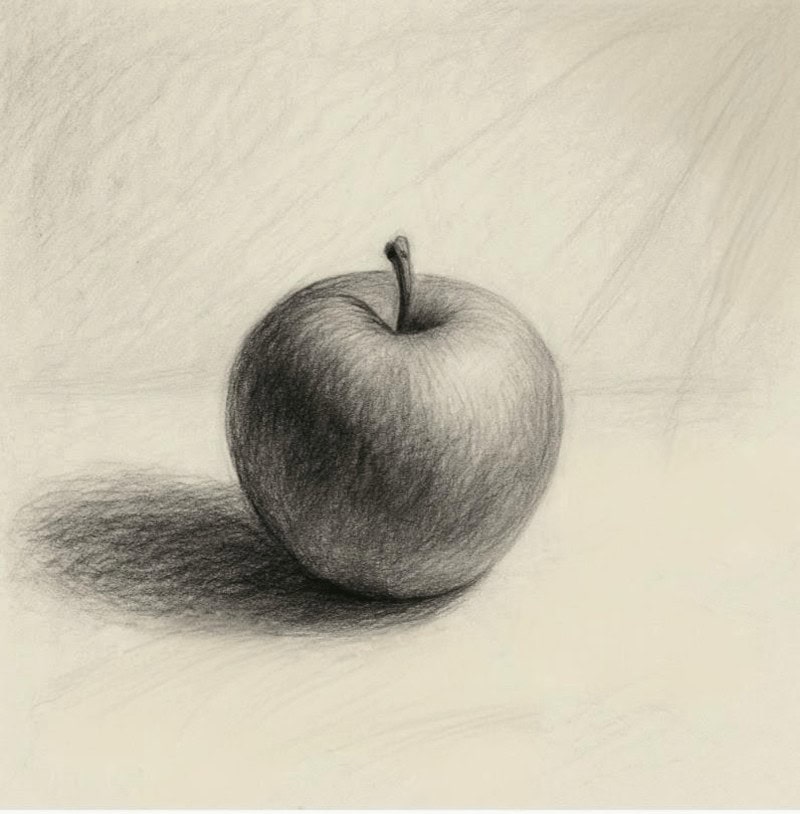
Why this matters: Horror is all about shadows, and the best way to learn them is from life. Watching how real shadows stretch, fade, and warp will make your drawings instantly more convincing.
Exercise:
- Place a simple object under a single lamp. Try a mug, an apple, or (if you’re brave) a porcelain doll.
- Sketch the object and its cast shadow.
- Move the lamp to different angles and notice how the shadow grows longer, shorter, sharper, or blurrier.
5. Timed Shading Sketches
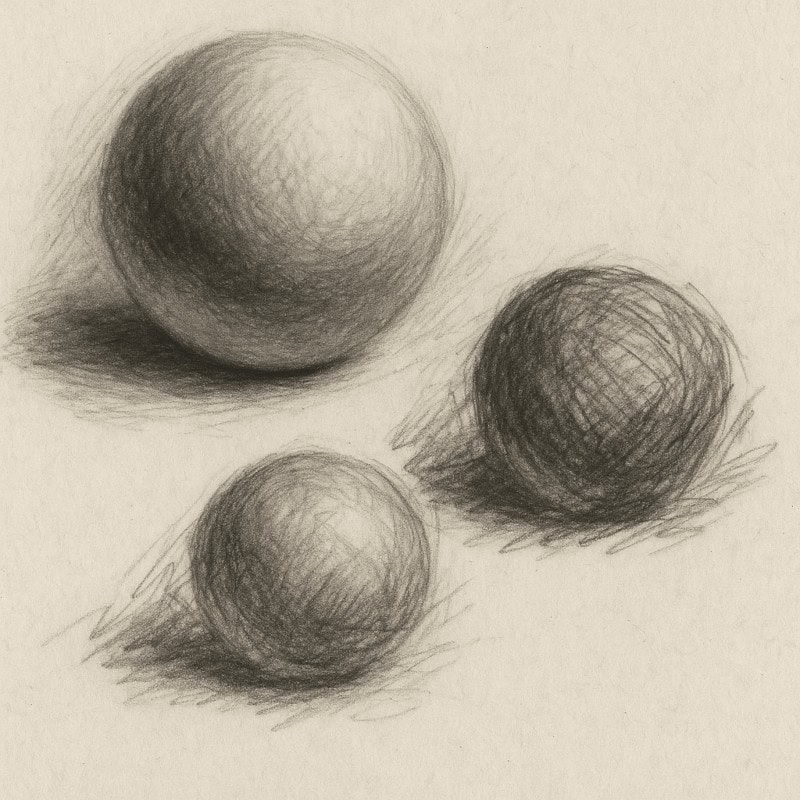
Why this matters: Shading can be time-consuming, and sometimes perfectionism kills progress. Timed sketches loosen you up and train your instincts. These quick drills help you build speed and stop you from fussing over every line.
Exercise:
- Set a timer for 5 minutes. Draw and shade a simple sphere.
- Repeat in 2 minutes. Then 1 minute.
- Don’t worry about “perfect” – aim for bold shapes and quick value placement.
Think of it as speed-dating with shadows: it’s fast, it’s messy, and sometimes you’ll regret what you end up with – but you’ll definitely learn something.
6. Horror Challenge
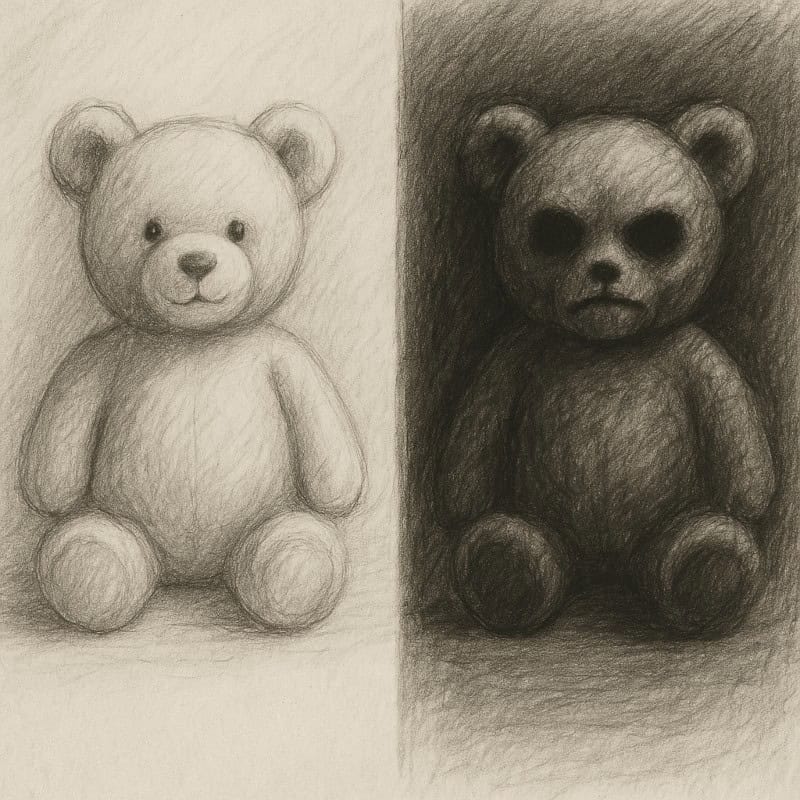
Why it matters: Shading isn’t just about accuracy – it’s storytelling. With the right shadows, you can transform everyday objects into nightmare fuel.
Exercise:
- Pick a harmless object – an apple, a teddy bear, a balloon.
- First, shade it normally.
- Then, redraw it with dramatic shadows.
- Apple – add bruising shadows until it looks cursed.
- Teddy – darken the eye sockets so it looks possessed.
- Balloon – shade it so it looks like it belongs in a sewer with Pennywise.
Struggling with uneven shading or muddy shadows? Check out Common Shading Mistakes in Drawing and How to Fix Them to troubleshoot common problems.
Final Words
Shading is a skill built through repetition, patience, and a touch of sinister imagination. These exercises aren’t about perfection – they’re about building control so your pencil does what you want when you need it most.
The more you practice, the more you’ll find your horror art gaining atmosphere, tension, and that delicious “oh no, something’s behind me” vibe.
Tip: Keep a dedicated sketchbook for shading drills. Looking back at your progress will feel like watching your very own monster evolution chart.
So, grab your pencils and dim the lights – because in horror art, shading isn’t just practice, it’s survival. Now go forth and shade like your pencil depends on it … because it kind of does.