Texture and Depth in Shading Techniques for Drawing
Shading isn’t just about darkness – it’s what breathes life (or eerie realism) into your art. Texture and depth help your drawings feel tangible, whether it’s the roughness of tree bark, the softness of fur, or the cracked surface of old bones. In this guide, we’ll explore techniques to make your shading more dynamic and immersive.
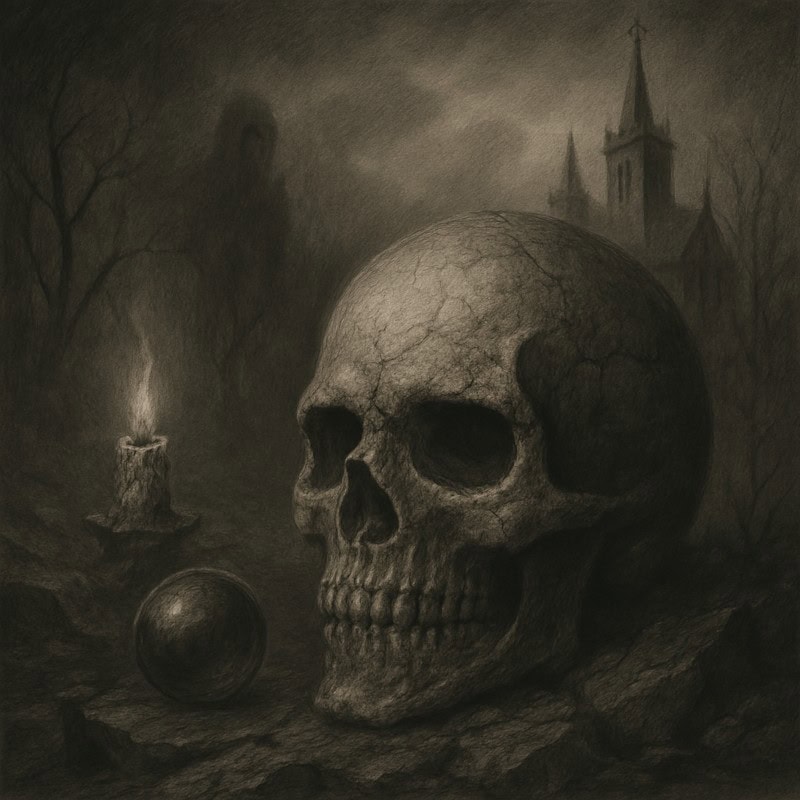
Think of shading as makeup for your drawings, except instead of contouring cheekbones, you’re enhancing the dramatic flair of creepy skeletons and suspiciously haunted trees.
In this guide, we’ll explore how shading techniques create texture and depth. Each section also links to deeper tutorials if you want to study the techniques in more detail.
1. Why texture and depth matter in shading
Shading isn’t just about making things look dark; it’s what brings your drawings to life. Texture lends your art a gritty realism and eerie charm, while depth draws your viewers into the scene, guiding their eyes from the foreground to the background. When used right, these tools can shape the entire mood of your piece, whether you’re going for something soft and ghostly or bold and dramatic.
- Texture creates realism and makes objects feel distinct.
- Depth helps separate foreground, midground, and background elements.
- Using shading techniques effectively can enhance mood, whether subtle or dramatic.
If you want to explore this further, I go deeper into how shading techniques affect mood and atmosphere in the Why Texture and Depth Matter in Shading post.
2. Understanding surface textures

Different surfaces require different shading techniques to make them feel believable. Whether you’re drawing the slick sheen of metal, the rugged bark of a tree, or the soft haze of fog, how you apply texture will shape the entire mood of your artwork. In this section, we’ll break down how to approach smooth, rough, and soft textures so your drawings look and feel more real.
Here’s how to approach them:
- Smooth Surfaces (Skin, Glass, Metal)
Use soft blending and light, gradual pressure with graphite pencils (H to 2B) to avoid harsh edges and create sleek finishes.
- Rough Surfaces (Stone, Bark, Fabric)
Try cross-hatching, stippling, and directional strokes to build up a gritty texture. Uneven shading helps achieve a more natural, organic look.
- Soft Surfaces (Moss, Smoke, Fog)
Layer short, fine strokes to mimic soft, drifting effects like mist or moss. Blending with light stippling and gentle pressure builds up subtle transitions in tone.
If you want to explore this in more detail, you can read Understanding Surface Textures in Shading next.
3. Creating depth with shading
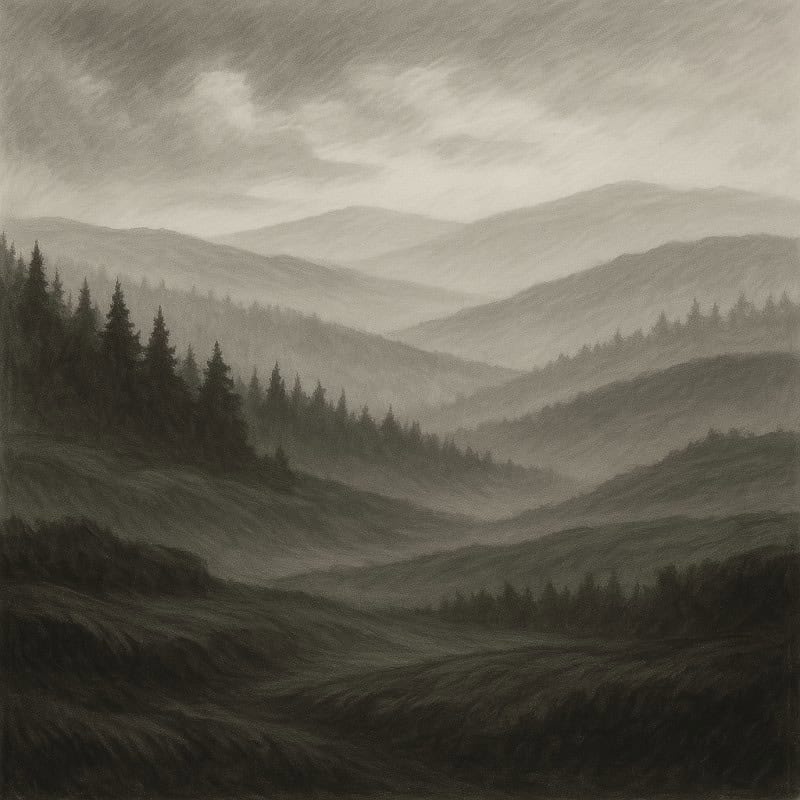
Depth is what turns a flat sketch into a scene that pulls you in, like a foggy graveyard that seems to stretch forever. By playing with contrast, layering, and perspective, you can guide the viewer’s eye and make your drawings feel dimensional and immersive. In horror art, especially, these techniques can add drama, tension, or that quiet, unsettling vibe lurking in the background.
- Contrast is Key – Stronger shadows and highlights create a sense of depth.
- Layering Technique – Start with light shading and gradually build up darker values.
- Atmospheric Perspective – Objects further in the background should have softer edges and lighter shading, while foreground elements have sharper contrast.
These techniques might not raise the dead, but they’ll definitely bring your drawings to life.
If you’d like a deeper look at these ideas, the Creating Depth With Shading guide explores how contrast, layering, and atmosphere work together to create depth in your drawings.
4. Techniques to add texture and depth
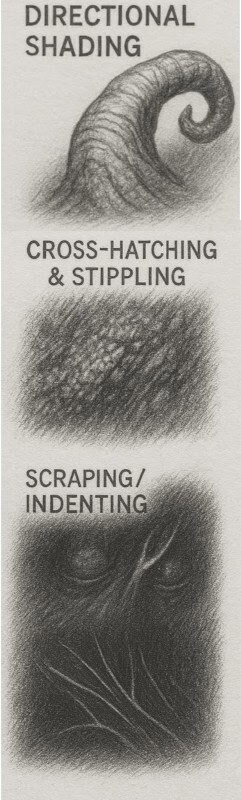
When it comes to bringing eerie surfaces and gritty details to life, it’s all about technique. The right stroke can make skin look stretched, stone feel ancient, or mist seem to drift off the page. This section explores essential shading methods like directional strokes, cross-hatching, blending, and more – each one a tool for conjuring up creepy textures and adding spine-chilling depth to your drawings.
- Directional Shading: For realistic texture, follow the object’s natural form (e.g., circular strokes for round objects and straight strokes for rigid ones).
- Cross-Hatching & Stippling: Great for rough or porous texture.
- Blending & Erasing: Smooth out tones or lift highlights for added realism.
- Scraping & Indenting: Use a kneaded eraser or scratching tool (like a sewing needle) to create crisp highlights for scratches, veins, or wrinkles. Scratching is best done before shading, while erasing works well after layering graphite.
For a broader look at how shading builds texture, depth, and atmosphere, you can explore my Techniques to Add Texture and Depth guide.
5. Practice exercises
The best way to improve your shading skills is by getting your hands dirty – graphite dirty, of course. These exercises will help you apply what you’ve learned about texture and depth in a hands-on way. Whether you’re studying materials or building dramatic lighting, each practice will sharpen your eye and add more life to your art.
- Texture Study – Choose different materials (wood, glass, fabric) and try to replicate their textures with shading.
- Layering Challenge – Start with soft shading and gradually increase contrast to build depth.
- Shading a 3D Scene – Sketch a still life with various objects and apply different shading techniques to each.
Aim for so much realism in your textures that your bark drawing makes nearby furniture nervous…
Next up: common shading mistakes and how to fix them
Now that you’ve explored texture and depth, let’s fine-tune your shading by avoiding common slip-ups. Up next, we’re diving headfirst into those pesky shading nightmares – muddy shadows, harsh lines, and shading disasters. But don’t worry, you’ll learn how to fix them like a pro!
Continue to Common Shading Mistakes and How to Fix Them