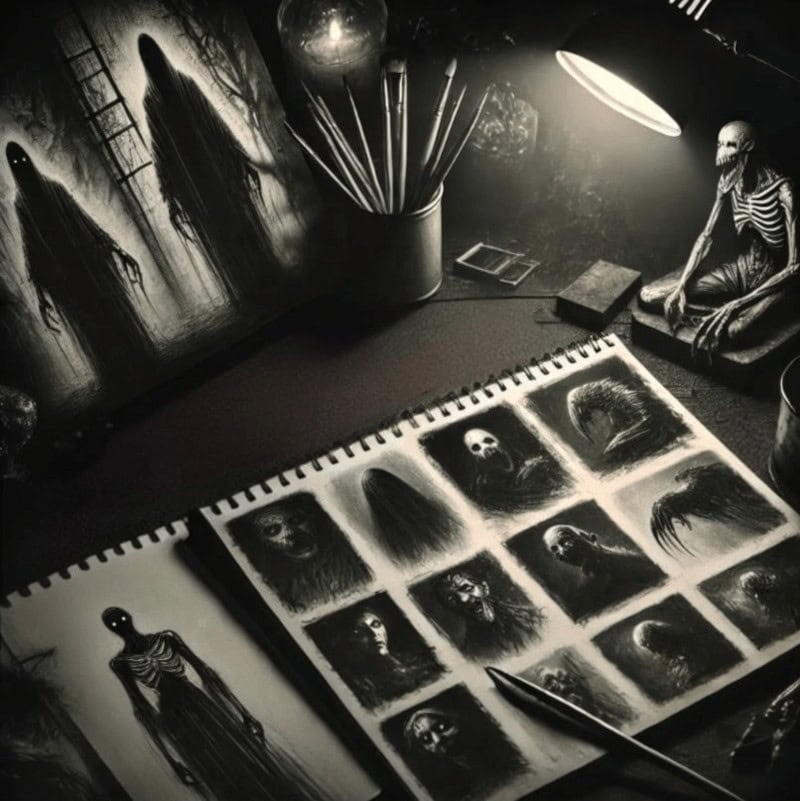
Welcome to the Shading & Lighting Hub – where shadows aren’t just for lurking monsters, but for making your horror art terrifyingly good. Whether you’re a beginner or an advanced artist, mastering shading and lighting techniques is key to creating eerie depth and chilling horror effects.
Explore structured tutorials on shadow techniques, eerie glows, and atmospheric lighting to bring your horror art to life. From subtle fades that whisper “something’s there” to harsh contrasts that slam dread right into the scene, this hub gives you the tools to turn flat sketches into spine-tingling nightmares.
If your shading currently looks like your monster is lit by a broken fridge bulb, don’t worry – you’re in the right place.
Lighting in horror art
Lighting plays a crucial role in horror art, often acting as a silent puppet master. It determines whether your monster appears menacing or as if it’s auditioning for a music video. This section will explore how lighting establishes the tone of your drawings, transforming flat sketches into atmospheric scenes filled with unease.
You’ll see how shadows, highlights, and contrast work together to guide the viewer’s eye and build suspense. If you want to soften harsh shading and create smoother transitions between light and shadow, blending tools can help. I explain exactly how they work in my guide to Blending Tools for Horror Art.
If you’re specifically using graphite or charcoal, you can also follow my step-by-step tutorials on Using Blending Stumps with Graphite and Using Blending Stumps with Charcoal.
1. Introduction to Light and Shadow Effects in Horror Art
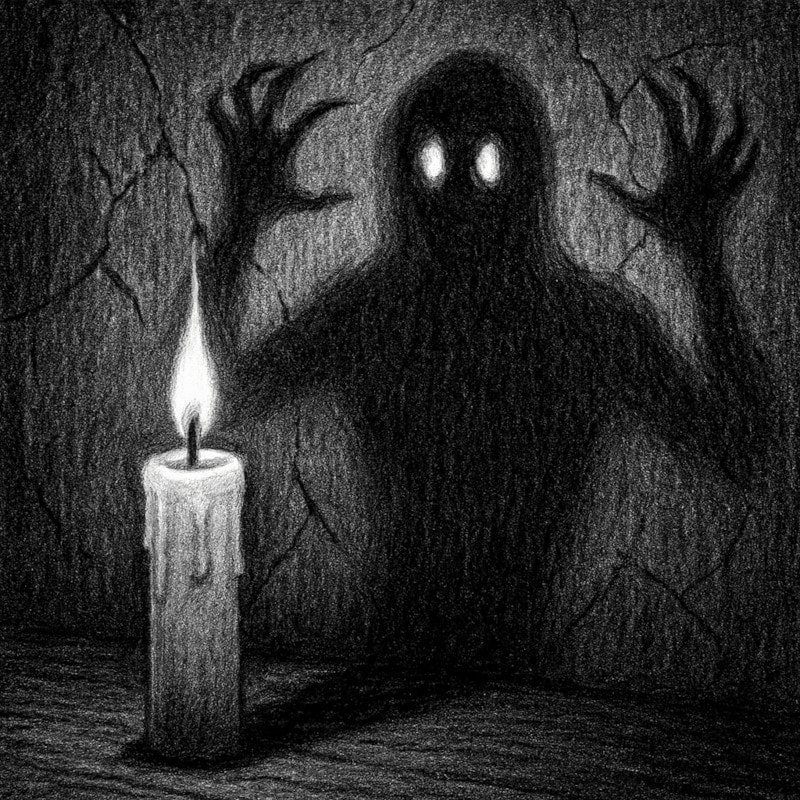
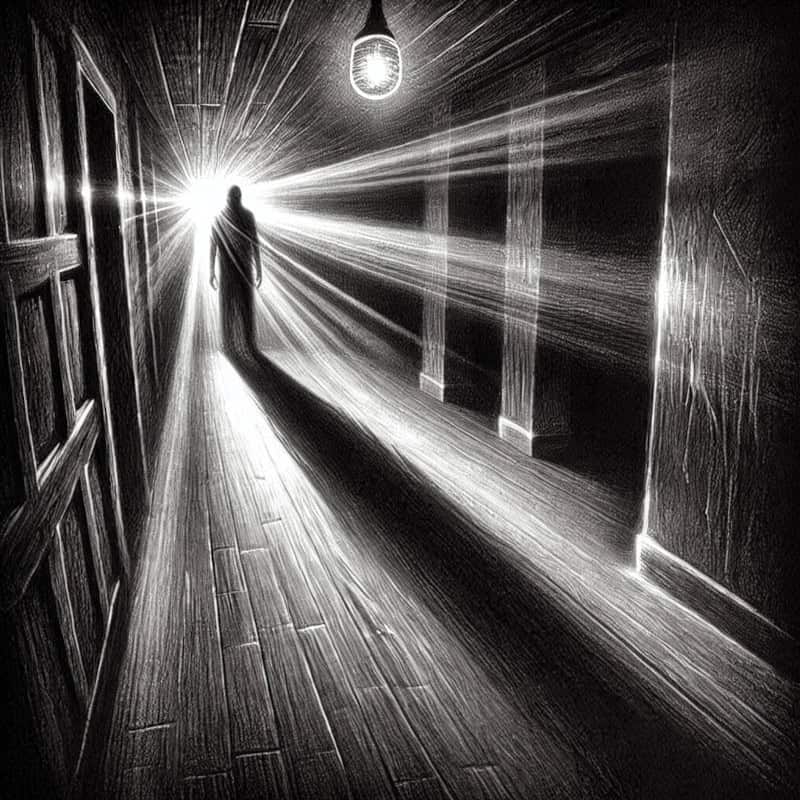
Lighting in horror art isn’t just about visibility – it’s the backbone of suspense. You’ll explore how light and shadow team up to build mood, whether it’s a dim corridor with a single bulb, a candlelit ritual, or a figure lurking half-hidden in the dark. You’ll learn how shadows guide the viewer’s eye, add atmosphere, and turn an ordinary drawing into something unnervingly alive.
We’ll also look at why lighting is considered one of the most powerful storytelling tools in horror art. By understanding how highlights, mid-tones, and dark values interact, you’ll discover how to set the stage for drama and dread. Think of it as the starting point that transforms your flat sketches into eerie, cinematic scenes.
2. How Different Light Sources Affect Horror Art
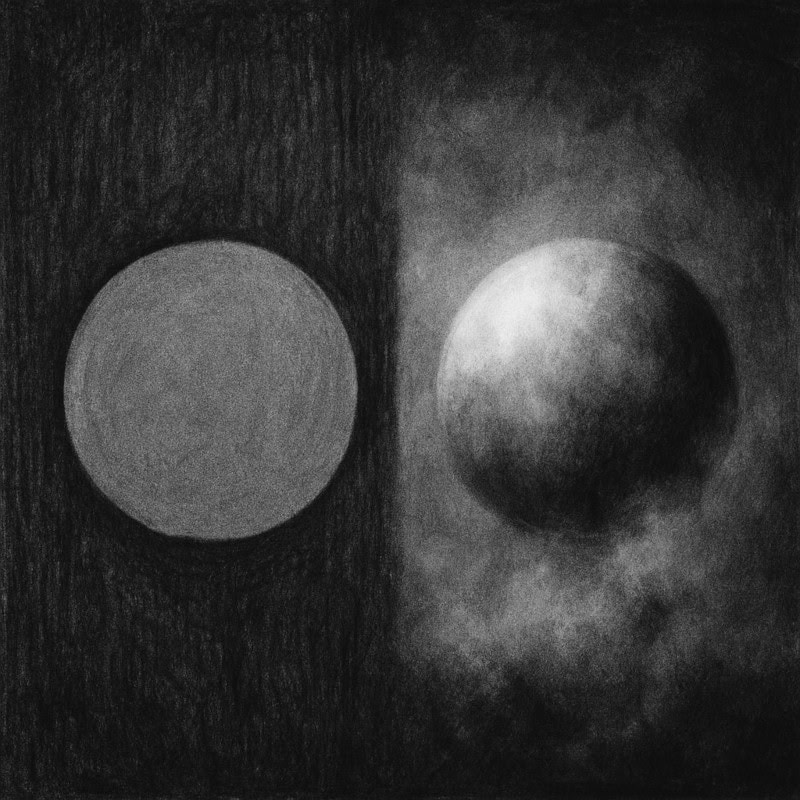
Not all light behaves the same way – a flickering candle sets a nervous tone, neon lights glow unnaturally and coldly, and moonlight casts shadows that seem otherworldly. We’ll break down the quirks of different sources, from direct and diffused to ambient, point, and directional lighting, and show you how each one changes the mood of your art.
You’ll learn how to bend these light sources to your will, dialling up tension, creating surreal dreamscapes, or adding a cinematic edge to your drawings. Whether you’re aiming for gritty realism or a stylised, haunting glow, this section is your survival guide to choosing the right kind of light for your horror scenes.
3. Advanced Lighting Techniques for Horror Artwork

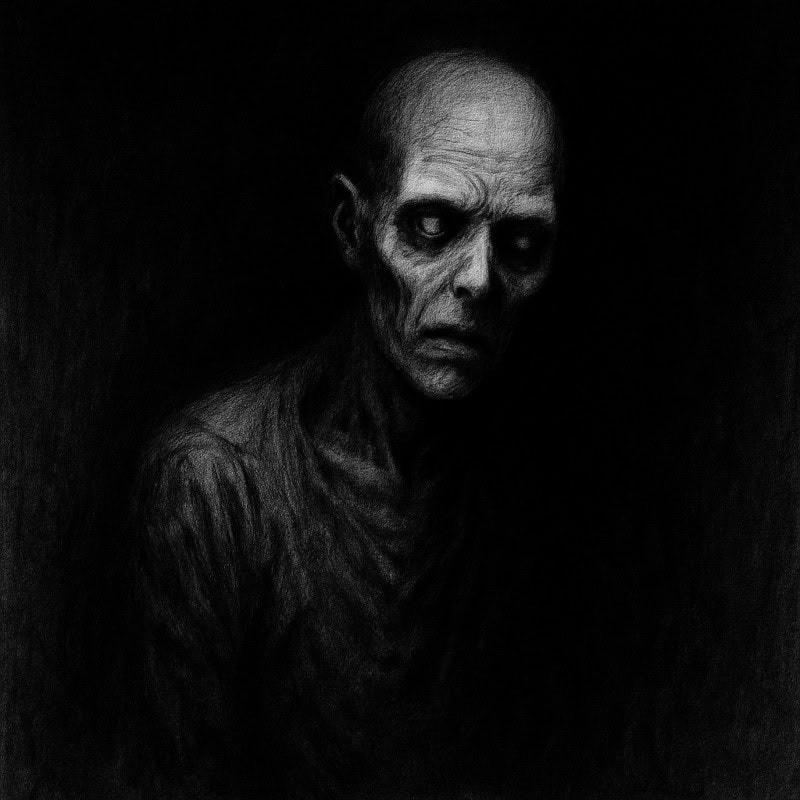
Once you’ve got the basics down, it’s time to push lighting into overdrive. This post dives into advanced methods like chiaroscuro, rim lighting, and using extreme contrast to amplify fear and atmosphere. These techniques can spotlight your subject while tossing the rest of the scene into unsettling darkness – like a monster hogging the flashlight during hide-and-seek.
We’ll also look at how to combine multiple light sources, experiment with unusual angles, and play with glow effects to add otherworldly energy to your drawings. These approaches give you more tools to control mood and storytelling, helping you turn simple scenes into spine-chilling set pieces.
4. Practice Exercises for Horror Lighting
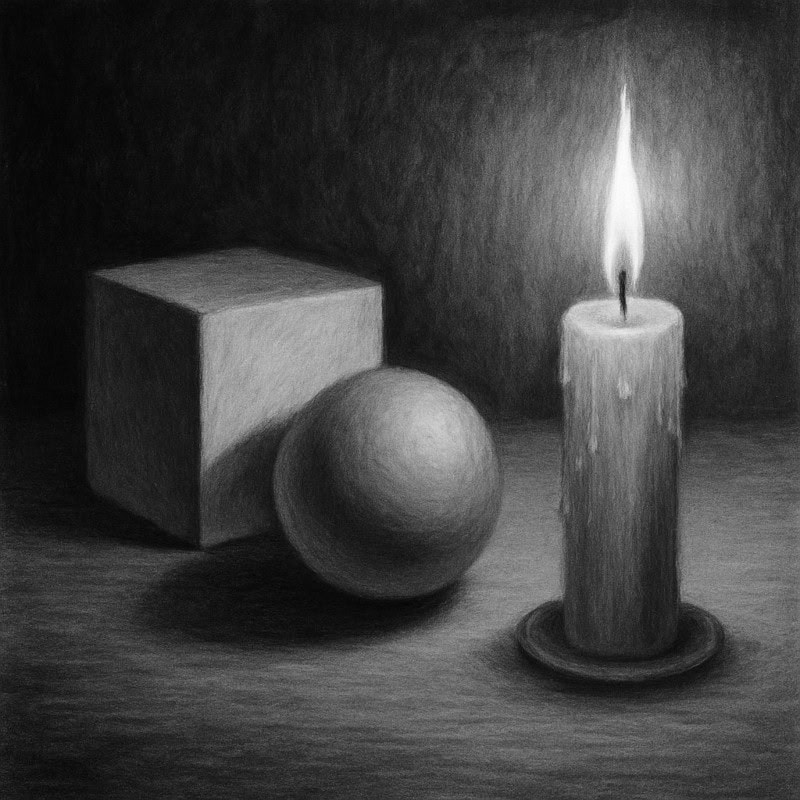
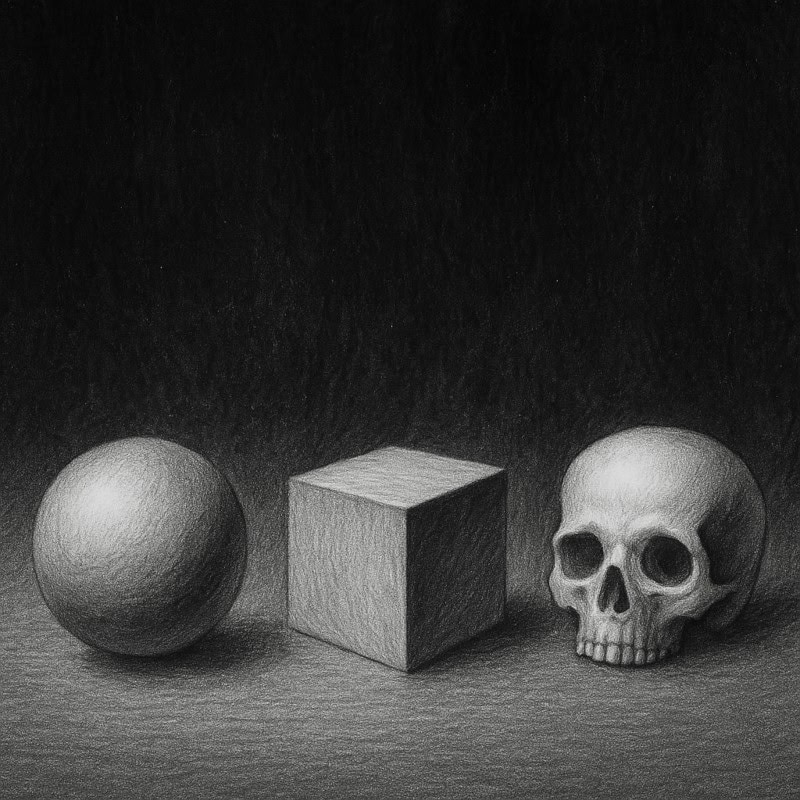
The best way to master lighting is by putting pencil to paper. This post gives you practical exercises to help you train your eye and hand, from sketching value strips to testing out different light sources on simple shapes like spheres and cubes. You’ll build a solid foundation for understanding how light interacts with form, space, and texture.
Once you’re comfortable, you’ll move on to more advanced drills designed to create atmosphere – like layering multiple lights, experimenting with dramatic contrasts, and exploring how shadows shift depending on the direction of your light. These exercises are your lighting bootcamp, helping you turn theory into hauntingly effective practice.
Shading in horror art
Shading is where your drawings stop being flat and start being unnerving. With the right shadows, you can add atmosphere, tension, and an uncanny sense of realism that creeps under the viewer’s skin. This section digs into why shading is so powerful in horror – from creating depth that pulls the audience in, to hiding details that make people imagine something worse.
You’ll see how different techniques can turn an ordinary face into a gaunt, sinister creature, or transform a quiet background into a space that feels threatening. Master shading, and suddenly your sketches won’t just look finished – they’ll look haunted.
1. Basic Shading Techniques for Horror Art
Every eerie masterpiece starts with the basics. Here you’ll uncover the core shading methods – from smooth gradients to hatching and cross-hatching – that turn flat sketches into forms with weight and presence. By learning to control pressure and tone, you’ll be able to shift between soft, subtle shading for quiet tension and harsh, dark shadows for dramatic scares.
It’s all about laying the foundation. Master these simple techniques, and you’ll have the tools to make any drawing – from a creepy figure in the background to a looming monster – feel solid, dimensional, and just unsettling enough to linger in the viewer’s mind.
2. Texture & Depth with Shading
Flat shading can make drawings look dull, but depth brings them to life. This post shows you how to use shading to create form, weight, and atmosphere, turning simple sketches into images that feel three-dimensional and immersive. You’ll explore how light and dark values interact, how to push contrast for a stronger impact, and how soft versus sharp transitions can suggest different surfaces.
By layering tones and paying attention to edges, you’ll learn to make your artwork feel more tangible and believable. From misty fog that fades into the background to harsh shadows that carve out dramatic shapes, these techniques will help you add the kind of depth that makes horror art feel both real and unnerving.
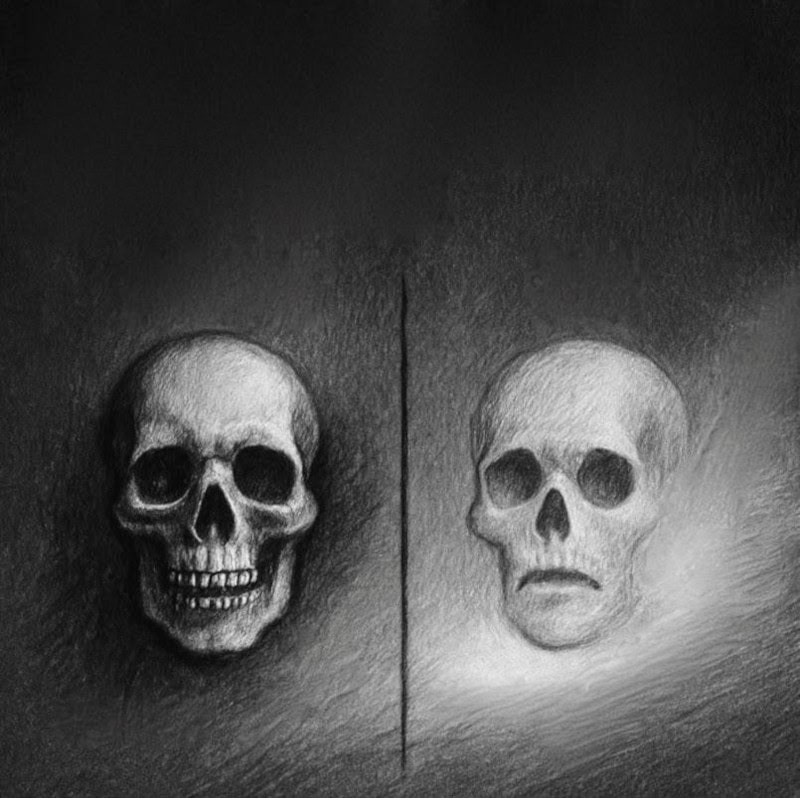
3. Mastering Shadows for Depth and Drama in Horror Drawings

This post explores how shadows go beyond filling empty space – they’re storytellers that build mood, tension, and depth. You’ll learn techniques for layering shadows to create rich contrasts, pushing the drama in your drawings, and using distorted or exaggerated forms to unsettle the viewer. Shadows aren’t just dark patches; they’re what make your work feel alive, eerie, and cinematic.
We’ll also cover how to avoid common mistakes that weaken the impact of your shadows, such as muddy blending or misaligned light sources. By the end, you’ll know how to make your shadows clean, controlled, and loaded with atmosphere – the kind that makes a drawing whisper “something’s in here with you.”
4. Advanced Shading Techniques for Horror Drawings
This post is all about pushing your shading further once you’re comfortable with the basics. You’ll explore methods like layering shadows for richer tones, experimenting with contrast to create striking effects, and using techniques such as negative space to make figures emerge from the dark. The focus here is on building drama and atmosphere through deliberate control of values.
You’ll also see how different approaches – smooth blending, cross-hatching, or textured marks – can shift your artwork’s vibe from “harmless doodle” to “why is this sketch breathing?” By applying these ideas, you’ll learn to add weight, tension, and mood to your drawings, giving your shadows more storytelling power than ever before.
5. Common Shading Mistakes and How to Fix Them
Everyone slips up with shading, but in horror art, the wrong shadow can make a terrifying drawing look flat or awkward. This post highlights the most frequent mistakes, like pressing too hard with your pencil, over-blending until everything looks smudgy, or ignoring the direction of your light source. Each mistake comes with a clear fix so you can get back on track quickly.
By working through these examples, you’ll sharpen your eye for what makes shading convincing and atmospheric. Instead of muddy tones or misplaced shadows, your work will have the kind of depth and clarity that keeps the eerie mood intact.
6. Practice Exercises for Mastering Shading
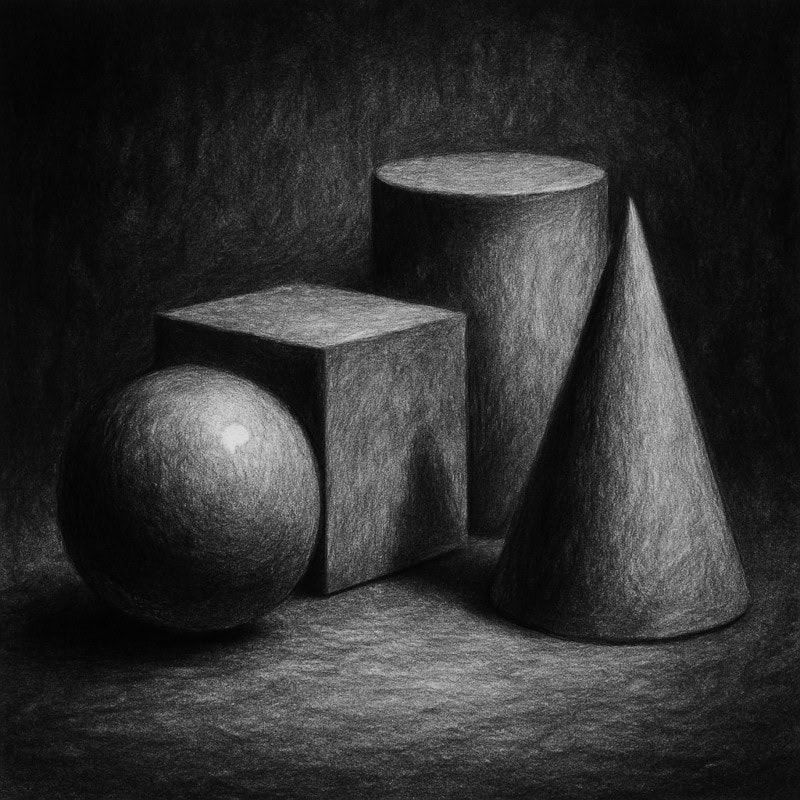
Shading skills don’t come overnight – they’re built through practice. This post gives you step-by-step exercises to strengthen your control, from creating value scales and smooth gradients to shading basic shapes like spheres, cubes, and cones. These drills help you understand how light interacts with form so you can create shadows that feel natural and convincing.
Once you’ve worked through the basics, you’ll also be challenged to experiment with objects and scenes, adding shading that enhances mood and atmosphere. By repeating these exercises regularly, you’ll train your hand and eye to work together, giving your horror art stronger foundations and a much creepier edge.
Mastering shading & lighting in horror art
Understanding shading and lighting is essential for bringing eerie depth and chilling ambience to your horror artwork. A well-placed shadow can turn a mildly creepy monster into something haunting your dreams. By mastering shadow techniques, experimenting with eerie glows, and refining your control over contrast, you can create spine-chilling effects that enhance your horror characters and scenes.
Moreover, practising different lighting styles allows you to evoke emotion and suspense, making your artwork feel truly alive. Whether you’re aiming for soft, eerie illumination or dramatic, high-contrast shadows, each technique contributes to the overall impact of your piece.
So, keep refining your skills, experiment fearlessly, and let your creativity cast shadows that draw viewers into the darkness. If people start looking over their shoulders after seeing your work, you’re doing it right.