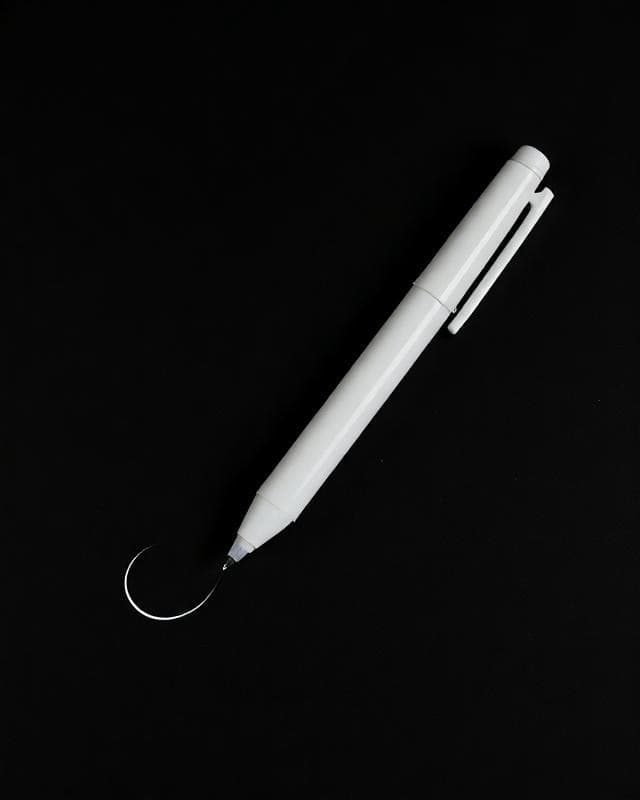
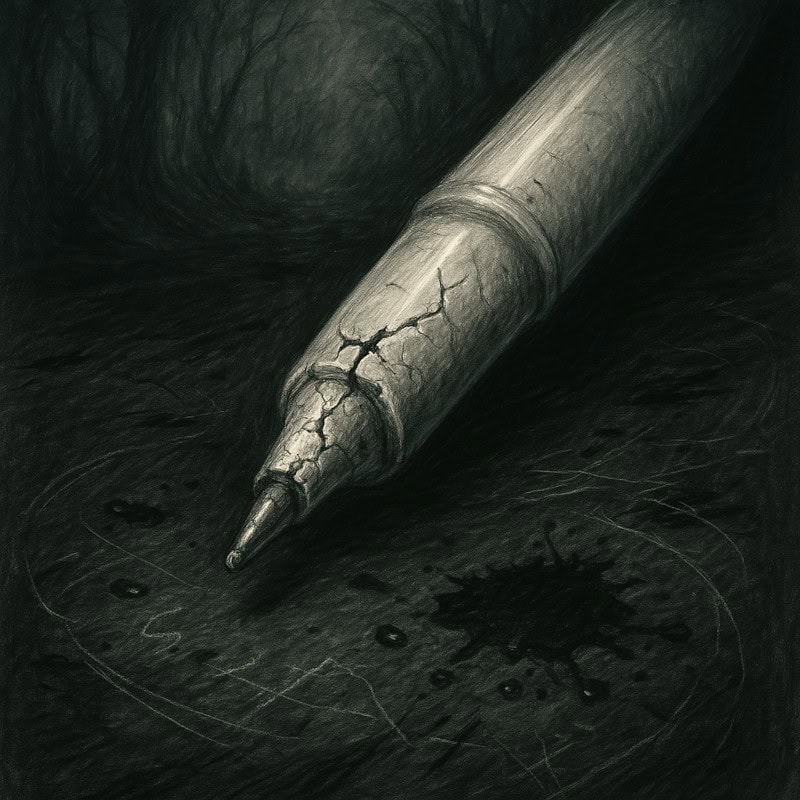
White Gel Pens for Drawing: Highlights and Glow Effects
Small but mighty, white gel pens light up your art faster than a ghost saying “boo” in a blackout.
When it comes to creating horror art, the devil is in the details – those fine highlights, eerie glows, and unsettling contrasts that make your artwork stand out. White gel pens are often overlooked, yet are incredibly versatile tools, perfect for bringing those haunting finishing touches to life.
Let’s dive into what makes these white gel pens a must-have for horror artists and how they can elevate your work to new levels of creepy brilliance.
1. What are white gel pens?
White gel pens are essentially pens filled with opaque white ink that flow smoothly and dry quickly. Unlike traditional white ink in a pot, gel pens don’t require brushes or additional tools, making them perfect for precision work. Their ease of use and ability to layer on top of darker mediums like graphite, ink, or coloured pencil make white gel pens for drawing ideal for horror art.
2. Why white gel pens are a horror artist’s secret weapon
Horror art thrives on contrast, texture, and atmosphere, and white gel pens excel in all these areas.
Here’s how white gel pens for drawing can enhance your work:
Creating High Contrast
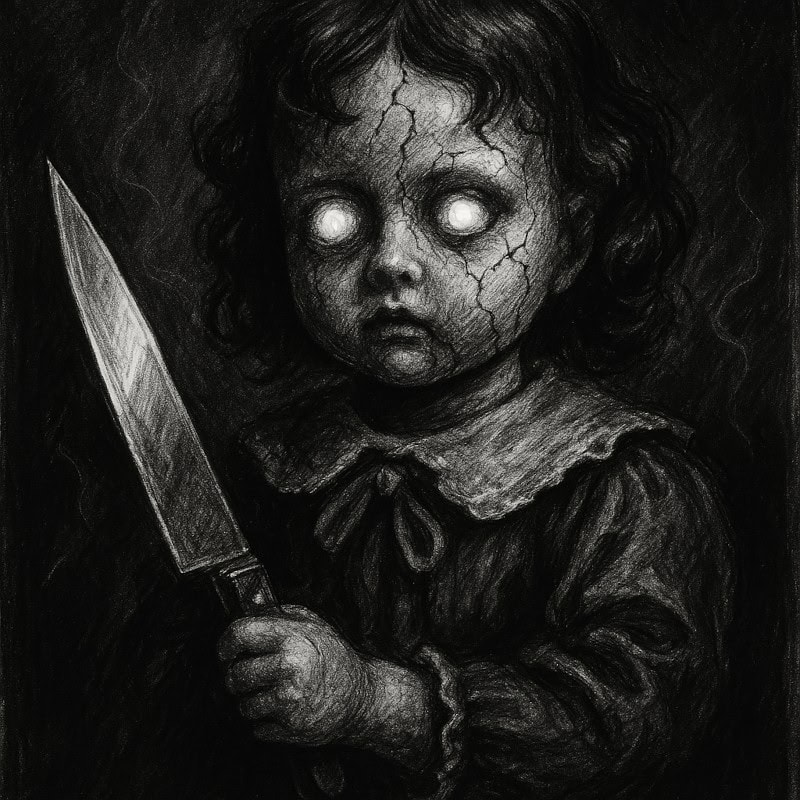
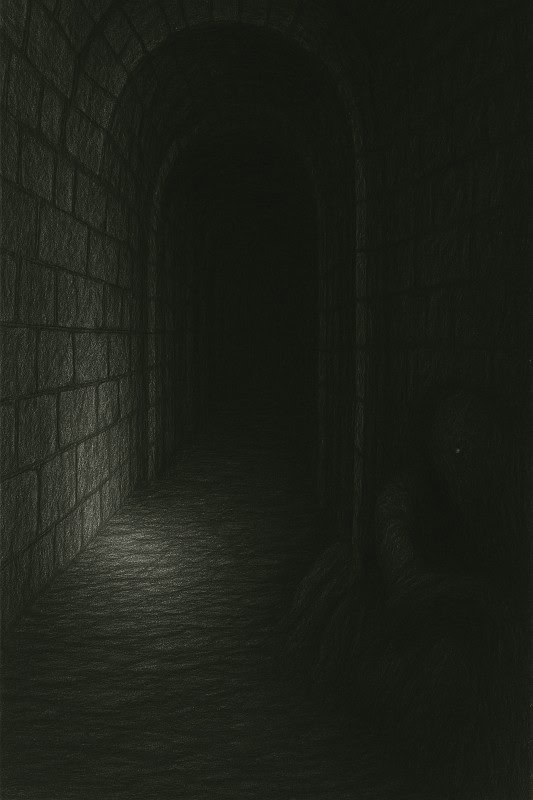
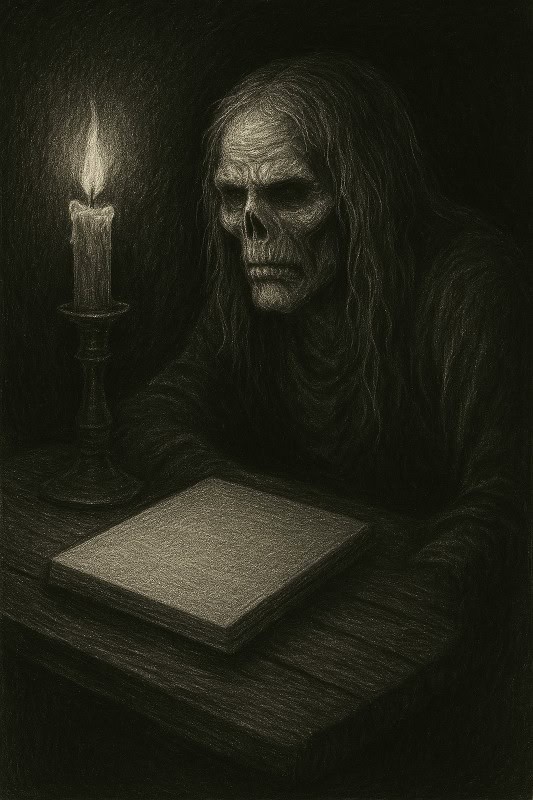
In horror art, contrast is your best friend, and white gel pens are the perfect accomplice. The stark white ink cuts through dark backgrounds like a scream in the night, instantly drawing attention to key details that make a piece pop. Whether it’s the eerie gleam of a bloodied blade, the haunting stare of a ghost’s glowing eyes, or the cracked porcelain skin of a possessed doll, white gel pens make these moments feel vividly unsettling.
High contrast doesn’t just help your details stand out; it sets the mood. The sharp difference between light and shadow creates tension, mystery, and visual drama, all staples of a spine-tingling horror piece. Think of it like this: your graphite or ink sets the stage, but the white gel pen? That’s your spotlight, slicing through the gloom to make the horror hit harder.
Adding Texture
Texture in horror art is like that unsettling crunch in a dark hallway – you might not see it, but you definitely feel it. White gel pens are amazing for carving out creepy textures that bring your work to life.
A white gel pen can be used to:
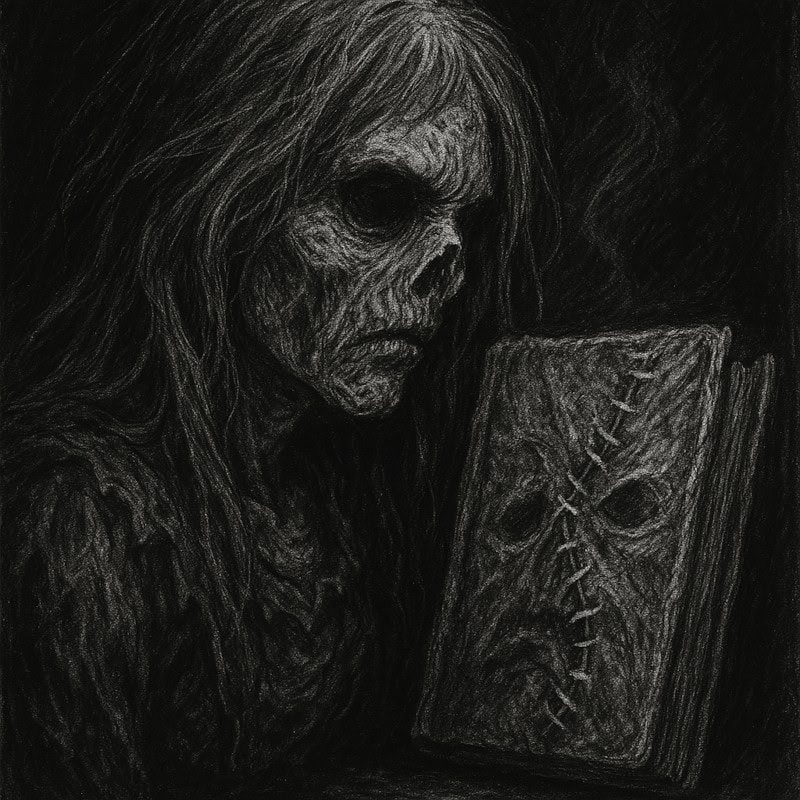
- Add fine strands of hair to a witch or demon.
- Highlight scales, feathers, or other monstrous details with eerie clarity.
- Add ghostly stitching or crusty wrinkles to cursed tomes, stitched flesh, or decomposing corpses.
- Enhance the gritty feel of old, abandoned places, like cracked wallpaper in a haunted house or rot-ridden wood on a crypt door.
These little pens might look innocent, but they’re wickedly good at creating that “ew, I can almost feel that” texture. Basically, they’re the artistic equivalent of stepping on something squishy in the dark – disturbing, but kind of satisfying.
Illuminating Eerie Glows
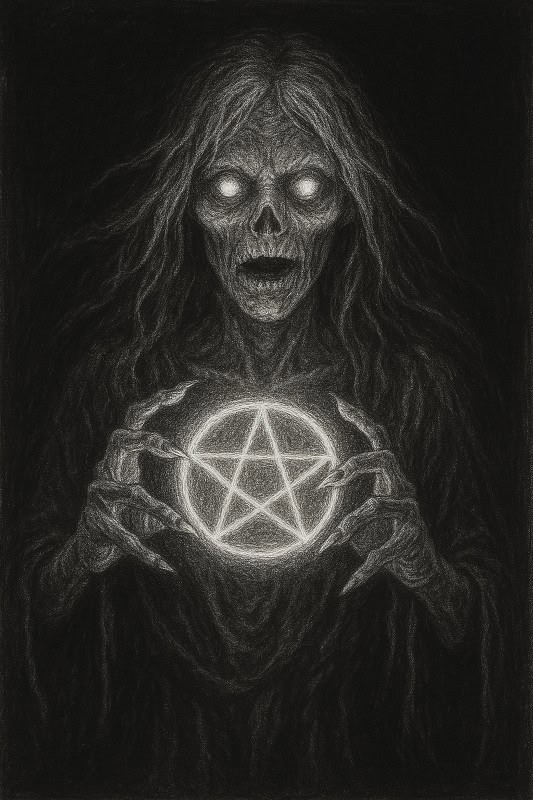
If your artwork includes supernatural elements such as glowing symbols, flickering candles in the dark, or eerie mist, a white gel pen is an excellent tool for achieving an ethereal effect. The pen’s precision lets you control the glow’s intensity, enabling you to layer the ink as needed for a more realistic or exaggerated appearance.
White gel pens are like the flashlight in your horror survival kit – except you’re the one creating the glowing eyes in the dark. You can use them to make magic circles shimmer with cursed energy, haunted lanterns cast ghostly light, or even creepy floating orbs that look like they’re up to no good. Whether you’re going for subtle glows or full-blown spectral radience, these pens bring a supernatural spark that feels like it’s whispering secrets from the void.
Enhancing Shadows
While white gel pens are usually used for bright highlights, they can also do something sneakier, enhancing the look of shadows. It’s not about making them lighter, but about giving them depth and contrast by carefully adding reflective touches in the darkest areas. Think about it like teasing the eye into seeing more than what’s really there.
For example:
- Adding reflective highlights to wet or slimy shadows, like puddles of blood or slime, to suggest light bouncing off the surface.
- Suggesting condensation or a faint glow around the edges of shadowed environments, just enough to unsettle the viewer.
- Enhancing contrast in dim corners, like around a creature’s face or limbs, to make the surrounding darkness feel heavier and more alive.
Sometimes, it’s that barely-there gleam that makes a shadow look like it’s watching you back. White gel pens give just enough shine to make the dark feel deeper… and way less empty.
Perfecting Final Details
Sometimes, it’s the smallest details that make horror art truly terrifying.
White gel pens are excellent for:
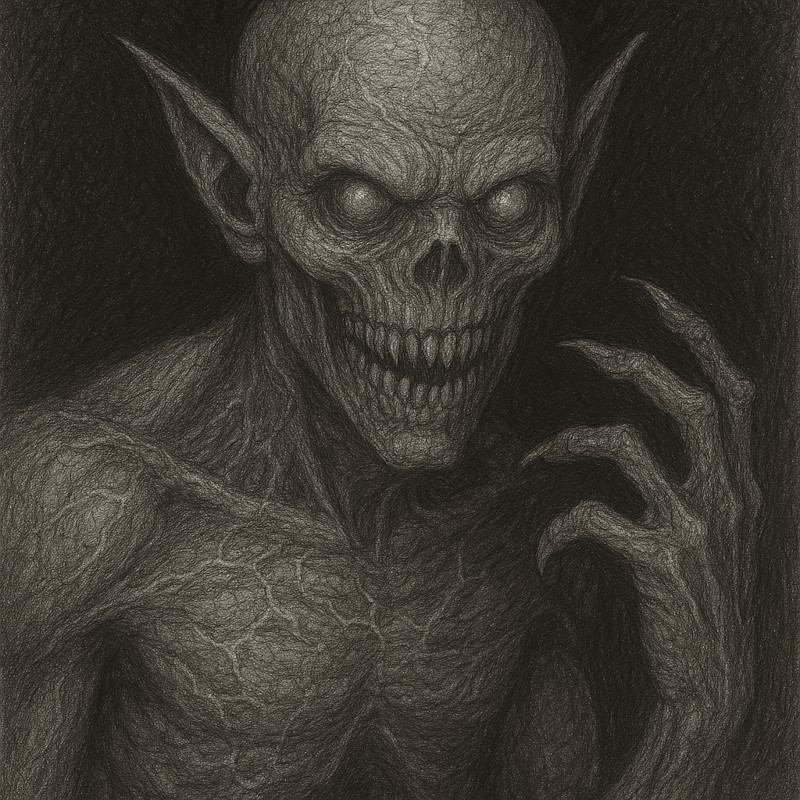
- Adding veins, cracks, or scratches to skin.
- Highlighting sharp teeth or claws.
- Accentuating veins and reflective details in the eyes to give them a lifelike (or uncomfortably lifeless) stare.
But those aren’t just “finishing touches” – they’re the last flicks of the pen that make your creature feel real. These tiny highlights can turn a decent monster into a nightmare that crawls out of the page. A subtle scratch across decayed flesh or a pinpoint shine on a bloodied claw can speak volumes without shouting. It’s the final “oh no” that creeps in after the viewer thinks they’ve taken it all in. White gel pens give you that control to guide the viewer’s eye exactly where you want it.
3. How to choose the right white gel pen for horror art
Not all white gel pens are created equal, and your choice can affect the outcome of your art.
Here are a few things to consider:
Opacity
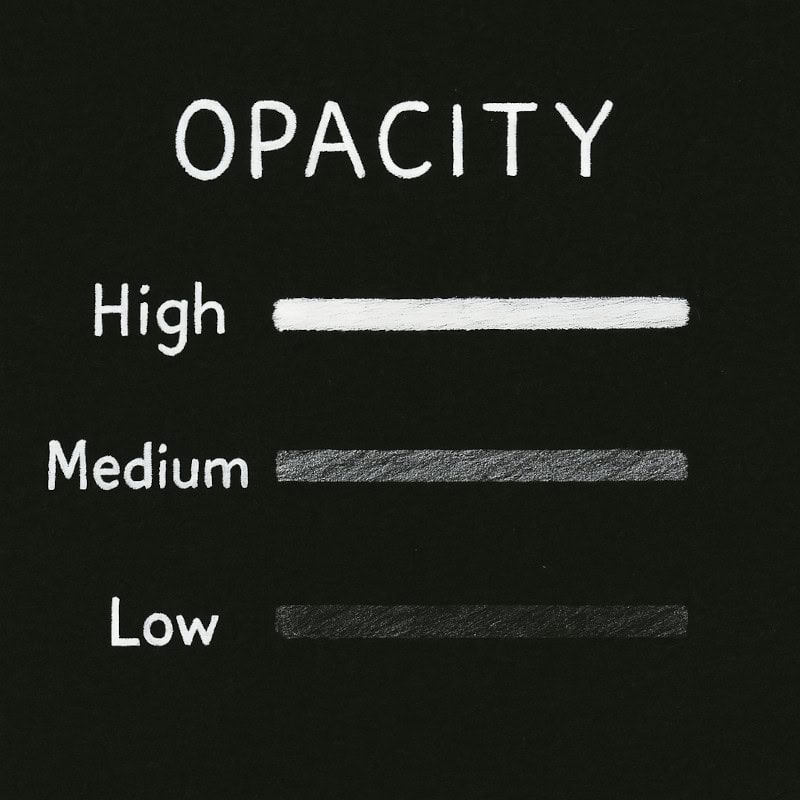
Look for white gel pens with highly opaque ink, as these will show up best on dark backgrounds. In horror art, weak opacity can make your highlights look more like ghostly whispers than sharp, bone-chilling brilliance. You want your lines to slice through the darkness, not fade into it. High-opacity pens lay down solid white ink that doesn’t dull or disappear when layered over graphite, ink, or coloured pencil. They’re perfect for bold vein highlights, glowing eyes, or scratching out details on even the blackest shadows.
Nib Size
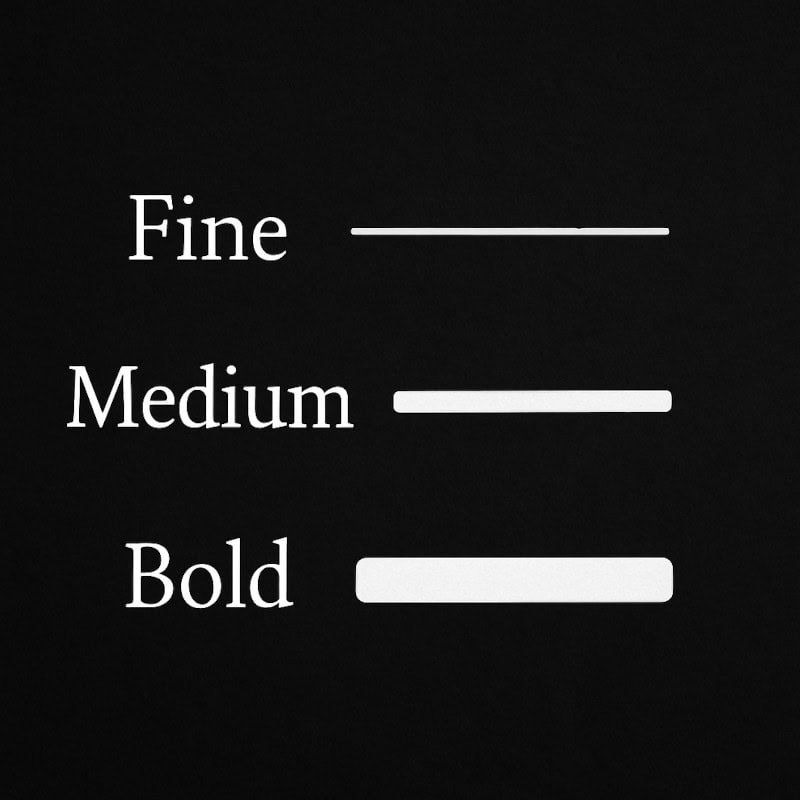
The nib size determines how fine or bold your lines will be – and in horror art, that can make all the difference between a subtle vein and a full-blown glowing ritual sigil.
- Fine nibs (like 0.5mm) are perfect for adding tiny, sharp details; veins, eye reflections, hair strands, or cracks in cursed porcelain. If you’re working on intricate characters or tight spaces, these nibs offer precise, surgical-level accuracy.
- Medium nibs (around 0.8mm) are a solid all-rounder. They’re great for layering highlights, defining textures like scales or stitches, and creating readable contrast without overpowering your linework.
- Bold nibs ( 1.0mm) are your go-to for dramatic highlights – like glowing runes, moonlit edges, or blood-slick claws. They lay down thick, opaque lines that demand attention.
Choosing the right nib is like picking your weapon before a boss fight, go fine for precision strikes or bold for maximum impact. And hey, it never hurts to have all three in your horror art arsenal. After all, you never know if today’s sketch calls for delicate demon freckles.
Flow and Consistency

A smooth ink flow is essential for achieving clean, uninterrupted lines. Always test your pen on scrap paper to ensure it doesn’t skip or blob.
When creating dark, detailed horror art, you don’t want a white gel pen that sputters like a dying flashlight in a haunted basement. Skipping lines or inconsistent ink flow can ruin fine highlights and break the mood of your piece faster than a poorly timed jump scare.
High-quality gel pens should glide like a ghost across the page – no gaps, no blobs, just smooth, hauntingly perfect lines. Always warm them up first with a few quick test scribbles, especially if they have been sitting for a while. And if you notice uneven flow mid-drawing, pause and scribble again to recharge the ink stream.
Nothing kills the vibe faster than a demon’s eyeball appearing flaky, resembling a dandruff problem.
4. Caring for your white gel pen
Gel pens can dry out or clog if not cared for properly, and nothing kills your artistic flow like a possessed pen refusing to draw a mid-demon eyeball.
To keep your pen in top shape:
- Store it horizontally to prevent the ink from settling unevenly in the barrel.
- Always cap the pen tightly after use to stop the nib from drying out.
- Test the pen on scrap paper before starting your artwork to ensure the ink flows smoothly.
- If the ink skips, gently scribble in circles to help restart the flow.
- Warm the pen slightly with your hands if it’s been inactive for a while.
- Avoid pressing too hard, as this can damage the nib and cause ink blobbing.
A well-cared-for pen is like a loyal minion – it’ll be ready when you need it, whispering white brilliance onto your darkest creations.
5. Integrating white gel pens into your workflow
White gel pens are most effective as a finishing tool, so it’s best to use them after completing the majority of your artwork. Whether you work with graphite, coloured pencil, ink, or even mixed media, save the white gel pens for drawing those final touches that bring your piece to life.
Think of them as your visual exclamation point, perfect for edge highlights, glowing eyes, or pulling out details that might otherwise get lost in the darkness. Use them sparingly for maximum effect, especially in horror art, where subtle contrasts often hit the hardest.
6. Experiment and push the boundaries
Don’t be afraid to experiment with your white gel pen to discover new and unexpected ways of using it. Try layering it with other mediums, smudging it slightly for a softer effect, or combining it with coloured highlights to create unique lighting illusions. Horror art is all about breaking rules and embracing the strange, so let your creativity run wild.
After all, some of the best monsters were born from happy accidents… and questionable artistic decisions.
Conclusion: A small tool that has a big impact
White gel pens might seem like a humble addition to your art supplies, but in the realm of horror art, they are nothing short of transformative. From razor-sharp highlights to ghostly glows, this unassuming tool can help you craft the chilling details that make your work unforgettable. Whether you’re illustrating a creepy character or an eerie environment, a white gel pen could be the secret weapon you’ve been searching for.
So, if you haven’t already, grab a white gel pen, and let it bring your dark ideas to life. After all, in horror art, the details aren’t just important – they’re everything. Now go forth, fellow fright-scribbler… and make something so creepy it needs its own exorcism.
What You Learned:
- White gel pens add bold highlights, eerie glows, and sharp contrast that make horror art pop.
- They’re great for fine textures like cracks, stitches, scales, and wisps of monster hair.
- You can use them to enhance shadows with tiny reflective touches that deepen the mood.
- Different pens vary in opacity, nib size, and ink flow, all of which affect precision and brightness.
- Good care – like storing horizontally and doing quick test scribbles – keeps your pen working smoothly.
- They work best as a finishing tool, added after your main graphite/charcoal work is complete.
- Experimenting with layering, smudging, or mixing mediums helps you unlock new creepy effects.
Want More Creepy Tools for Your Horror Art Kit?
If white gel pens are your secret weapon for eerie highlights, you might also love exploring these other supplies:
- Acrylic Paint Markers
For bold, opaque lines that appear as if they’ve been painted with liquid nightmare fuel. - Liquid Chalk Markers
Great for foggy, temporary effects that feel like runes scrawled on a cursed blackboard. - Circle Templates (Stencils)
Because sometimes drawing eyeballs and glowing orbs freehand just turns into lopsided potatoes.