Liquid Chalk Markers for Horror Art
If your art had a weather forecast, liquid chalk markers would bring the eerie fog rolling in.
Like ghostly graffiti from the underworld, liquid chalk markers create bold, ghostly strokes that look both temporary and strangely permanent. They’re smooth to use, and their matte, powdery finish gives artwork a hazy, atmospheric look that feels perfect for horror themes, eerie lettering, and mysterious symbols.
These markers are especially useful for creating foggy textures, glowing effects, creepy writing, and layered chalk-like details on dark surfaces. They’re a favourite for artists who want soft, misty effects without the mess of traditional chalk or pastel dust.
What You’ll Learn:
In this guide, you’ll learn how to use liquid chalk markers to create eerie horror effects, atmospheric textures, and ghostly mixed-media artwork.
- How liquid chalk markers differ from traditional chalk and standard paint markers
- Which surfaces work best for smooth lines, blending, and easy cleanup
- Why non-porous materials help prevent staining and uneven ink absorption
- How to create fog, glowing symbols, spectral outlines, and creepy lettering
- Which colour combinations work best for different horror moods and effects
- How to combine liquid chalk with graphite, charcoal, coloured pencil, and ink
- Tips for blending, layering, and creating soft atmospheric effects
- Common mistakes that can cause streaking, staining, or dried-out nibs
- How to clean, store, and care for your markers properly
- When liquid chalk markers work best for temporary horror art and atmospheric effects
Why Liquid Chalk Markers Are Worth Summoning
If traditional chalk is the dusty spectre of art supplies, liquid chalk markers are the cleaner, more controlled version built for bold lettering, eerie effects, and smooth shading.
Here’s what makes them so useful for horror art:
- Matte, Ethereal Finish:
The soft, powdery look creates foggy textures, ghostly writing, and atmospheric highlights that work perfectly for horror themes.
- No Dust or Mess:
Unlike traditional chalk or pastel, liquid chalk markers create clean effects without leaving powder on your hands, clothes, or workspace.
- Smooth, Controlled Flow:
The ink flows evenly, making it easier to create sharp lettering, glowing symbols, and soft misty shading without broken chalk or rough texture.
- Easy to Erase from Non-Porous Surfaces:
On surfaces like glass, mirrors, acrylic boards, and chalkboards, the ink can usually be wiped away with a damp cloth for quick corrections or temporary designs.
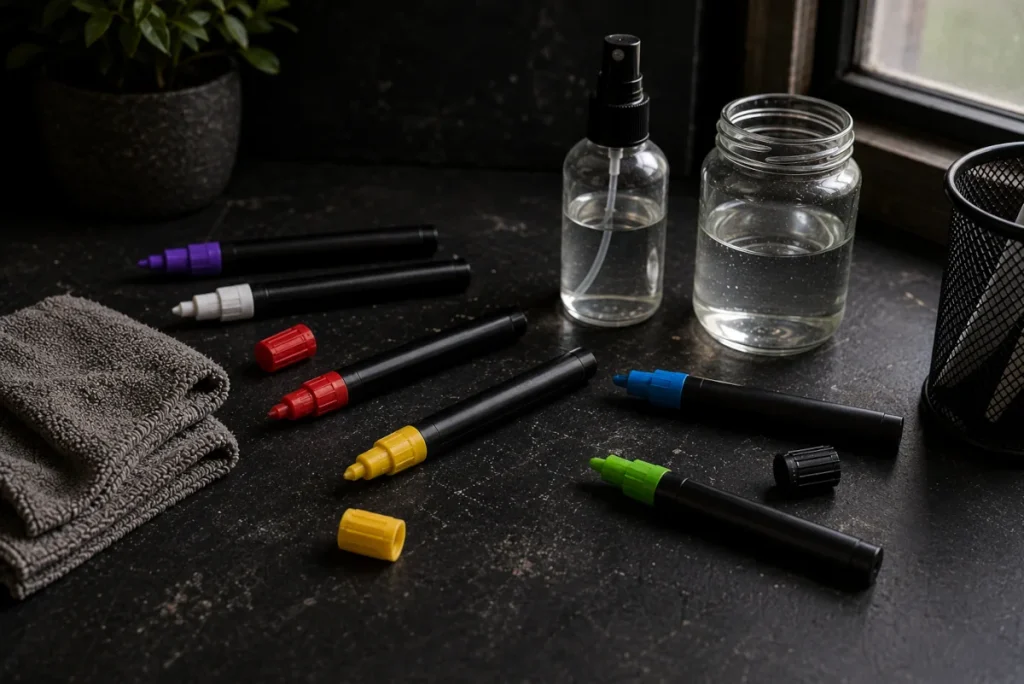
Best Surfaces for Liquid Chalk Markers
Liquid chalk markers behave very differently depending on the surface you use them on. They work best on smooth, non-porous materials, where the ink can sit cleanly on top instead of soaking in or staining the surface underneath.
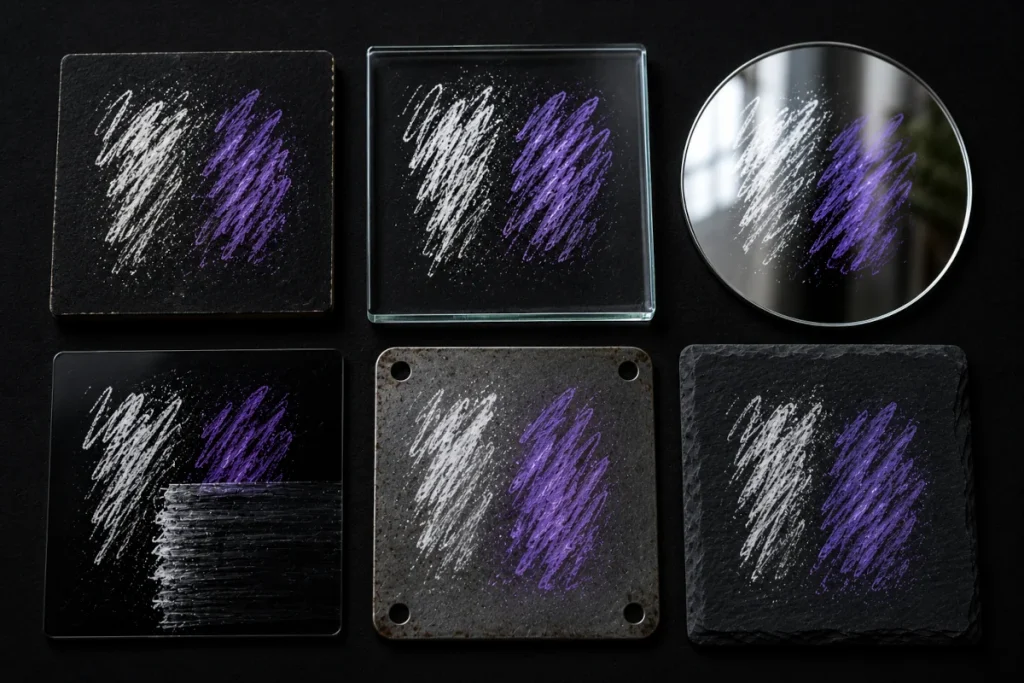
On the right surface, the colours look brighter, the lines stay sharper, and cleanup is much easier. On the wrong surface, however, the pigment can cling permanently, fade unevenly, or leave behind faint “ghost” marks even after wiping.
Good surfaces include:
- Chalkboards (real or faux)
Quick note: Real chalkboards can sometimes be slightly porous, especially if they aren’t sealed. Faux or vinyl chalkboards usually wipe clean much more easily. - Glass or Mirrors
- Black Acrylic Sheets
- Whiteboards
- Metal Signs
- Sealed Ceramic or Slate
Pro Tip:
Liquid chalk often appears softer and more matte on chalkboards, but brighter and more vibrant on glossy surfaces like glass or acrylic.
Extra Tip:
Always test a small area first, especially on painted, porous, or unsealed surfaces. Some materials can absorb ink, leaving behind faint staining or “ghosting.”
Creating Horror Art with Liquid Chalk Markers
Liquid chalk markers might sound like classroom tools, but in horror art they’re surprisingly effective for creating soft, eerie effects that feel misty, faded, or ghostly.
Because the finish is naturally matte and slightly powdery, these markers work especially well for haunted signage, spectral shapes, creepy handwritten notes, and fog-like textures that appear harder to achieve with regular paint pens or standard markers.
They’re also excellent for temporary designs on mirrors, glass, acrylic sheets, or chalkboards, making them useful for both artwork and atmospheric horror displays.
Try these ideas:
- Eerie Fog Effects:
Blend light strokes gently with a soft cloth or your finger to create drifting mist across graveyards, forests, windows, or swamp scenes.
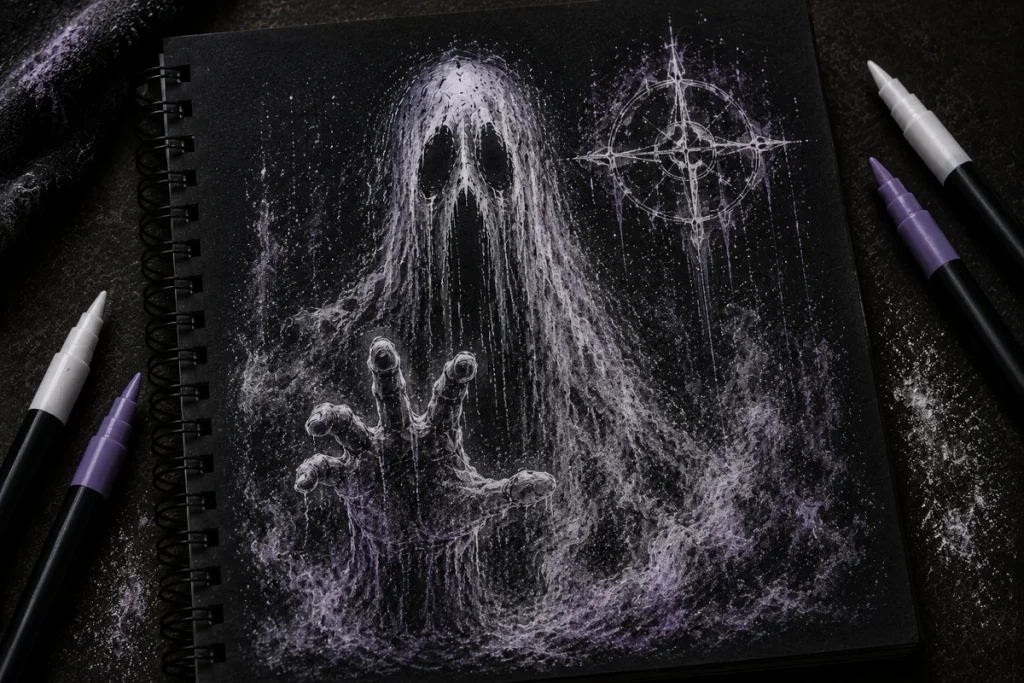
- Spectral Outlines:
Draw glowing shapes or ghostly silhouettes over dark surfaces for spirits, phantom figures, or haunted landscapes.
- Runes and Sigils:
The soft matte finish works perfectly for occult symbols, ritual circles, faded warnings, and unsettling handwritten messages.
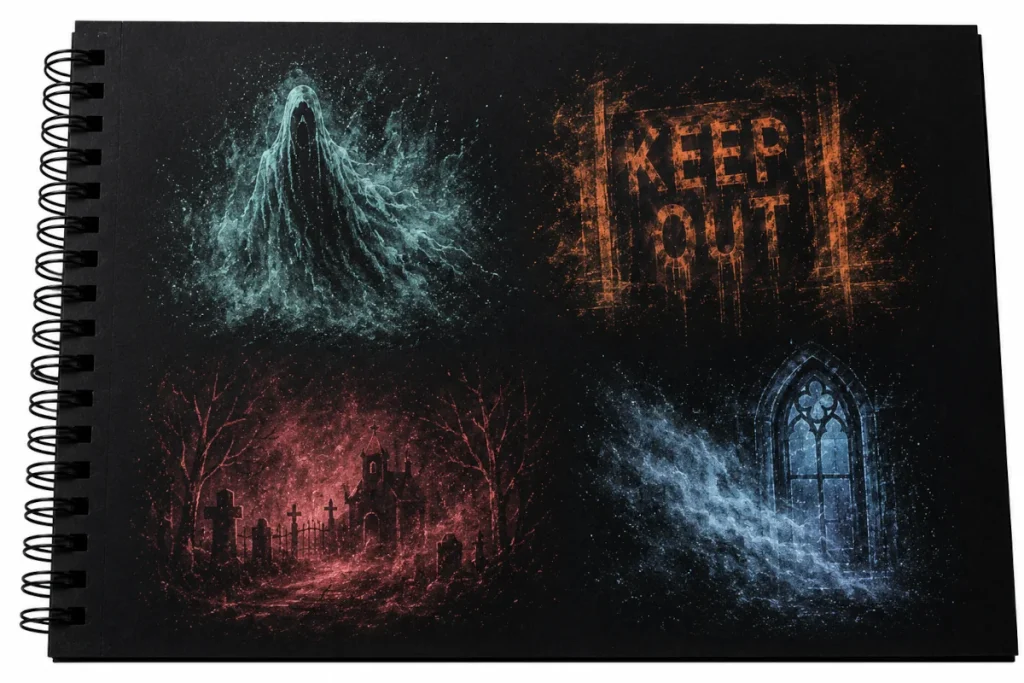
- Weathered Signs:
Create faux-vintage warning signs or haunted attraction props with faded lettering and rough textures. Great for phrases like “Beware of the Basement” or “Keep Out.”
- Creepy Handwritten Notes:
Write messages that look partially erased or faded away, ideal for horror journals, fake evidence boards, abandoned letters, or cursed diary pages.
Extra Tip:
Try layering brighter colours over faded white chalk effects. This creates a glowing, misty look that works brilliantly for supernatural scenes and eerie lighting.
Mixing Liquid Chalk with Other Mediums
Liquid chalk markers pair surprisingly well with other art materials, especially when you want layered horror effects with soft glows, dusty textures, or faded supernatural details.
Because liquid chalk has a naturally matte, misty finish, it works brilliantly for adding atmosphere over dark shading and textured artwork.
Here are some of the best combinations:
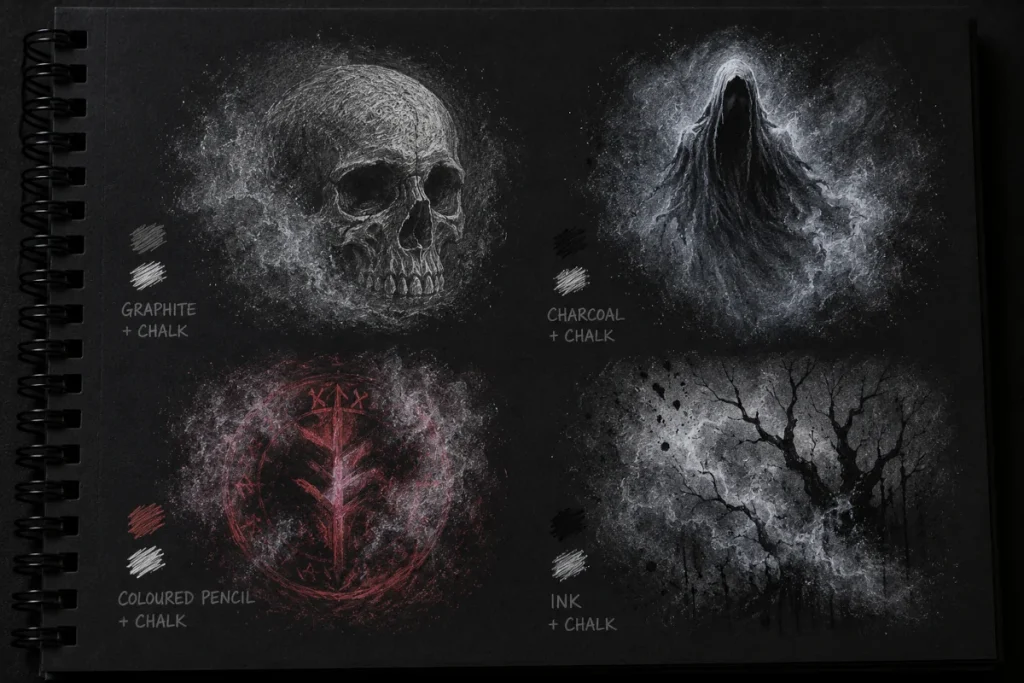
- Graphite + Chalk:
Start with graphite for your structure and shadows, then add white or coloured chalk highlights for glowing eyes, mist, reflections, or eerie lighting effects.
- Charcoal + Chalk:
Charcoal creates deep, smoky shadows while liquid chalk adds soft glowing details over the top. This combination works especially well for ghost figures, fog, and haunted environments.
- Coloured Pencil + Chalk:
Layering chalk over coloured pencil can create unusual glowing colour effects, especially on darker surfaces. Great for supernatural lighting, spectral energy, or cursed-looking symbols.
- Ink + Chalk:
Once your ink has fully dried, liquid chalk can be used to add faded runes, glowing outlines, handwritten warnings, or soft atmospheric details.
Important Surface Note:
Most of these combinations work best on smooth or sealed surfaces where the chalk ink can sit properly on top. On absorbent paper, liquid chalk may fade, smear, or soak in unevenly.
Good surfaces include:
- Sealed chalkboards
- Acrylic sheets
- Glass
- Metal
- Glossy or coated boards
Beware the Bleed:
Never layer liquid chalk over wet ink, paint, or marker. Let each layer dry fully first to avoid smudging or muddy textures.
Colour Recommendations for Horror Effects
Liquid chalk markers often come in bright or pastel colour sets, but with the right combinations and dark surfaces, even cheerful colours can become eerie, unsettling, or supernatural-looking.

Because liquid chalk has a naturally soft, dusty finish, colours tend to appear slightly faded and atmospheric compared to standard paint markers. This makes them especially useful for ghost effects, occult symbols, foggy lighting, and haunted signage.
Here’s how to use colour to your creepy advantage:
- White:
The essential horror-art colour. Perfect for ghost glows, fog, moonlight, candle reflections, faded writing, and supernatural highlights.
- Grey:
Excellent for soft shadows, smoke, mist, and subtle background texture. Great for haunted alleyways, abandoned buildings, and fog-heavy scenes.
- Red:
Best for warning messages, blood smears, ritual symbols, glowing eyes, or anything that needs immediate tension and contrast.
- Blue:
Creates a cold spectral glow that works beautifully for ghost outlines, underwater horror, frozen environments, or supernatural lighting.
- Green:
Perfect for toxic slime, cursed objects, eerie fog, radioactive effects, or anything that looks suspiciously alive.
- Purple:
Adds a mystical or arcane atmosphere. Ideal for magical symbols, supernatural energy, dreamlike horror, or occult-inspired artwork.
- Yellow:
Works well for dim lantern light, aged paper effects, weak candle glow, or unsettling lighting in dark scenes. Use lightly to keep the atmosphere moody rather than overly bright.
Extra Tip:
Combining two colours often creates stronger horror effects than using a single colour.
For example:
- White + blue = cold ghost glow
- Red + black = ritual or warning imagery
- Green + yellow = toxic or infected atmosphere
- Purple + white = supernatural magic effects
Tips & Tricks for the Perfect Haunting
- Shake Before Use:
Always shake the marker well to mix the pigment evenly. You’ll hear a small ball rattling inside – that’s normal and helps keep the colour smooth and consistent.
- Prime the Tip Carefully:
Press the nib down gently until the ink begins to flow. Avoid forcing it too hard, or you can flood the tip and end up with blobs, splatters, or overly wet lines.
- Layer for Depth:
Start with lighter colours first, then slowly layer darker shades over the top. This works especially well for fog, glowing symbols, ghostly lighting, and eerie atmosphere effects.
- Blend While Slightly Wet:
For softer transitions or smoky textures, lightly blend the ink with a damp cloth, cotton swab, or fingertip before it fully dries. This creates a faded, misty look that works brilliantly in horror scenes.
- Use Dark Surfaces for Stronger Contrast:
Liquid chalk markers stand out best on black or dark backgrounds. White, pale blue, red, and neon colours become much more dramatic when surrounded by darkness.
- Test Surfaces First:
Some porous or unsealed surfaces can absorb the ink permanently. Always test a small hidden area first if you’re working on décor, furniture, or real chalkboards.
- Erase with Water or Cleaner:
Most liquid chalk ink wipes away easily with a damp cloth. For stubborn residue, use a mild cleaner or diluted vinegar solution and gently wipe the surface clean.
Extra Tip:
If your colours start looking streaky or faint halfway through drawing, the nib usually just needs another quick shake and re-prime. Liquid chalk markers behave best when the ink stays evenly mixed.
Common Mistakes (And How to Fix Them)
- Using Porous or Unsealed Surfaces:
The ink can soak in and leave permanent stains, especially on raw chalkboards, paper, wood, or unsealed décor. Always test a small hidden area first before committing to a full drawing.
- Forgetting to Shake the Marker:
If the pigment isn’t properly mixed, the colour can come out watery, streaky, or faded. Give the marker a thorough shake before every use for smooth, even coverage.
- Pressing the Nib Too Hard:
Over-priming can flood the tip with ink and create blobs, splatters, or overly thick lines. Gentle pressure works best.
- Leaving the Cap Off:
Liquid chalk ink can dry surprisingly fast when exposed to air. Always recap your markers tightly after use to keep the nib from drying out.
- Mixing Brands on the Same Surface:
Different formulas can react differently, leading to uneven texture, streaking, or inconsistent opacity. Sticking to one brand per project usually gives cleaner results.
- Trying to Erase Too Soon:
If you wipe the ink before it fully settles, it can smear instead of cleaning away properly. Let the marker dry completely before adjusting or erasing sections.
Quick Fix:
If a marker suddenly starts looking faint or scratchy, shake it again and gently re-prime the tip on scrap material. Most “broken” liquid chalk markers just need the pigment redistributed.
Cleaning & Care
After a drawing session full of ghostly scribbles and suspicious symbols, a little marker maintenance helps keep your liquid chalk pens working properly.
1. Wipe the markers clean with a soft cloth after use, especially around the nib and cap area. Dried residue can affect ink flow over time.
2. Store them horizontally so the pigment stays evenly distributed inside the barrel. This helps prevent dry starts and uneven colour.
3. Keep the caps tightly sealed. Liquid chalk ink dries quickly when exposed to air, and a loose cap can ruin the nib surprisingly fast.
4. Clean surfaces gently with a damp cloth rather than harsh scrubbing. Most liquid chalk wipes away easily once loosened with a little water.
5. Avoid extreme heat or direct sunlight when storing your markers. Too much heat can dry out the ink or affect the consistency.
Quick Tip:
If a nib becomes clogged with dried pigment, gently wipe it with a damp cloth and re-prime it on scrap material before assuming the marker is dead.
When to Use (And When to Pass)
Liquid chalk markers shine when you want artwork that feels atmospheric, temporary, and slightly supernatural rather than perfectly polished.

Use liquid chalk markers when you want:
- Translucent, eerie strokes with a soft, foggy appearance
- Easy cleanup on non-porous surfaces
- Temporary art displays for windows, mirrors, signs, or seasonal décor
- Mixed-media artwork with ghostly glows, faded writing, or misty textures
- Bold contrast on dark surfaces like black acrylic, chalkboards, or glass
Despite their eerie charm, liquid chalk markers are not the best choice for every surface or every type of artwork.
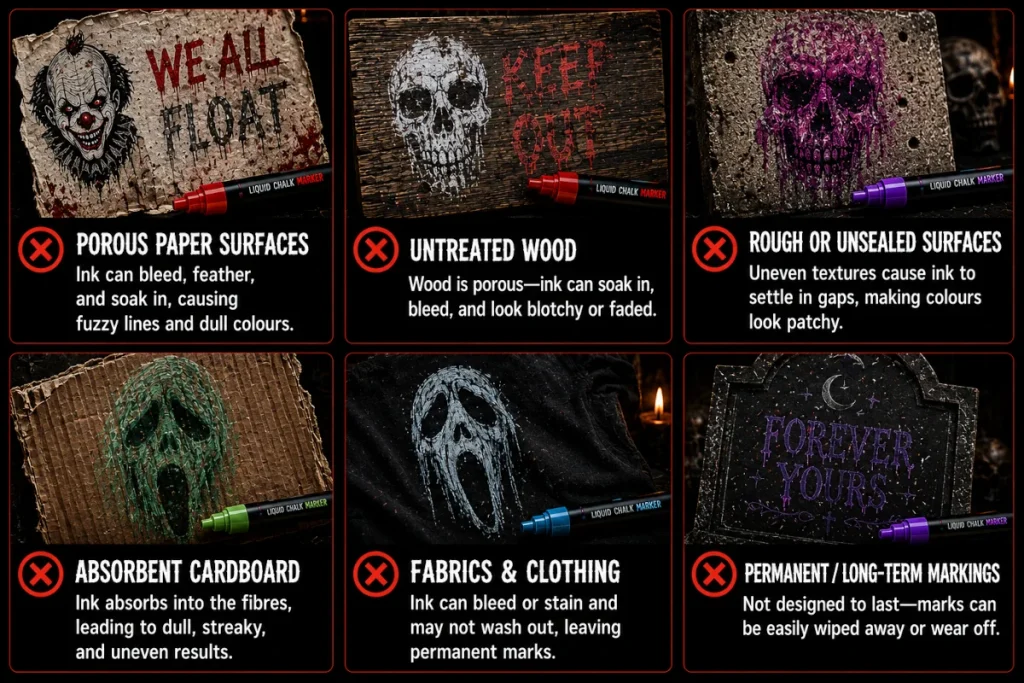
Skip them when you need:
- Permanent detail work that must stay untouched long-term
- Ultra-fine precision on porous paper surfaces
- Heavy layering on absorbent materials, where the ink can bleed or stain
- Artwork exposed to rain or constant handling without sealing
- A surface that really shouldn’t be drawn on (walls, furniture, pets, or unsuspecting relatives)
Simple Rule:
Liquid chalk markers work best when you want atmosphere, glow, texture, and temporary spooky effects – not ultra-detailed permanent illustration work.
Final Thoughts
Liquid chalk markers are one of the easiest ways to add eerie atmosphere, glowing effects, and bold contrast to horror artwork. Their soft, matte finish makes them perfect for foggy textures, ghostly lettering, spectral highlights, and temporary spooky displays.
They work especially well on dark, non-porous surfaces like glass, acrylic, mirrors, sealed chalkboards, and metal. Because they wipe away easily, they’re also great for experimenting with creepy ideas, mixed-media effects, and layered horror compositions without worrying about permanent mistakes.
While they aren’t ideal for ultra-fine detail work or absorbent paper surfaces, they excel at creating atmosphere, texture, and dramatic visual effects that feel almost cinematic.
So if you want artwork that glows, smudges, fades, or looks like it appeared in the middle of a haunted hallway at midnight, liquid chalk markers are absolutely worth experimenting with.
What You Learned:
- Liquid chalk markers create soft, matte, atmospheric effects that work especially well for horror-themed artwork
- Non-porous surfaces give the best results because the ink sits on top instead of soaking in and staining
- Glass, mirrors, acrylic, metal, and sealed chalkboards allow smoother lines, easier blending, and cleaner wipe-offs
- Porous paper and unsealed surfaces absorb the ink quickly, which can cause smudging, fading, and permanent marks
- White and grey markers work especially well for fog, ghosts, moonlight, and misty lighting effects because they stand out softly against dark surfaces
- Red, green, blue, purple, and yellow markers each create different horror moods, from blood warnings and cursed symbols to spectral glows and eerie lighting
- Blending with a damp cloth or cotton swab softens harsh lines and helps create smoke, fog, and glowing transitions
- Layering liquid chalk over graphite, charcoal, coloured pencil, or ink adds highlights, glowing effects, and mixed-media texture
- Shaking and priming the marker properly keeps the pigment smooth and consistent while preventing streaky or uneven ink flow
- Keeping the caps sealed tightly and storing the markers horizontally helps stop the nibs from drying out
- Liquid chalk markers work best for temporary displays, atmospheric effects, and mixed-media horror art, but they are less suitable for permanent or ultra-detailed work on paper
Tools You Might Also Like
If you’re building your horror art toolkit, these guides can help you explore more ways to create eerie textures, creepy atmosphere, and unsettling effects:
- Coloured Pencils for Horror Art: Turning Sweet Tools into Nightmare Fuel
For cursed skin tones, bruised shadows, and fine details that whisper, “Something’s not right here.” - Acrylic Paint Markers for Horror Art
For bold, permanent lines, glowing details, and dramatic highlights that refuse to stay subtle. - Pastels for Horror Art
For hazy backgrounds, spectral fog, and dusty textures that feel like they’ve haunted your paper for centuries.