Shading Techniques for Creepy Drawings
Bring your monsters to life – one pencil stroke at a time.
Shading is where your drawings crawl out of the flat, lifeless page and start to look real (and sometimes disturbingly so). Whether you’re sketching a zombie, a vampire bat, or a haunted teapot, learning to shade correctly turns “eh” sketches into dramatic, eerie art.
Even if you’re brand new to shading, don’t worry – this tutorial will guide you step by step so you’ll know exactly what to do (and when to stop before your paper starts looking like a fog bank from a bad 80’s horror movie).
What Shading Really Does
Shading isn’t just about adding darkness – it’s how you create form, atmosphere, and emotion. By controlling your pencil pressure, direction, and tone, you decide how light interacts with the shapes you draw.
Quick note:
In drawing, “tone” just means how light or dark something looks – it’s all about value, not colour. So, when we talk about creating tone, we’re building the illusion of light and shadow with graphite alone.
In horror art, shading is everything. It builds tension, creates mystery, and adds that deliciously creepy realism. Use it to suggest decay, gloom, or even the glint of something lurking in the shadows.
Pro Tip:
Start light and build your layers gradually. You can always go darker – but resurrecting over-shaded paper? That’s a job for necromancers.
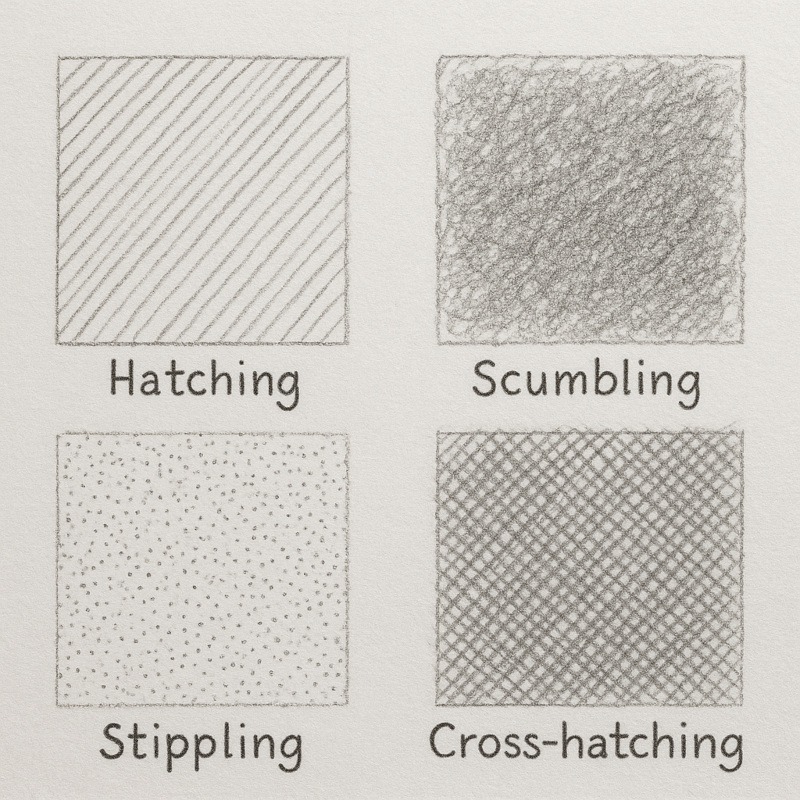
1. Hatching – Lining Your Way to Shadows
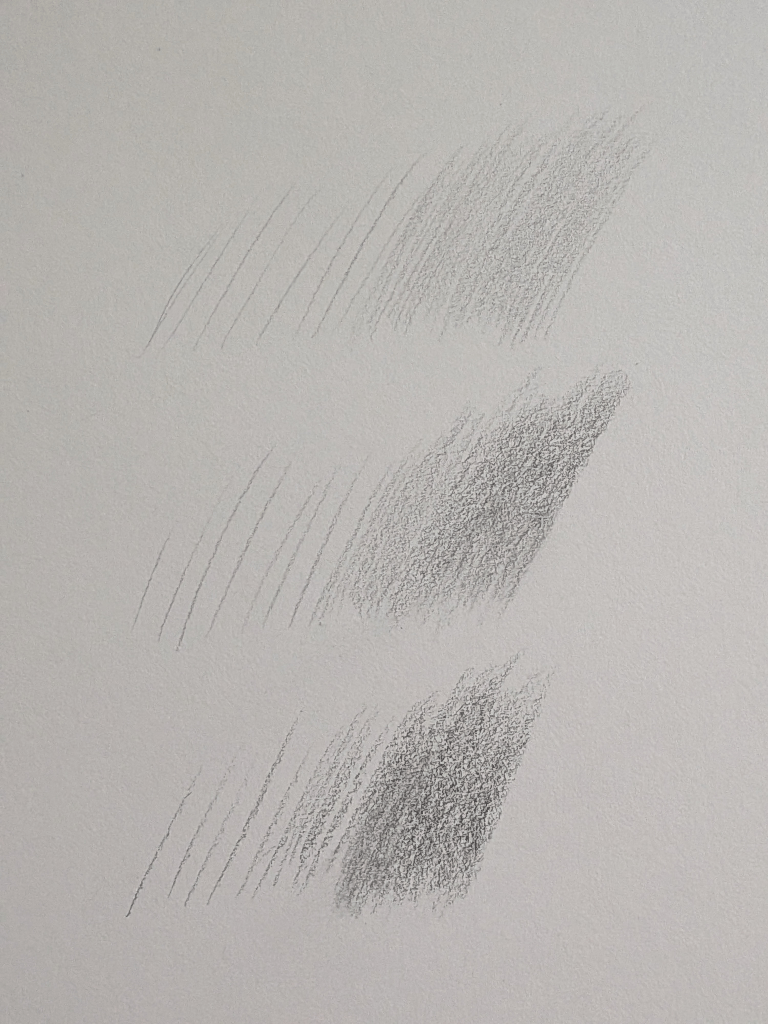
Hatching uses parallel lines to build tone and create the illusion of form. It’s simple, beginner-friendly, and one of the fastest ways to add creepy depth to your drawings.
How to do it:
1. Choose a direction for your lines (diagonal, vertical, etc.) and stick to it.
2. Draw light, evenly spaced lines in that direction. Keep your wrist relaxed.
3. To darken an area, add more lines between the first ones so the spacing becomes tighter.
4. Build up the shadow slowly – light pressure first, then denser lines for deeper tones.
In horror art:
Use hatching to create dry, cracked, stretched, or aged skin. It’s perfect for mummified faces, gaunt cheeks, or anything that should look unnervingly dehydrated.
Exercise:
Shade a small sphere or cube using only hatching. Focus on keeping your line direction consistent and your spacing smooth.
2. Cross-Hatching – Controlled Chaos
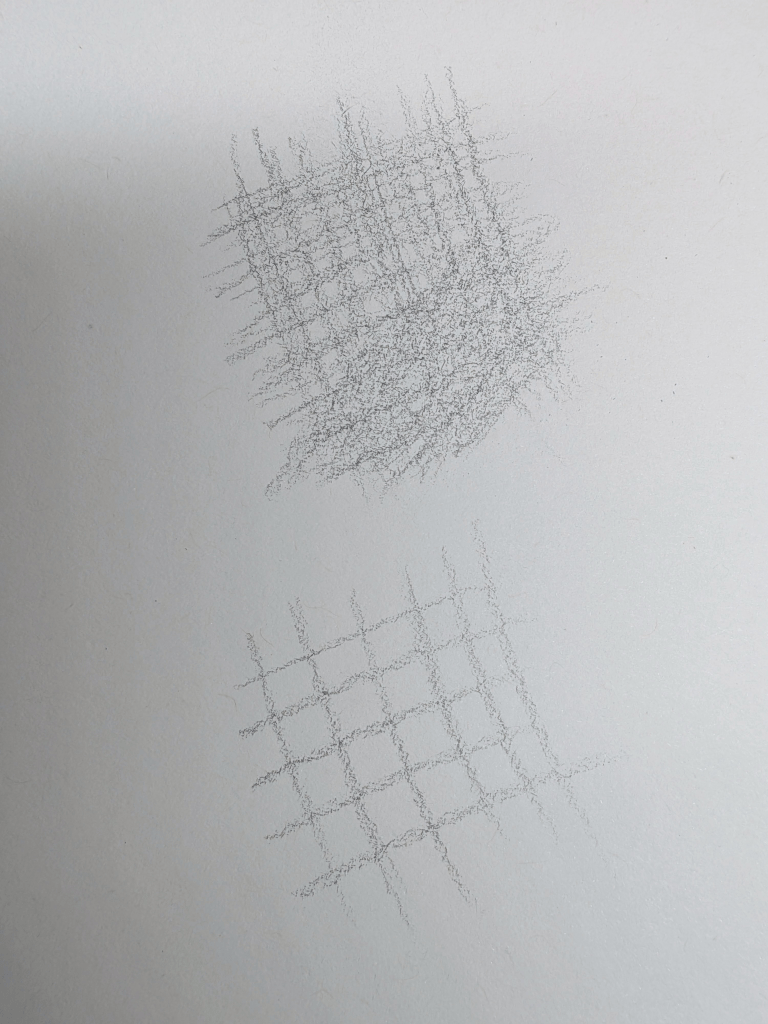
Cross-hatching creates richer shadows by layering lines at different angles. Each new angle deepens the darkness and adds tension, texture, and that “this thing hasn’t slept in 400 years” look.
How to do it:
1. Start with a light layer of hatching in one direction.
2. Add a second layer of lines that cross over the first at a different angle.
3. Add a third or fourth layer for darker areas, each at a new gentle angle.
4. Keep pressure light so you can control how quickly the shadow deepens.
In horror art:
Cross-hatching is incredible for building gritty, decayed surfaces – rotting wood, hollow eye sockets, worn bandages, cracked bone, or anything that needs rough texture.
Exercise:
Create a small square and shade it using three layers of cross-hatching: light, medium, and dark. Focus on gradually increasing density.
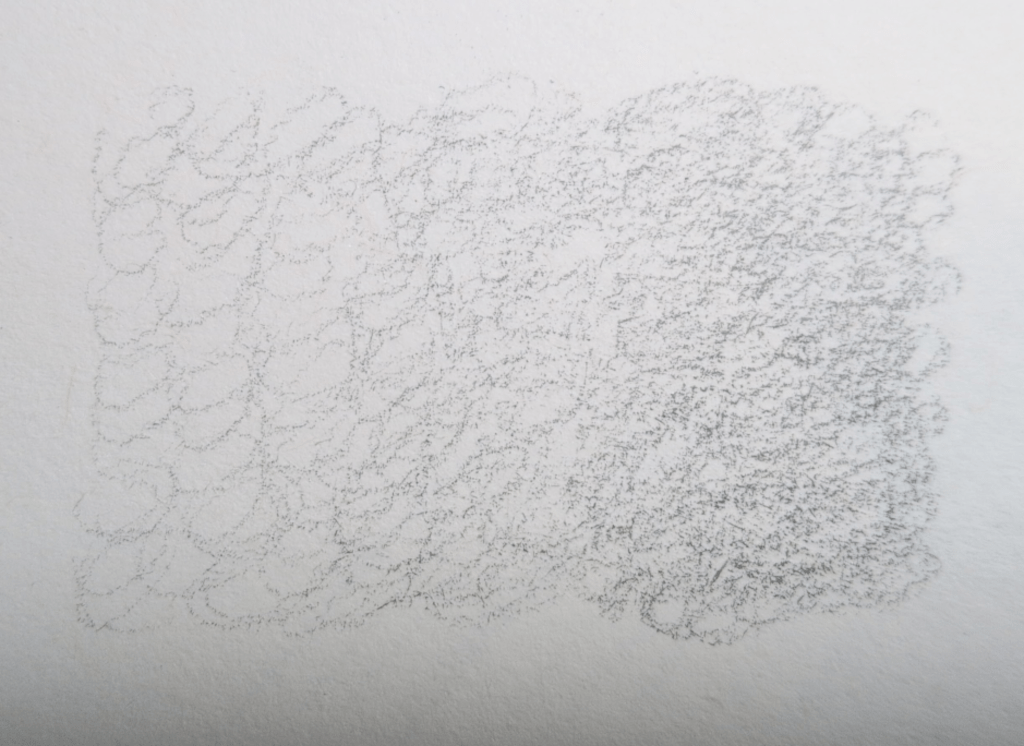
3. Stippling – The Patient Artist’s Curse
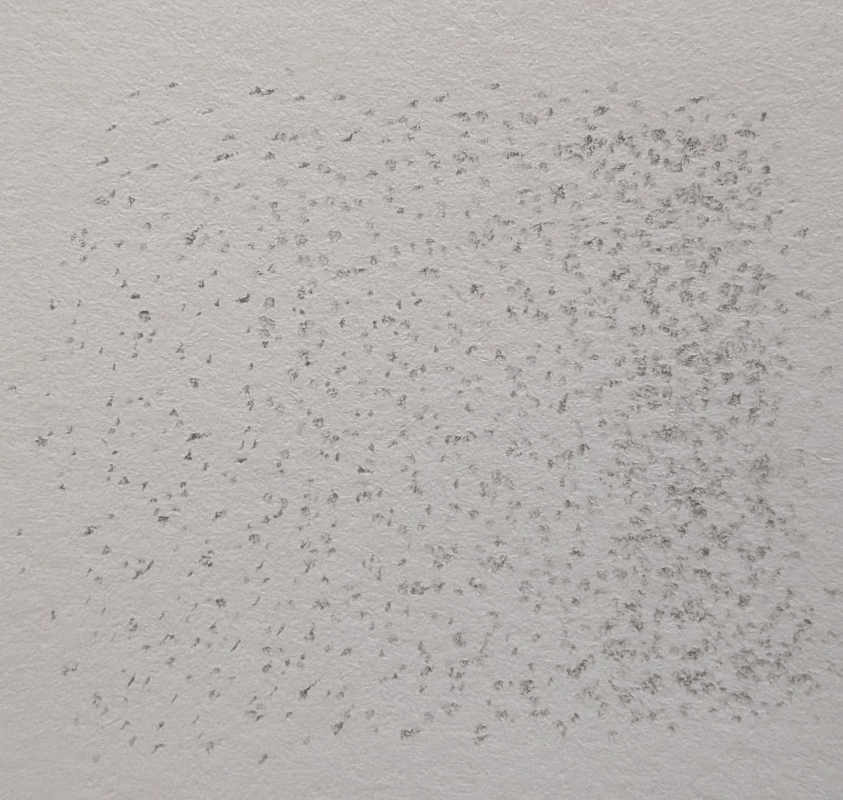
Stippling uses tiny dots to build tone. It’s slow, strangely calming, and perfect for creating eerie textures that look organic and unsettling.
How to do it:
1. Make small dots by gently tapping your pencil – no circles, dragging, or scribbles.
2. Spread the dots far apart for a light tone.
3. Add more dots closer together to darken the area.
4. Keep the dots random and build the gradient slowly.
5. A sharp pencil gives the cleanest, crispest dots.
In horror art:
Stippling is amazing for bone texture, mould, skin pores, dust, decay, and anything that needs that gritty “something is definitely wrong here” feeling.
Exercise:
Create a stippling gradient from light to dark. Keep the left side airy and open, and gradually tighten the dots toward the right.
4. Scumbling – Controlled Scribbles
Scumbling uses tiny circular scribbles to create a soft, uneven texture. It’s forgiving, expressive, and perfect for creating a natural-looking tone without harsh lines.
How to do it:
1. Make small, loose circular motions with your pencil – like soft little scribbles.
2. Overlap the circles to create a textured tone.
3. Increase pressure or add more layers to darken the area.
4. Keep your hand loose so the texture stays natural instead of stiff.
In horror art:
Use scumbling for foggy textures, rough skin, bruises, shadows under the eyes, or anything that needs a soft, unsettling atmosphere.
Exercise:
Practice shading a small area using only scumbling. Try creating light, medium, and dark sections by adjusting pressure and layering.
5. Blending – Soft Shadows and Eerie Realism
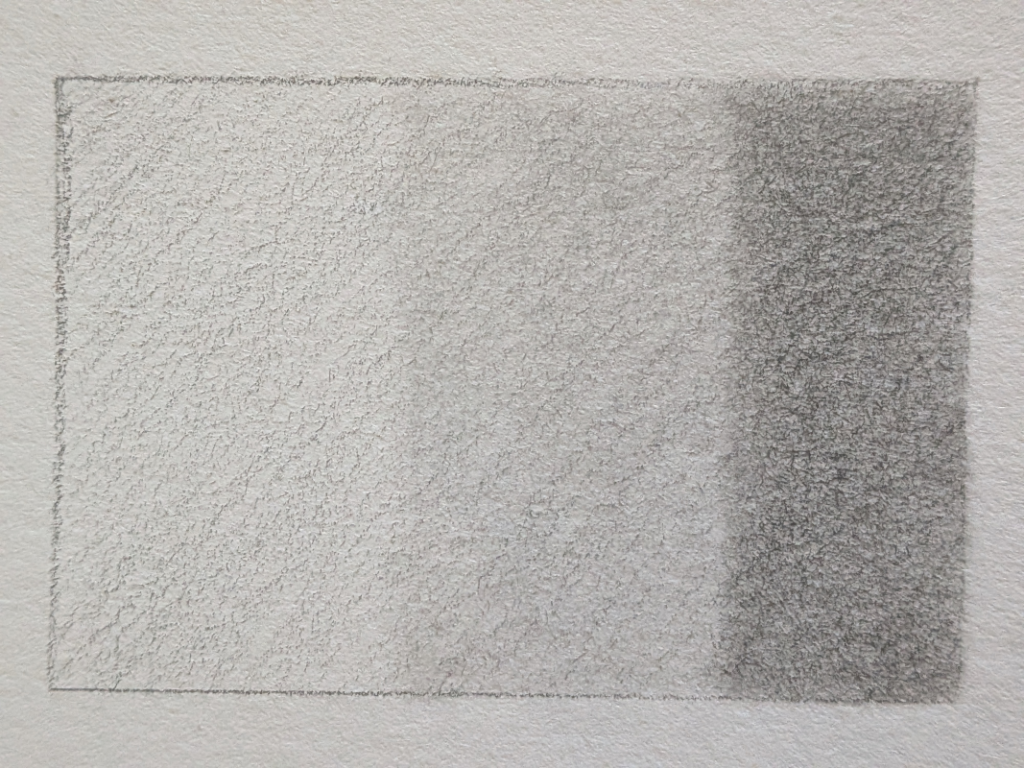
Blending smooths your graphite to create soft, ghostly shadows and atmospheric transitions. It’s ideal for making areas look misty, fleshy, or hauntingly real.
How to do it:
1. Lay down a light base layer of graphite using soft shading, hatching, or tiny circles.
2. Use a blending stump, soft tissue, or brush to gently smooth the graphite in one consistent direction.
3. Add more graphite to deepen shadows, then blend again if needed.
4. Keep the lightest areas clean to preserve highlights.
Extra clarity for beginners:
Avoid over-blending – if you blur everything too much, your drawing can look flat. Keep a few crisp edges where the darkest shadows meet the midtones to hold the shape together.
In horror art:
Blending is perfect for creating soft, eerie shadows around eyes, fog-like transitions, smooth skin, candlelit faces, and anything ghostly.
Exercise:
Create a small gradient using shading, then blend to soften it.
Want to see which tools work best for smoothing soft, eerie shading? Check out my Blending Tools for Horror Art guide.
6. Combining Techniques
Realistic horror art is created by blending different techniques, combining both texture and smoothness.
Try this combo:
- Hatching for texture (wrinkles, dried skin)
- Blending for depth (soft shadow transitions)
- Stippling for texture (organic detail)
If you’re still building your toolkit and want to know which core tools actually help with blending, layering, and texture work like this, I’ve put together a Beginner-Friendly Guide to Horror Drawing Tools here.
Mixing textures gives your drawings that extra layer of unsettling realism – the kind that makes viewers lean and whisper, “Wait… is that thing breathing?”
Exercise:
Draw one small creepy object – maybe a stitched-up eyeball – and use at least three different shading techniques on it.
Pro Tips for Creepy Contrast
- Use dark tones around the eyes, mouth, and any cracks to enhance the intensity.
- Use lighter shades on raised areas, such as cheekbones or scars.
- Miss a few outlines deliberately – it looks more natural and eerie.
- Avoid over-blending; a bit of rough texture gives your drawing that “freshly dug up” charm.
Practice Drills
Here are some simple but powerful exercises to help you train your eye, control your pencil, and get comfortable with shading before tackling full horror scenes.
These can be done in short 10-15 minute bursts; perfect for warming up before drawing something creepier.
1. Gradient Bars (The Smooth Operator Test)
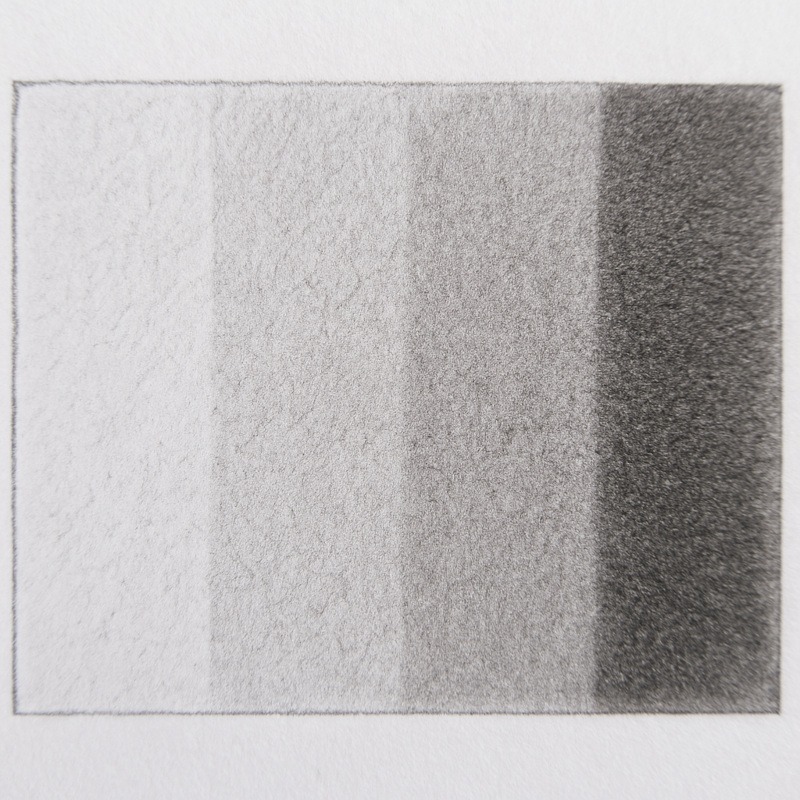
Draw a long rectangle and divide it into 4-5 smaller sections.
Start shading from one end using light pressure, gradually increasing to dark as you move along.
Goal: Create a smooth, even transition from light to dark without visible lines or jumps in tone. Try this with different pencils – HB, 2B, 4B, and 6B – so you get a feel for each one’s darkness level.
Tip: If your shading looks patchy, overlap your strokes gently in small circles or short diagonal lines, then lightly blend.
Bonus challenge: see how even you can make your gradient look without blending tools – just pure pencil control.
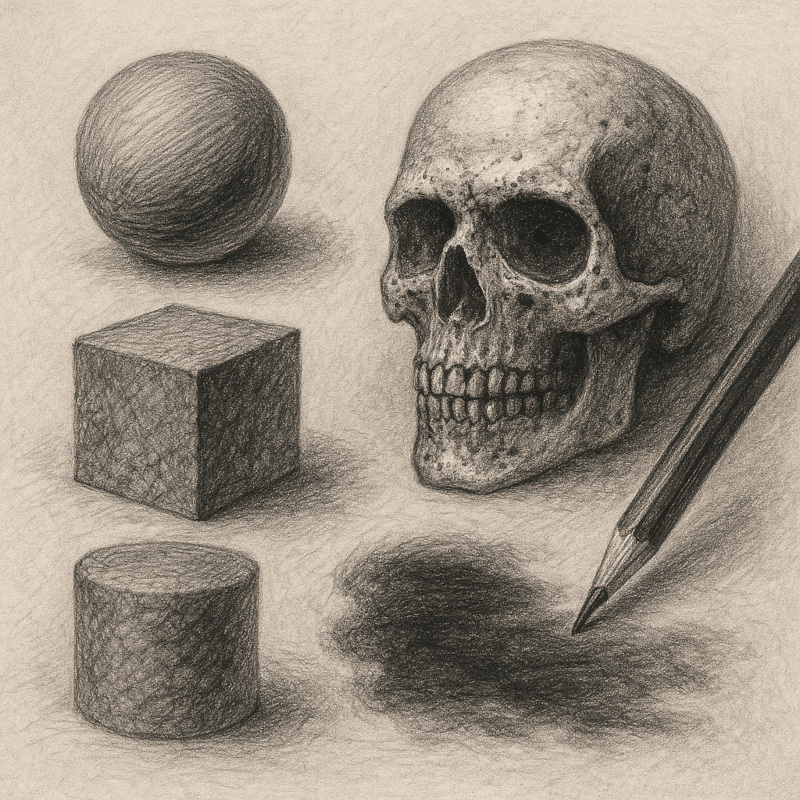
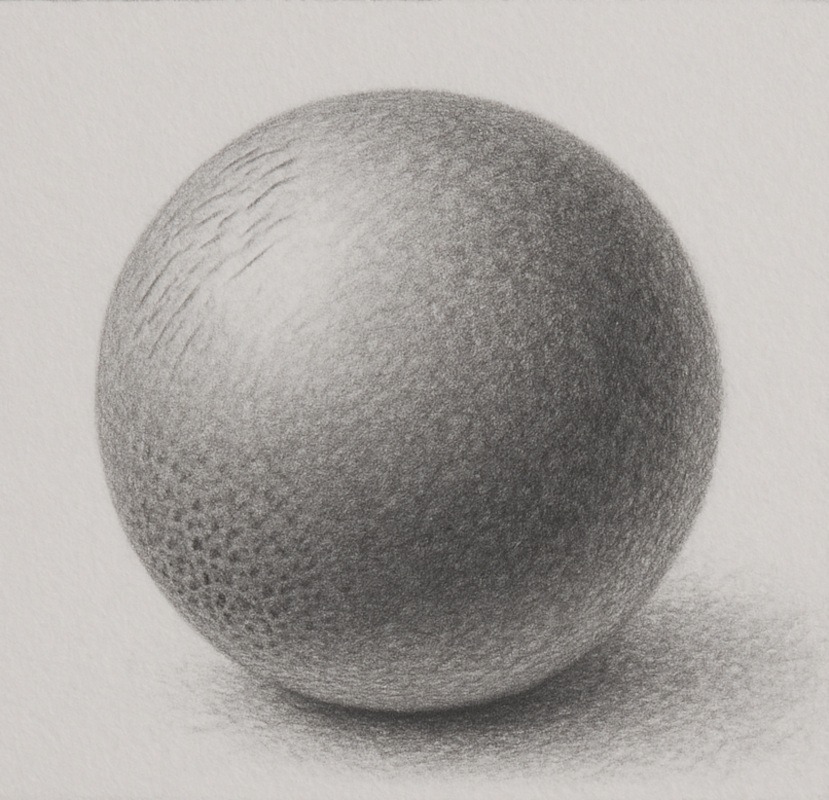
2. Shading Simple Shapes (The Classic Drill)
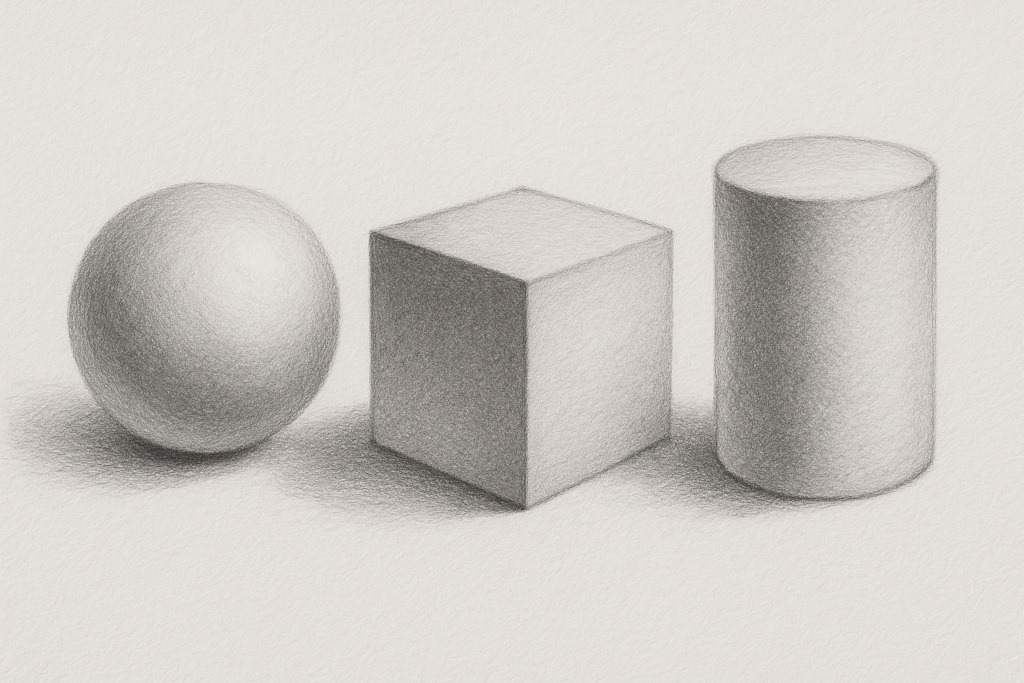
Draw a few basic shapes – a sphere, a cube, and a cylinder.
Decide on a single light source (top left works well) and shade each form based on that direction.
- Sphere: Focus on smooth transitions.
- Cube: Keep clear sides and edges distinct.
- Cylinder: Use curved shading to show its roundness.
Goal: Train your brain to see form instead of outlines.
If it helps, lightly sketch arrows showing where your light hits before you shade – it’ll make positioning shadows easier.
Remember: if your sphere looks like the moon, you’re doing great. If it looks like a potato – congratulations, you’ve invented a new monster.
3. Texture Tests (Creepy Surface Studies)
This is where things start getting horror-themed.
Pick small squares or circles and practice different shading techniques inside each:
- Hatching: fine lines for stretched skin
- Stippling: pitted or mouldy surfaces
- Scumbling: rough decay or dirt
- Cross-Hatching: cloth, wrinkles, and bone
Keep each patch about the size of a coin and label them.
You’ll build a library of creepy textures you can reuse for zombies, skulls, or anything unsettlingly lumpy.
Think of it as growing your own little graveyard of textures.
4. Mini Horror Challenge – Candlelit Object
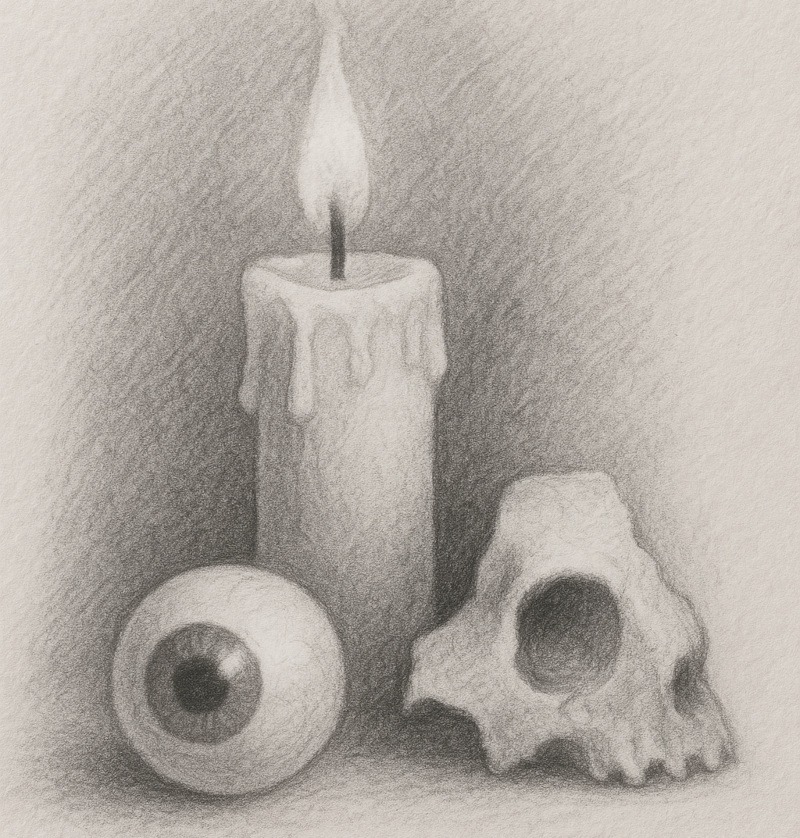
Now for a bit of fun: choose a small horror-themed object (like an eyeball, skull fragment, or candle) and imagine a single candle lighting it from one side.
Sketch the object lightly to start. Keep your lines soft at first – you can darken them later once your shadows are placed.
Use any combination of shading techniques you’ve learned to create strong light and shadow. Push your darkest tones right next to your brightest highlights to make it pop dramatically. Leave a thin strip of midtone between the light and dark so everything blends smoothly.
Goal: Practice using contrast to tell a story – the bigger the difference between light and dark, the more eerie and realistic it’ll look.
Pro Tip: Don’t worry about perfection. Even messy shading looks great in horror art – it adds atmosphere and grit.
How to Use These Drills:
- Do one or two drills before every drawing session.
- Rotate them – one day gradients, another day textures.
- Keep all your exercises together in a sketchbook so you can see your improvement over time.
“Every great horror artist started with a few messy spheres and scratchy shadows – the monsters come later.”
Final Thoughts
Shading is one of those magical skills that makes everything else fall into place – once you get it, you’ll start seeing light and form everywhere (yes, even in your tea stains).
Whether you’re crafting a ghostly portrait or a full zombie apocalypse scene, keep experimenting. Your creepy creations will only get stronger the more you play wth tone, texture, and contrast.
Keep practising, keep smudging, and remember – if it looks a little weird, that’s just your art finding its inner darkness.
What You Learned:
- Shading is what gives your creepy drawings depth, drama, and that delicious horror mood.
- Tone simply means how light or dark something is – no colour needed.
- Hatching, cross-hatching, stippling, scumbling, and blending each create different spooky textures.
- You can mix techniques to add realism, grit, and eerie atmosphere.
- Build your shadows slowly – you can always go darker, but reviving over-shaded paper is forbidden necromancy.
- Practising gradients, simple shapes, and textures helps you understand how light actually behaves.
- Strong contrast (bright highlights against deep shadows) instantly makes your horror art more dramatic and eye-catching.
Related Posts
Looking for more spooky shading wisdom? These posts will guide you deeper into the shadows: