Blending Tools for Graphite and Charcoal: A Horror Artist’s Guide
Behind every haunting drawing is a perfectly placed smudge – crafted, not accidental.
Blending might sound like the calm, peaceful part of horror art – the quiet whisper after all the dramatic linework is done. But let’s be honest… we both know it’s the moment where things either come together beautifully or dissolve into a graphite-stained panic spiral.
It’s where your foggy forests are born, your haunted cheekbones take shape, and your shadows either whisper “creepy masterpiece” or scream “why is this zombie’s face melting?” And the tools you use? They matter a lot.
Grab your blending stump, a clean tissue, and the quiet confidence of someone who absolutely did not just smear an entire cheekbone into the abyss. Let’s smudge up some spooky magic.
If you’re still putting together your art kit and aren’t sure what tools you actually need to start, check out my Beginner Guide to Horror Drawing Tools first.
Why Blending Tools Matter in Horror Art
In horror art, shadows aren’t just background noise – they’re the main character’s unspoken threat. A harsh line might be good for outlining a chainsaw, sure… but a soft, smudged shadow? That’s where the dread lives.
Blending is how you create:
- Moody lighting in haunted environments
- Decayed and worn textures on skin, fabric, and bone
- Atmospheric effects like fog, mist, or smoke
- Subtle depth that hints at something lurking just out of view
Whether you’re drawing a haunted doll, a rotting forest creature, or a fog-covered path that leads absolutely nowhere good, blending brings your horror art to life – or, you know… unlife.
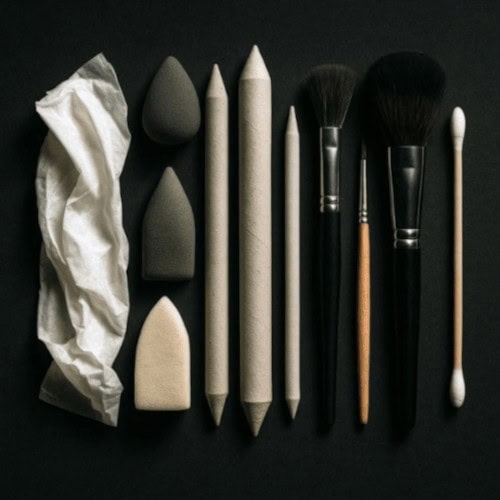
Meet the Blending Tools (and What They’re Good at)
Different blending tools give different effects. Some are precise and clean. Others are chaotic little goblins that smear everything in sight.
Let’s break them down:
Blending Stumps & Tortillons
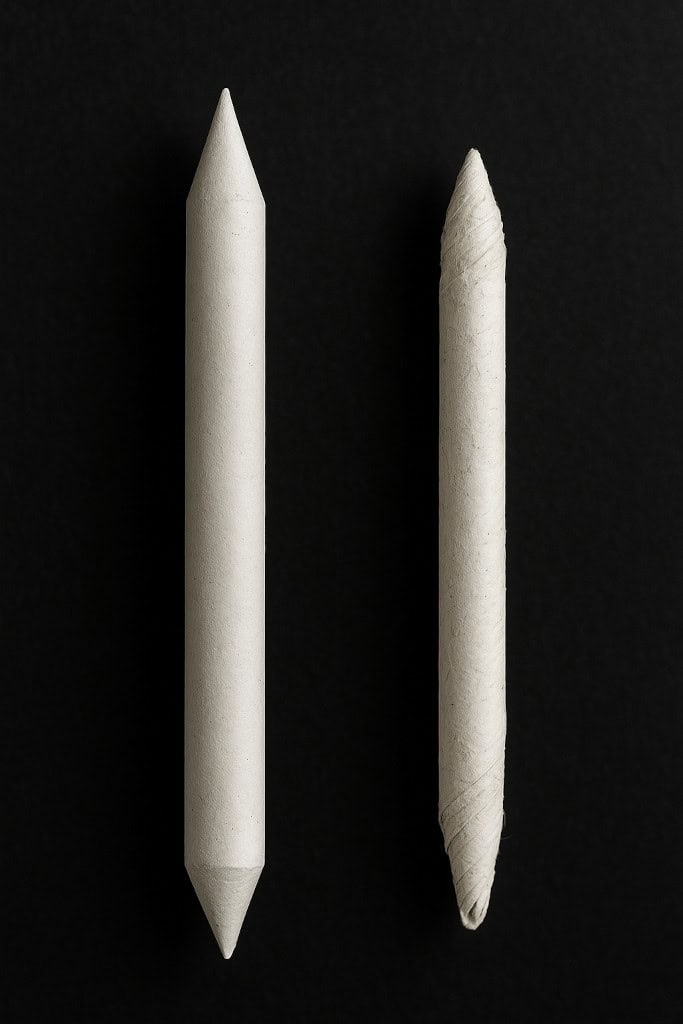
Best for: Fine details, tight spaces, and controlled shadows
These rolled paper tools are a horror artist’s go-to for subtle smudging – like defining deep eye sockets, or shading the fold of a cursed cloak. Stumps are thicker and easier to clean and reuse, while tortillons are pointier and better for squeezing into weird corners (like under a zombie’s eyebag).
If you’d like a full step-by-step breakdown of how to use them properly, check out my guides on How to Use Blending Stumps with Graphite and How to Use Blending Stumps with Charcoal.
Tips:
- Sharpen and clean with sandpaper for clean control
- Clean between uses or risk transferring old graphite (aka: “mystery smudge syndrome”)
Tissue or Toilet Paper
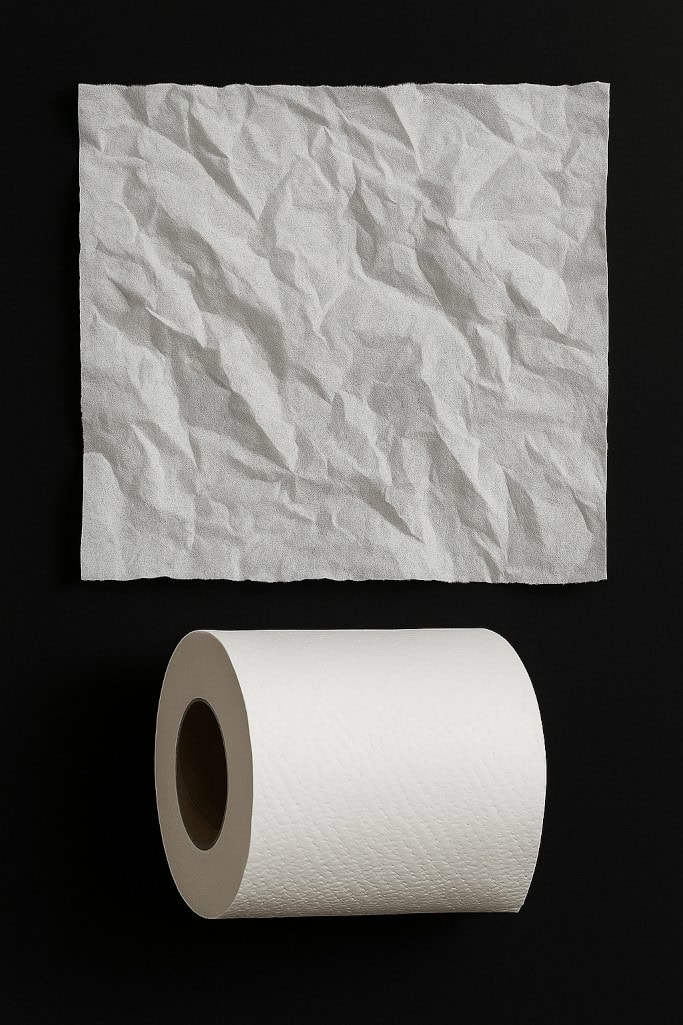
Best for: Soft gradients, misty backgrounds, and large shadowy areas
Tissues are a budget-friendly way to create dreamy (or nightmarish) effects. They’re perfect for foggy scenes, blurry backgrounds, and ghost silhouettes that fade gently into nothingness.
Tips:
- Fold it for control, or crumple it for texture
- Keep switching to clean parts to avoid smudging your smudge
Makeup Sponges or Eyeshadow Applicators
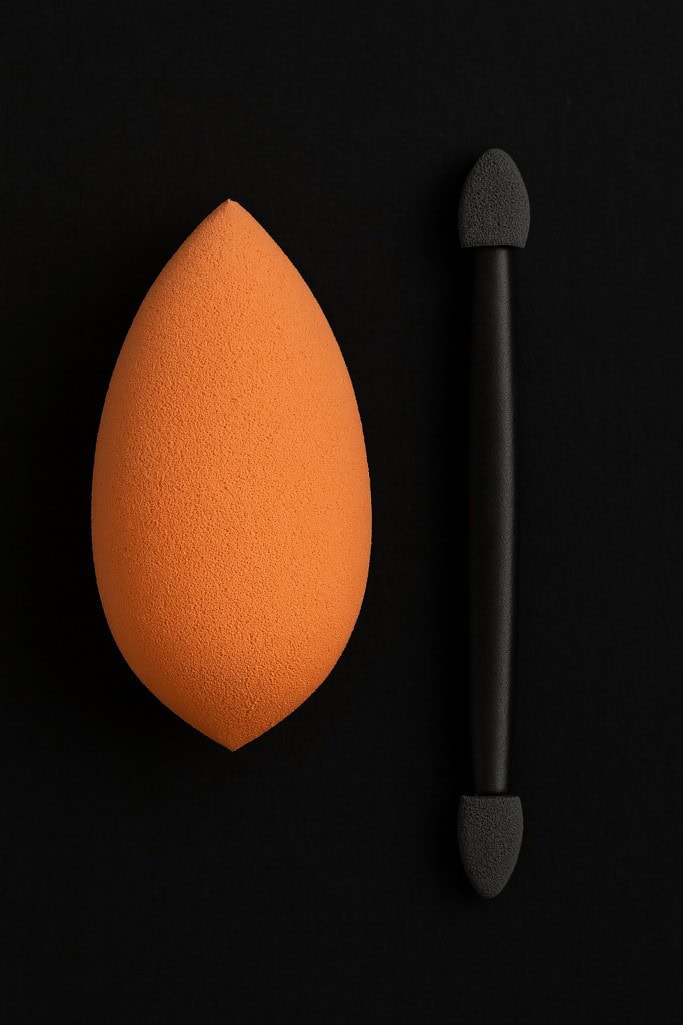
Best for: Smooth textures, skin shading, and glowing effects
Who knew your blending MVP might be hiding in your makeup bag? These soft sponges apply graphite or charcoal like a dream – perfect for waxy undead skin, soft light gradients, or shadowed areas that need a clean finish.
Tips:
- Cut into angles for better control
- Use gently – sponges can accidentally lift more graphite than intended if pressed too hard
Soft brushes (Dry)

Best for: Subtle texture work, fog effects, and blending charcoal
Brushes are amazing for ghost-like softness – think distant fog, dusty corners, or atmospheric gloom. They’re also less likely to leave harsh marks like tissues can.
Tips:
- Use a circular motion for haze
- Clean between uses, or your fog may accidentally look like ash from a house fire
Cotton Swabs (Q-Tips)

Best for: Tiny details, touch-ups, and small-area blending
Q-tips are great for blending around the eyes, between the teeth, or inside small, decayed crevices. They’re especially handy for softening small highlights or smoothing where stumps can’t quite reach.
Tips:
- Rotate to the clean side frequently
- Avoid over-blending – they grab graphite fast
Your Fingers
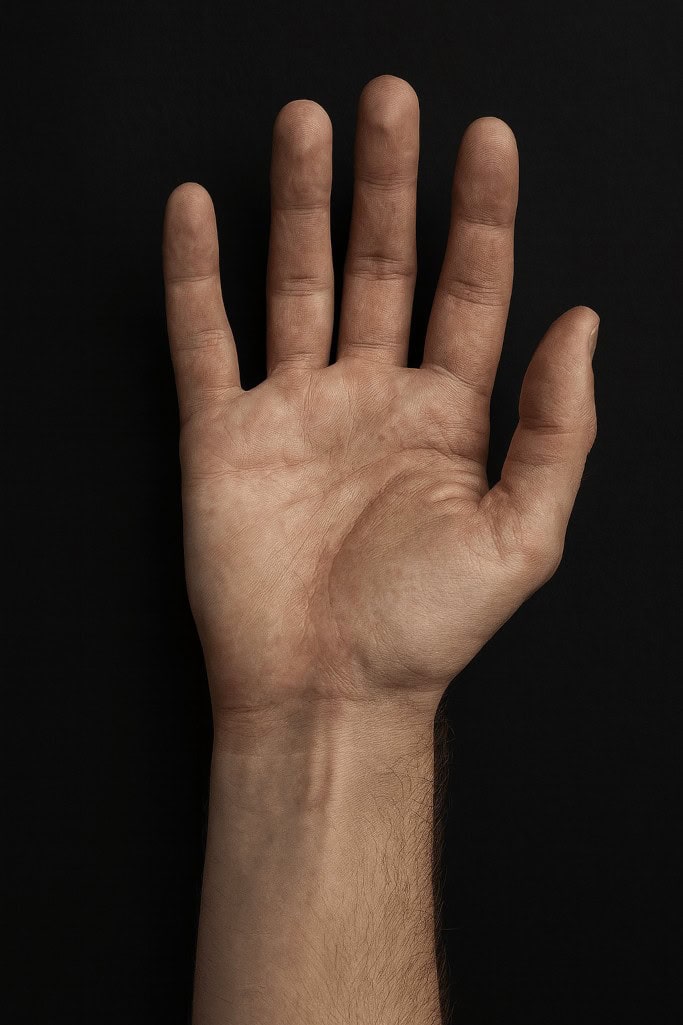
Best for: Chaos (and last resorts)
Using your fingers to blend is tempting. They’re right there. You’re in the zone. What could go wrong?
A lot, actually. Your fingers contain natural oils that can stain your paper or make the graphite behave weirdly. But hey – if you want a rough, raw look for textured horror work? Sometimes fingers do the trick.
Tips:
- Wash your hands before and after
- Use on scrap paper first if you’re unsure – don’t risk a finished piece!
Common Blending Mistakes (and How to Fix Them)
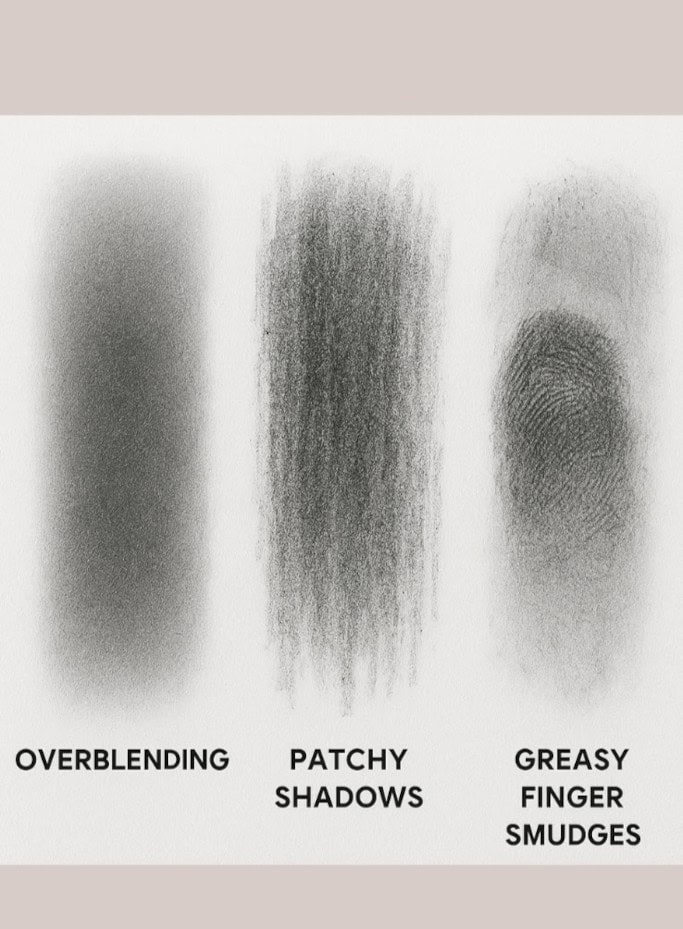
Let’s be honest – blending has a bit of a learning curve. Here are the top three smudge sins (and how to redeem your spooky soul):
1. Overblending Everything
The issue:
Everything turns grey. Shadows flatten. Your ghost ends up looking like a sad, potato-like figure.
Fix it:
Use blending selectively. Keep contrast by leaving some edges sharp.
2. Patchy Shadows
The issue:
Uneven tone, streaky shading, blotchy undead skin.
Fix it:
Blend in small circles and layer graphite before smudging. Don’t try to fix it all in one pass.
3. Greasy Finger Smudges
The issue:
That haunting eye you drew now has a thumbprint of doom.
Fix it:
Use a kneaded eraser to lift the stain, or blend over it with charcoal to hide the crime.
Blending for Specific Horror Effects
Looking to create a specific mood?
Use the right blending tool for the job:
- Fog & Mist: Tissue or brush, circular motions, gentle pressure
- Rotting Flesh: Sponge + eraser lift for uneven texture
- Sunken Eyes: Tortillon + soft brush layering
- Apparitions: Soft brush, no outlines, gentle ghostlike blend
- Creepy Lighting: Blending stump for shadows, sponge for glow
Want to go all in? Try combining tools – like layering with a tissue, refining with a stump, then erasing back the highlight. Think of it like building the perfect haunted sandwich.
Cleaning & Storing Your Blending Tools
Smudging with a dirty stump is like brushing your teeth with a rusty fork.
Cleaning Tips:
- Blending stumps/tortillons: Sandpaper block, nail file, or a fine-grit pad
- Brushes: Wipe on tissue or use a kneaded eraser
- Sponges: Wash gently with soap and dry completely
- Q-tips & Tissues: Single-use only – let them rest in peace
Storage Tips:
- Keep blending tools away from erasers and pencils (to avoid grime transfer)
- Use a zip pouch, pencil case, or old tin (bonus points for a repurposed coffin box)
- Store clean tools separately from used ones to prevent “phantom smudges”
Horror Blending Practice Prompts
Time to get those graphite ghosts onto paper.
Here are a few prompts to help you experiment with your blending tools while keeping things deliciously creepy:
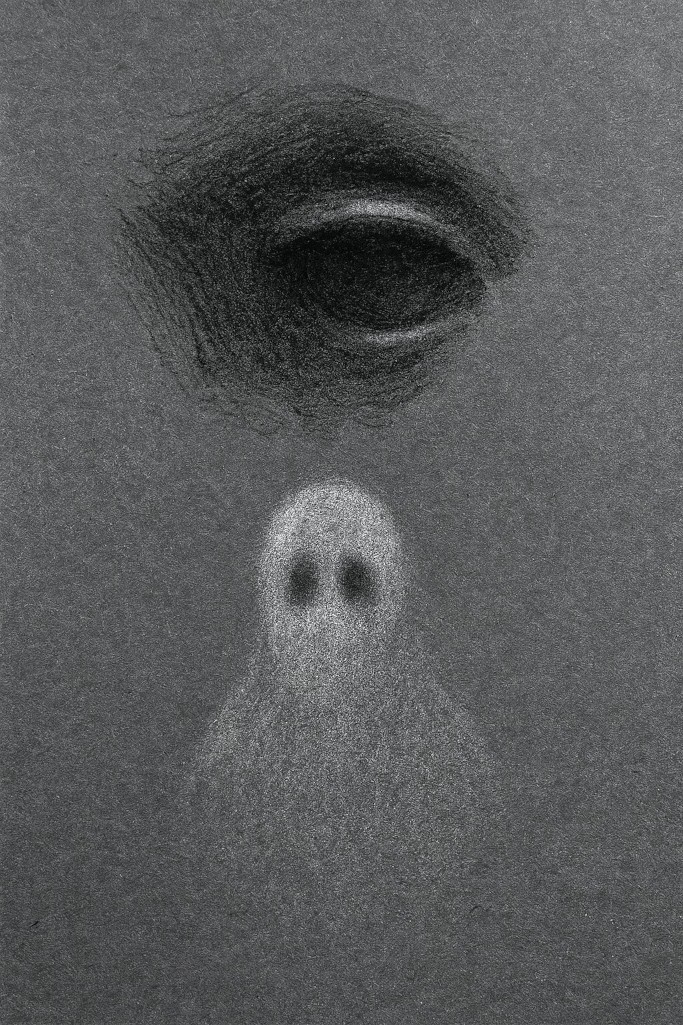
- Draw a ghost fading into mist. Use a tissue or soft brush to create blurred edges and an eerie fade.
- Sketch a rotting face with cracked cheekbones. Use a stump to define hollow areas, and a sponge to add uneven texture.
- Create a haunted forest background. Try blending the trees into fog using a makeup sponge or crumpled tissue.
- Blend a shadow that’s stretching toward something. Practice directional blending to create creepy motion.
- Redraw an old piece using your new tools. Compare the two and marvel at how much difference one Q-tip can make.
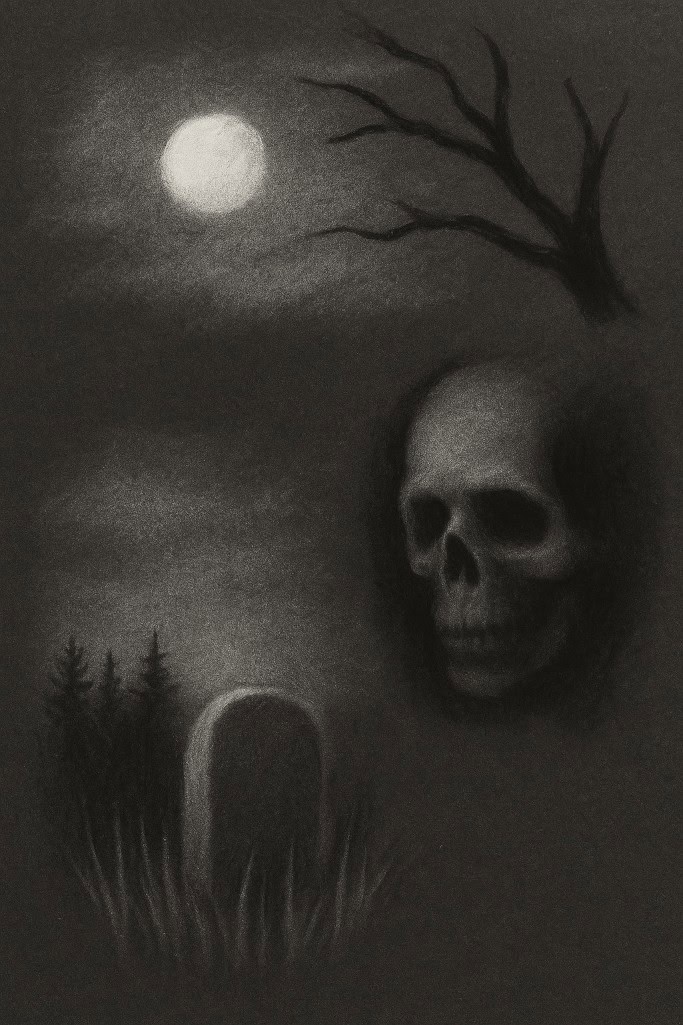
- Add a skull emerging from darkness. Use a tortillon or brush to smudge in bone texture and shadowed hollows.
- Try ghostly face distortion. Blur the edges of facial features to make them look like they’re melting, shifting, or vanishing.
Final Thoughts: From Shadows to Spooky Success
Blending in horror art isn’t about perfection – it’s about atmosphere, mood, and those eerie little details that linger in your viewer’s brain long after they’ve scrolled past. Whether you’re using a cotton swab, an old brush, or a tissue from the void, your blending tools help bring your dark ideas to life (or something close to it).
Don’t be afraid to mess up. Smudging is a messy, magical, mildly haunted process – and that’s the fun of it.
What You Learned:
- Different blending tools create different effects – from smooth gradients to textured shadows and atmospheric haze.
- Stumps and tortillons give you precision in tight spaces, while tissues and sponges build soft, foggy transitions.
- Brushes help you create ghost-like softness, dusty corners, and subtle texture without harsh lines.
- Q-tips and fingers work in a pinch, but clean tools always give you more control and fewer accidental smudges.
- Blending mistakes happen – but fixing them is easy with selective smudging, layering graphite, or lifting marks with an eraser.
- Using the right tool for each horror effect (fog, rotting skin, sunken eyes, creepy lighting) lets you build atmosphere with intention.
- Clean and store your tools properly to avoid grime transfer, muddy shading, and unexpected ghostly fingerprints.
Related Horror Art Tools & Materials
If you’re stocking up your haunted toolbox, don’t stop at blending tools. Check out these cursed companions:
- Sketchbooks & Paper Types
Choose the perfect paper to match your vibe – whether it’s smooth as a vampire’s charm or textured like a crypt wall. - Pencil Sharpeners
Your cursed creations deserve a sharp point. Dull pencils lead to muddy shadows and artistic heartbreak. - Coloured Gel Pens
From glowing eyes to forbidden symbols, these inky tools add vivid horror pops that shimmer against the void.