Fixatives and Sealants for Graphite and Charcoal Drawings
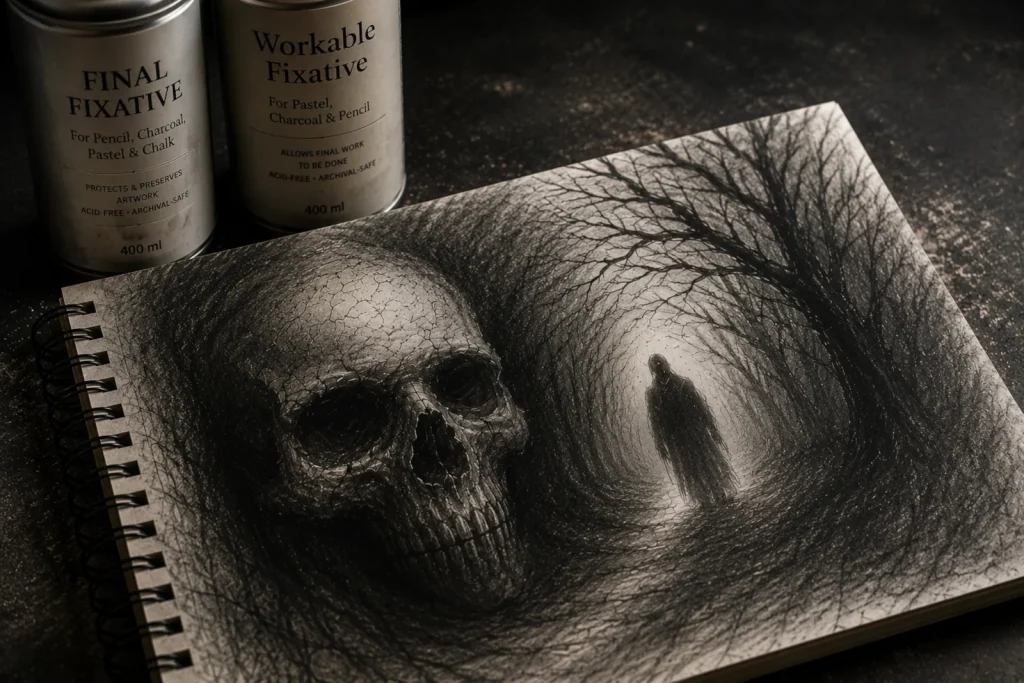
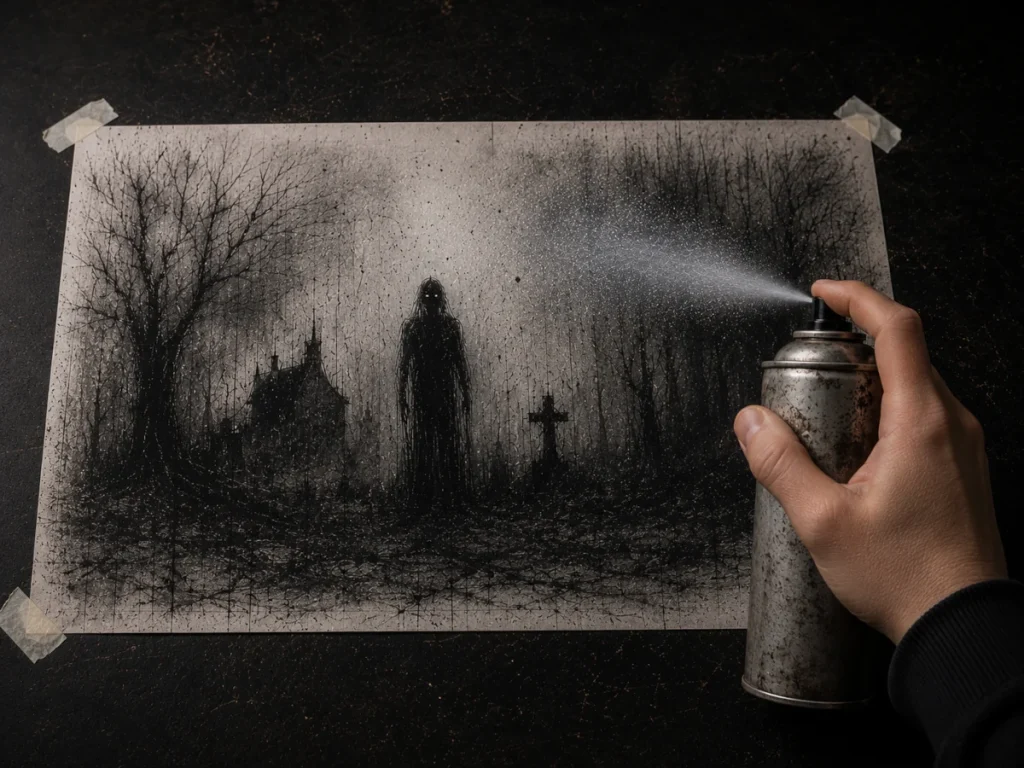
Fixative settles over your drawing like a cold breath, locking every detail exactly where it belongs.
You’ve spent hours (or possibly centuries, depending on your undead status) crafting a horrifyingly beautiful drawing. The shadows are perfect, the monster’s expression is chillingly delightful – and then… smudge. One careless swipe, and your masterpiece looks like it’s been attacked by an overenthusiastic eraser poltergeist.
That’s where fixatives and sealants come in. These sprays act as invisible guardians, protecting your work from fingerprints, fading, smudging and accidental blurring so your artwork stays exactly as intended.
Fixatives are mainly used during or after drawing to hold loose graphite, charcoal, or pastel in place, while sealants provide stronger long-term protection for finished artwork.
Think of them as the final protective layer standing between your artwork and absolute chaos.
WHAT YOU’LL LEARN:
In this guide, you’ll learn how to protect your horror artwork using fixatives and sealants without accidentally ruining your shadows, textures, or carefully crafted details.
- The difference between fixatives and sealants
- The different types of fixatives, including workable, final, matte, glossy, and satin sprays
- When to use each type for graphite, charcoal, pastel, ink, and mixed media artwork
- How to apply fixatives properly without causing blotches, warping, or uneven coverage
- How fixatives affect different drawing mediums and textures
- The best ways to preserve artwork long-term using archival sprays
- Common fixative mistakes and how to avoid them
- Important safety and ventilation tips for spraying indoors or outdoors
- How fixatives and sealants help preserve atmosphere, shadows, and fine details in horror art
Types of Fixatives
Not all sprays are created equal.
Here’s what lurks on the art store shelves:
- Workable Fixatives – Semi-permanent sprays that lightly “set” your drawing so you can continue working on top without smudging previous layers. Great for building up graphite or charcoal gradually without turning your carefully built shadows into muddy chaos.
- Final Fixatives – Used once your artwork is fully complete. These create a stronger, longer-lasting protective layer that helps prevent smudging, fading, and accidental damage over time.
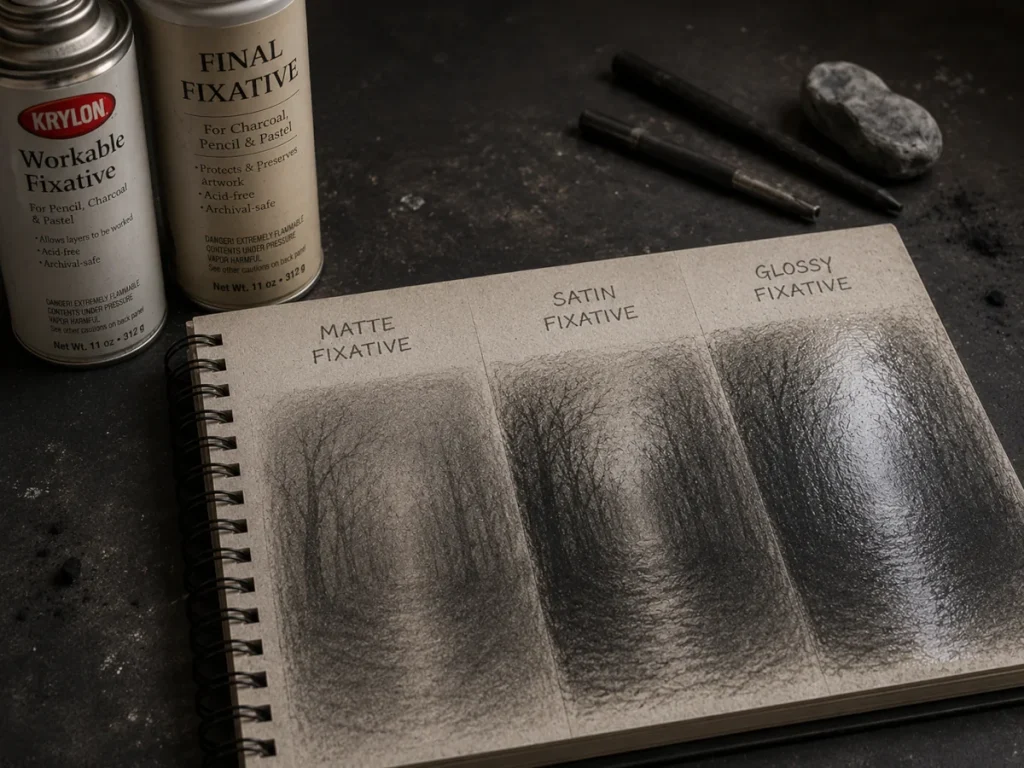
- Matte Fixatives – Leave a smooth, non-shiny finish. Perfect for horror artwork with misty atmospheres, soft shadows, and darker mood-driven pieces.
- Glossy Fixatives – Add a reflective shine to the surface. Useful for wet slime effects, blood, or anything meant to appear slick and unsettling.
- Satin Fixatives – A middle ground between matte and glossy, giving artwork a subtle sheen without becoming overly reflective or distracting.
Workable Fixatives – Locking in the Darkness
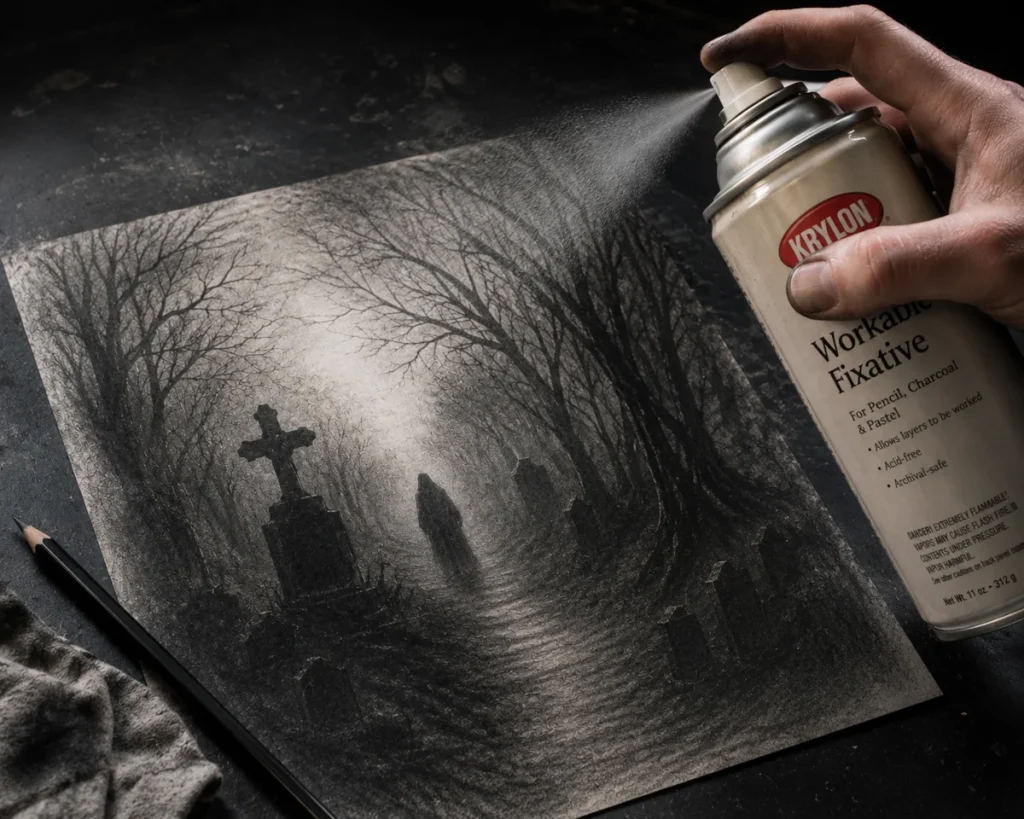
What They Do:
Workable fixatives lightly set your graphite, charcoal, or pastel so you can continue building layers without smudging previous work. They help protect shadows and textures while still allowing you to erase, redraw, and build new details on top.
They’re especially useful for complex horror artwork where you’re gradually building atmosphere, depth, and contrast over multiple layers.
When to Use:
- Building foggy graveyard shading in graphite or charcoal.
- Layering charcoal over pencil without muddying the surface.
- Adding highlights and details gradually while protecting darker shadows underneath.
- Experimenting with textures and atmosphere without constantly smudging earlier layers.
How to Apply:
- Lay your drawing flat on a clean surface in a well-ventilated area.
- Shake the can thoroughly before spraying. (No need to summon the dead first.)
- Hold the spray roughly 10–12 inches away from the artwork.
- Apply light, even coats using slow sweeping motions.
- Let each layer dry fully before drawing on top again.
Final Fixatives – Preserving Your Cursed Relics
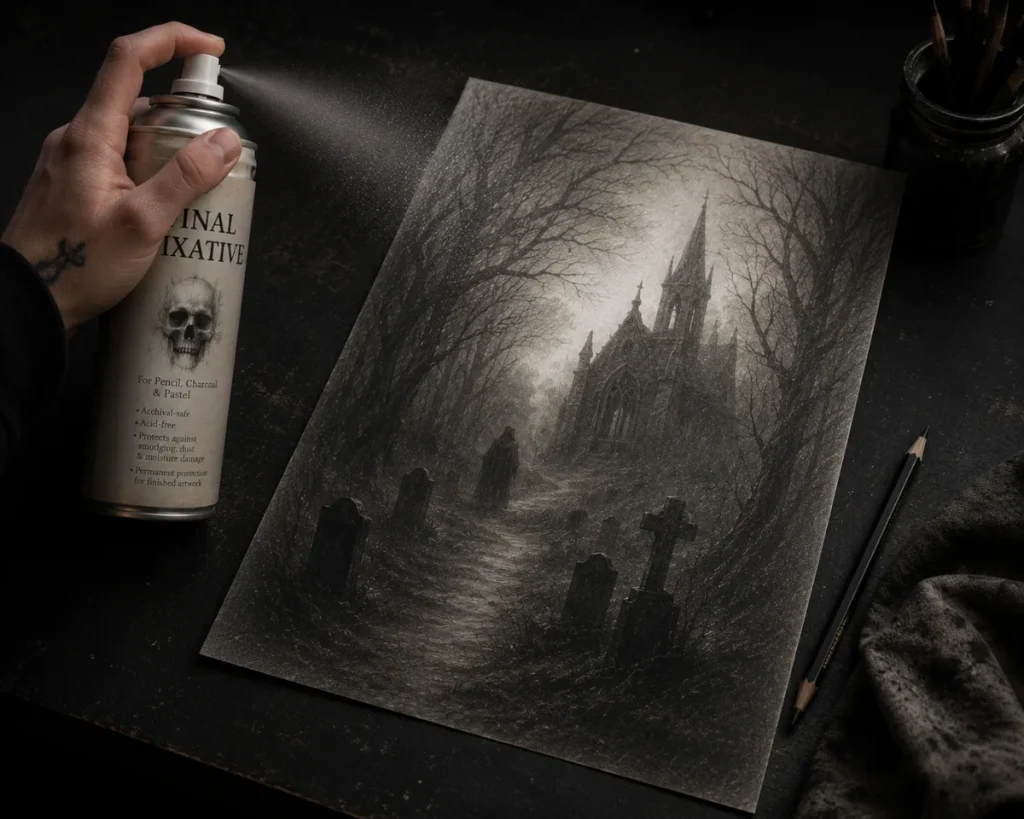
What They Do:
Final fixatives are designed for completed artwork. Once applied, they create a durable protective layer that helps prevent smudging, fading, dust, moisture damage, and accidental fingerprints.
Unlike workable fixatives, these are not meant for continued drawing afterwards. They permanently seal the surface to help preserve your artwork over the long term.
When to Use:
- After fully finishing a graphite or charcoal drawing.
- Before storing, transporting or framing your artwork.
- When you want to protect delicate shading and fine details from damage over time.
- For finished horror pieces with heavy charcoal or soft atmospheric blending that smudge easily.
How to Apply:
- Place your artwork flat in a well-ventilated area.
- Shake the can thoroughly before spraying.
- Apply several light coats rather than one heavy layer.
- Keep the spray moving evenly across the surface to avoid blotches or drips.
- Allow the artwork to dry completely before touching or framing it.
One careless heavy spray can darken details, flatten contrast, or leave shiny patches – so patience matters.
Sealants for Mixed Media – Making Monsters Play Nicely

What They Do:
Sealants create a protective barrier between different art materials, helping mediums like graphite, charcoal, coloured pencil, ink, pastel, and acrylic work together without smudging or muddying one another.
They’re especially useful in mixed media horror artwork, where heavy shadows, sharp highlights, splattered textures, and layered details can easily become messy without protection between stages.
When to Use:
- Adding ink blood splatters over graphite or charcoal shading.
- Layering coloured pencil details over dark charcoal backgrounds.
- Protecting soft pastel highlights before adding more texture on top.
- Building complex mixed media horror pieces with several fragile layers.
Helpful Tip:
Always test your sealant on scrap paper first. Some sprays can slightly darken graphite, dull pastel highlights, or change how later layers behave.
Application Techniques
Spraying may sound simple, but poor application can ruin hours of work in seconds.
- Distance matters: Hold the spray roughly 10–12 inches away for the most even coverage. Spraying too close can create dark, blotchy patches.
- Sweep, don’t blast: Use smooth side-to-side motions instead of spraying one spot continuously.
- Layer lightly: Several thin coats are far safer and more effective than one heavy layer. Heavy coats can darken graphite, flatten texture, or leave glossy spots.
- Flat vs vertical: Laying your artwork flat is usually the safest option, though you can tape it vertically if needed for controlled spraying.
- Test first: Always spray a scrap piece before using a new brand or finish on your final artwork.
Patience matters with fixatives. Rushing the process is a fantastic way to fingerprint your masterpiece into oblivion.
How it Affects Different Mediums
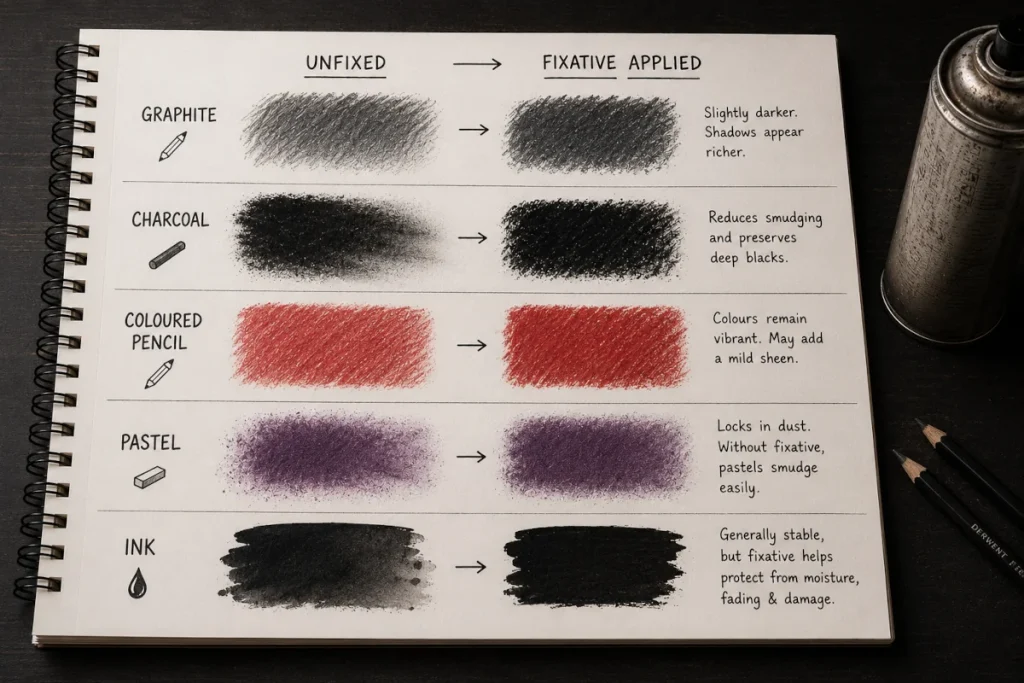
- Graphite: Fixatives often deepen tones slightly, making shadows appear richer and darker. Heavy application can reduce subtle gradients and make shaded areas look overly flat.
- Charcoal: One of the biggest beneficiaries of fixative. It dramatically reduces smudging while helping preserve deep blacks and smoky textures.
- Coloured Pencil: Some fixatives can slightly intensify colours or add a mild sheen, especially with glossier finishes.
- Pastels: Extremely delicate and highly dependent on fixative protection. Without it, soft pastel layers can easily smudge, fade, or lift away.
- Ink: Usually stable on its own, though sealants can add extra protection against moisture, fading, and surface damage.
Different brands react differently to different materials, so testing first is always worth the extra few minutes.
Archival Longevity
Not all fixatives are designed for long-term preservation.
- Acid-free archival sprays help protect artwork from yellowing, fading, and paper deterioration over time.
- Lower-quality sprays can discolour artwork, alter tones, or become brittle as they age.
- UV-resistant sealants can also help reduce fading if your artwork will be displayed in bright rooms or indirect sunlight.
If you want your artwork to survive for years without losing detail, tone, or atmosphere, choosing an archival-quality fixative is well worth it.
Common Problems & How to Fix Them
- Blotches: Usually caused by spraying too closely; Hold the spray slightly farther back and apply lighter, misted coats.
- Shiny spots: Often caused by uneven coverage or overspraying; Rotate the artwork and reapply lightly.
- Warped paper: Too much moisture can soak thinner paper; Use lighter coats and heavier drawing paper.
- Yellowing: Typically caused by low-quality sprays; Archival fixatives help prevent long-term discolouration.
Most fixative disasters come from spraying too heavily or rushing the drying process.
Safety & Ventilation
These sprays may seem harmless, but they should always be used with proper ventilation and care.
- Always spray in a well-ventilated area, preferably outdoors, on a balcony, or near an open window.
- Wear a mask when possible, especially when working with multiple layers or spraying for long periods.
- Protect your surroundings with cardboard, newspaper, or a spray box to avoid unwanted residue on nearby surfaces.
- Keep sprays away from flames or heat sources, as many fixatives are flammable.
- Allow the artwork to dry fully before bringing it back indoors or stacking it with other drawings.
Your artwork should smell unsettling because of the subject matter – not because you’ve accidentally fumigated the room.
Wrapping It Up
Fixatives and sealants might not be the flashiest tools in your horror art kit, but they’re the unsung guardians that keep your creations safe long after the drawing is complete. Whether you’re layering misty shadows with a workable fixative, sealing a finished demon portrait with a final spray, or combining different mediums with a mixed-media sealant, these invisible protectors help defend your art from smudges, fading, and accidental damage.
When handled properly, they can mean the difference between a masterpiece that survives the ages… and one that dissolves into a tragic smudge-blur of doom.
So next time you finish a drawing, don’t leave it at the mercy of fingerprints, dust, or careless handling. A quick spray is often all it takes to lock in your shadows and keep your horrors looking freshly sinister for years to come.
What You Learned:
- Fixatives and sealants protect drawings from smudging, fading, fingerprints, and accidental damage.
- Workable fixatives allow you to lock a layer in place while continuing to draw, shade, erase, and build textures on top.
- Final fixatives permanently seal finished artwork and help preserve graphite and charcoal drawings over time.
- Matte, glossy, and satin fixatives create different surface finishes depending on the mood and effect you want for your artwork.
- Sealants are especially useful for mixed media artwork, helping graphite, charcoal, coloured pencil, pastel, ink, and other materials work together more safely.
- Correct spraying techniques matter, including keeping the can around 10-12 inches away and building up several light coats instead of one heavy layer.
- Different mediums react differently to fixatives, with graphite becoming darker, charcoal losing some dustiness, and pastels requiring extra protection.
- Archival fixatives help preserve artwork long-term by reducing yellowing and deterioration over the years.
- Common fixative problems like blotches, shiny spots, warped paper, and yellowing can usually be prevented with proper application methods.
- Safety and ventilation are essential when using aerosol sprays, especially indoors or when applying multiple layers.
- Fixatives and sealants help horror artwork stay crisp and atmospheric, preserving shadows, textures, highlights, and details long after the drawing is finished.
Explore More Horror Art Tools
Want to keep building your haunted toolkit? Check out these other guides:
- Best Sketchbooks and Paper Types for Horror Art (Complete Guide)
Texture vs smooth, and how the right paper can take your artwork from “meh” to magnificently macabre. - Ink and Dip Pens for Drawing
Inky shadows, creepy cross-hatching, and dripping dread brought straight onto the page. - Specialised Markers for Drawing
Smooth blends, cursed colour washes, and backgrounds soaked in pure atmosphere.