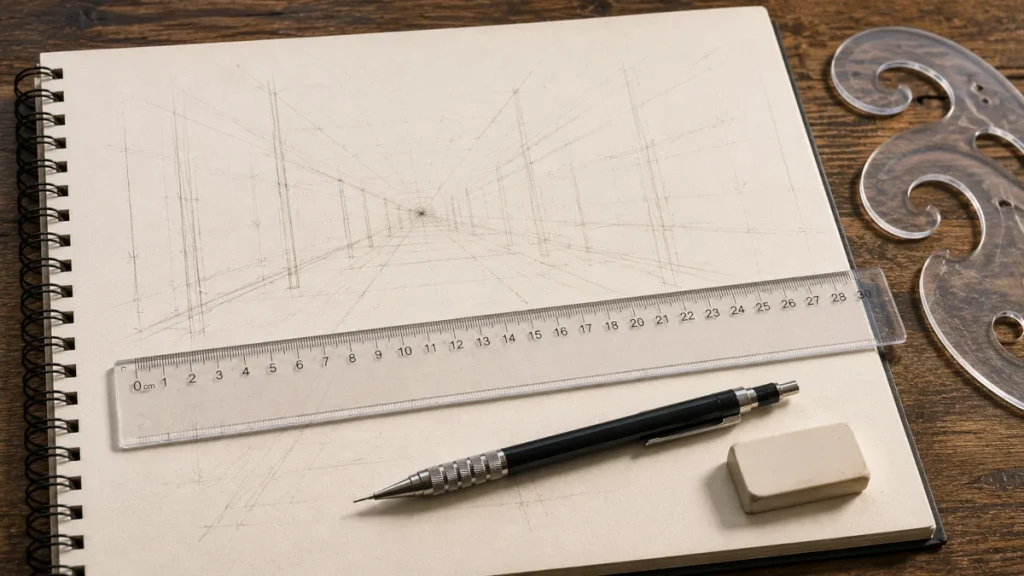
Rulers and French Curves: The Unsung Heroes of Horror Art
When your lines behave, your shadows misbehave even better.
If horror art tools ever had a high-school yearbook, rulers and French curves would definitely be “the quiet kids in the back.” They’re not flashy, they don’t demand attention, and nobody brags about owning them – until you realise they’re secretly the ones holding everything together.
Look closely, and these unassuming little tools are the backbone of haunted mansions, crooked hallways, ritual circles, and monster anatomy that actually makes sense. Without them, your elegant arches turn to wobbly noodles, your hallways collapse into chaos, and your creature’s horns have the structural integrity of soggy pasta.
This guide breaks down how to use these underrated heroes to build strong, eerie compositions without making your drawings look stiff or technical. You’ll learn how to balance structure with chaos, where straight lines belong in horror art, and how curved templates can transform messy sketches into dramatic shapes that still feel alive.
These tools are especially powerful when building accurate perspective, gothic architecture, creature anatomy, and environmental details in horror scenes. A ruler won’t make your artwork scary on its own, but it will help create the believable foundations that make horror art feel far more convincing.
What You’ll Learn:
In this guide, you’ll learn how to use rulers and French curves to create accurate structures, smooth organic shapes, and stronger horror artwork.
- How rulers can improve perspective, architecture, and structured designs in horror artwork
- How French curves help create horns, tentacles, flowing fabric, and other organic shapes
- Ways to use these tools for ritual circles, sigils, and arcane symbols
- Common mistakes beginners make and how to avoid them
- Simple tips for caring for and storing your drawing tools
- How to combine precise tool work with hand-drawn imperfections for more atmospheric horror art
What Are Rulers & French Curves?
Rulers
A ruler is exactly what it sounds like – but in horror art, it becomes much more than a straight-line dispenser.
Rulers help create the structure that makes unsettling scenes feel believable. Whether you’re drawing abandoned hallways, haunted buildings, ritual symbols, fences, windows, or dramatic perspective lines, a ruler helps keep everything consistent and convincing.
Rulers Help You:
- Lay down accurate perspective lines
- Draw believable environments and props
- Create long corridors that feel endless
- Add structure to complex scenes
- Keep sketchbook layouts neat for tutorials or comic-style spreads
- Avoid the dreaded “my wall is definitely melting, and I didn’t mean for it to” effect
Why Horror Artists Love Them
A clean, confident line creates a sense of stability – and stability makes the chaos in your drawing stand out beautifully. When everything is wobbly, nothing looks spooky.
Many horror scenes rely on perspective to create tension and atmosphere. A ruler helps viewers believe the space they’re looking at, which makes the creepy elements feel far more effective when they appear.
Common Horror-Art Jobs for a Ruler
- Hallways disappearing into darkness
- Haunted house architecture
- Window frames and doors
- Coffins and grave markers
- Comic panels and page layouts
- Ritual circles with measured spacing
- Creature armour and mechanical details
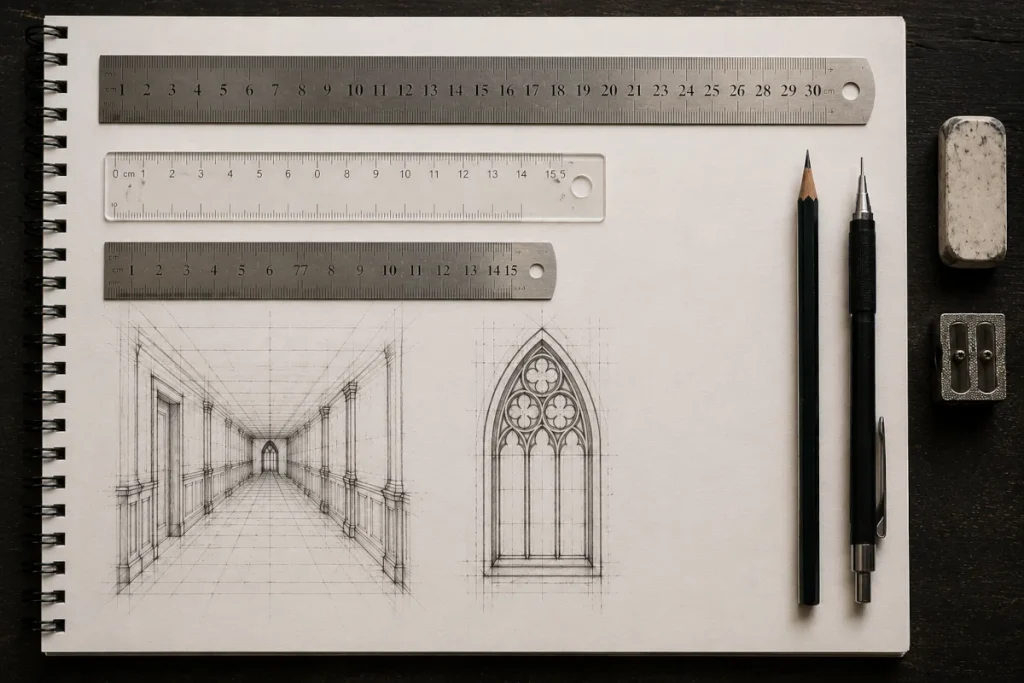
What Types Exist
- Plastic rulers – light, affordable, easy to carry, and often transparent for better visibility.
- Metal rulers – durable, highly accurate, and useful if you ever combine drawing with craft knife work.
- Short rulers – ideal for sketchbooks, thumbnails, and smaller studies.
- Long rulers – excellent for perspective work, architecture, and dramatic horror environments.
For most artists, a simple 30 cm ruler is all you need to get started. You don’t need a drawer full of specialised measuring tools before drawing your first haunted mansion.
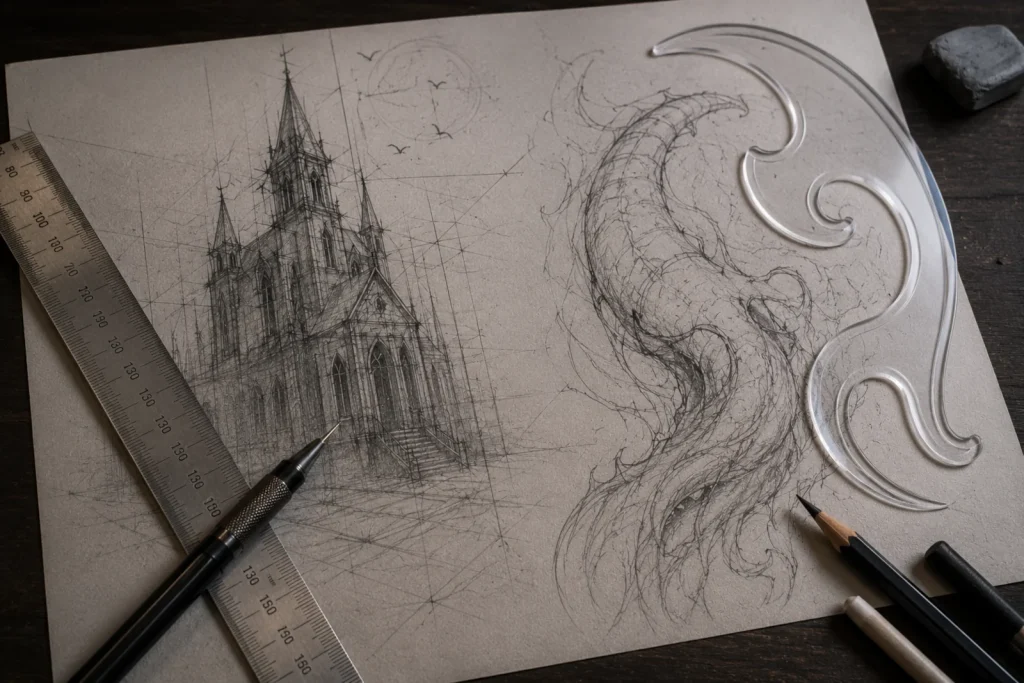
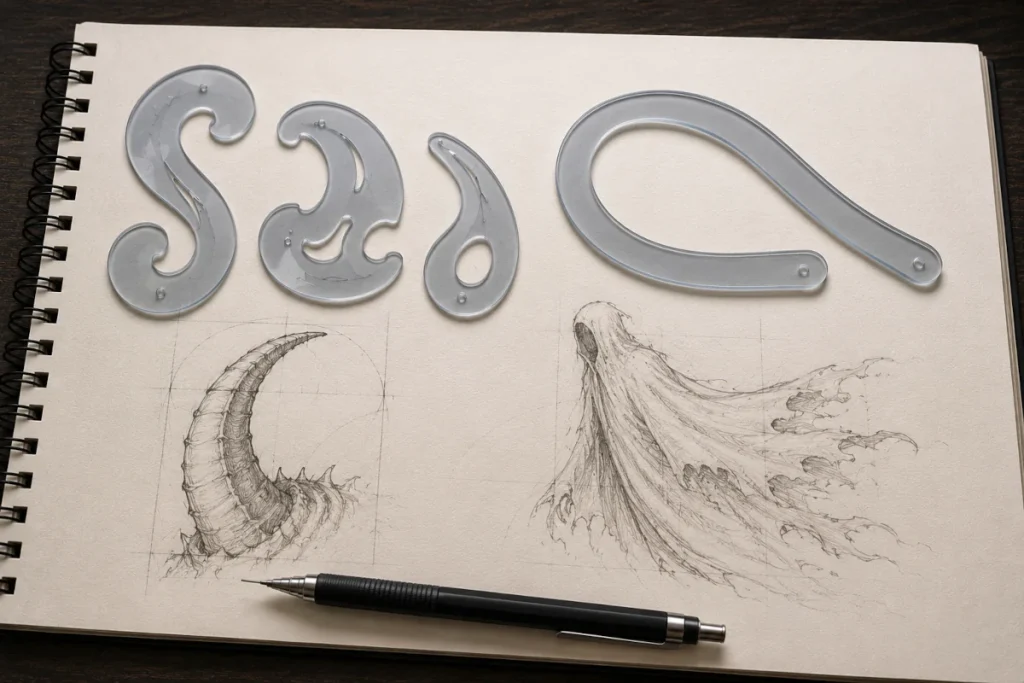
French Curves
A French curve set looks like someone caught a ghost mid-swoop and turned its shape into plastic. They’re curved templates designed to help you draw elegant, smooth arcs you’d struggle to freehand.
Unlike rulers, which create order with straight lines, French curves help you create controlled organic shapes. They’re particularly useful when a curve needs to look intentional, smooth, and believable rather than slightly wonky.
French Curves Help With:
- Horns, tusks, tails, and tentacles
- Flowing capes and dramatic ghost robes
- Curved staircases, archways, and window frames
- Summoning circles, occult symbols, partial circles, and eerie portals
- Decorative gothic shapes and architectural flourishes
Why They Matter in Horror Art
Horror thrives on contrast – the jagged next to the smooth, the rigid next to the organic, the elegant next to the grotesque.
French curves give you control over the elegant parts, while your shading and textures handle the creepy parts. They’re especially useful when drawing creatures, haunted architecture, and supernatural effects because smooth curves often make designs feel more believable and visually appealing before you start adding distortion and decay.
A well-placed curve can make a creature’s horn feel natural, a gothic arch feel grand, or a tentacle feel like it’s genuinely twisting through space rather than simply bending at random.
Flexible Curves
You can also use flexible curves, which bend into almost any custom shape and hold their position while you draw.
These are excellent for:
- Monstrous anatomy
- Twisting tentacles
- Serpentine creatures
- Alien architecture
- Organic horror designs
If a standard French curve can’t quite match the shape you’re trying to create, a flexible curve often can.
Many artists never move beyond standard French curves, but flexible curves are especially useful when designing creatures and environments with unusual or unpredictable shapes.
Why These “Boring” Tools Are Actually Horror Powerhouses
Most beginners look at rulers and French curves and think, “Ugh. Maths class flashbacks.”
But in horror art, they unlock three huge advantages that can make your drawings look more believable, more professional, and far more atmospheric.
1. Believable Backgrounds
No matter how spooky your creature is, it won’t shine if the background looks like a cardboard set someone kicked during filming.
Straight lines and clean curves make environments feel believable, which helps your monsters feel believable too.
When viewers believe the space around your creature, they’re far more likely to believe the creature itself. Strong construction creates a foundation that allows all your creepy details, shadows, and atmosphere to feel convincing.
Example
A crooked haunted hallway instantly feels creepier because the structure beneath it is accurate. Your shadows and decay sit on top of something solid and believable.
The stronger the underlying construction, the more effective the horror becomes.
2. Dramatic Composition
Want a corridor that looks like it stretches into infinity?
A staircase that curls into darkness?
A house that looms over the viewer?
These tools make that possible without guesswork.
Rulers and French curves help guide the viewer’s eye exactly where you want it to go. In horror art, composition isn’t just about making a drawing look nice – it’s about controlling tension, directing attention, and building anticipation.
A well-placed line or curve can pull the viewer deeper into the scene, making them feel as though they’re standing inside the nightmare rather than simply looking at it.
Example
A simple vanishing point plus a ruler creates a hallway that drags your viewer’s eye straight into the darkness. Add flickering lights, cracked walls, and deep shadows later, and suddenly you’ve created a scene filled with tension and dread.
The composition does the heavy lifting before the horror details even arrive.
3. Controlled Contrast
- Rulers = structure
- French curves = elegance
- Freehand = chaos
Blend all three, and you get visual tension – which horror absolutely thrives on.
The strongest horror artwork rarely relies on a single type of mark. Instead, it combines clean, controlled elements with rough, unpredictable ones. The contrast between order and disorder is often what makes a drawing feel unsettling.
Straight lines create stability. Smooth curves create beauty. Rough sketch marks and textures create unease.
When all three appear together, the viewer subconsciously notices the conflict between them, helping to create atmosphere and tension.
Example
A perfectly smooth French-curve demon horn next to rough, scratchy shading. A grand gothic archway surrounded by crumbling stone. A carefully constructed hallway disappearing into darkness.
The contrast makes the creepy elements stand out even more.
Why It Works
Horror often lives in the space between what feels familiar and what feels wrong. Rulers and French curves establish the believable foundation, while your shadows, textures, distortions, and monsters introduce the wrongness. Together, they create the kind of controlled chaos that horror artists constantly chase.
Choosing the Right Tools for Your Horror Kit
Rulers: What to Look For
You don’t need a professional drafting setup to start using rulers effectively in horror art. A simple, reliable ruler will handle the vast majority of perspective lines, architectural sketches, and layout work.
Start Simple
- Straight edge (no warping) – even slight bends can throw perspective lines off.
- Clear markings – easier measurements and cleaner planning.
- Transparent if possible – lets you see your drawing underneath while positioning lines.
- Around 30 cm / 12 inches – versatile enough for most sketchbooks and larger drawings.
For most horror artists, a basic transparent plastic ruler is more than enough. It’s inexpensive, lightweight, and works perfectly for perspective construction, corridor layouts, buildings, and environmental sketches.
Extras That are Helpful Later
- Anti-slip backing – prevents the ruler from sliding while drawing.
- Metal edge – useful if you later cut templates, stencils, or paper with a craft knife.
- Grid rulers – handy for artists who enjoy precise layouts and measured construction.
A Common Beginner Mistake
Many artists buy several rulers thinking different sizes will dramatically improve their work. In reality, one good ruler used consistently is far more valuable than a drawer full of unused measuring tools.
Spend your budget on paper, pencils, and practice instead.
Final Tip
Budget rulers work perfectly fine. You don’t need expensive drafting equipment to create convincing haunted mansions, endless hallways, or ominous architecture. As long as the ruler is straight and easy to read, it’ll do the job.
No need to summon a demon to afford the fancy stuff.
French Curves: What to Look For
French curves come in several forms, but most beginners don’t need a huge collection. The goal is simply to have enough curve options to create smooth, natural shapes without fighting your pencil.
You can Choose From:
- 3-piece curve sets – the most common option and a great starting point. The different shapes cover a wide range of curves for architecture, anatomy, clothing folds, and decorative details.
- Flexible curves – bend into custom shapes and hold their position. Excellent for creature anatomy, tentacles, tails, horns, and unusual organic forms.
- Circle or ellipse templates – useful for ritual circles, occult symbols, potion bottles, eyes, portals, and other circular horror elements.
For most artists, a standard 3-piece French curve set provides everything needed to start experimenting with controlled curves and cleaner designs.
Which One Should You Buy?
- Architecture and environments → Standard French curve set
- Creature design and anatomy → Flexible curve
- Symbols, ritual circles, and mechanical details → Circle or ellipse template
Many horror artists eventually use a combination of all three, but there’s no need to buy everything at once.
A Common Beginner Mistake
Don’t feel obligated to trace entire shapes with a French curve.
Instead, use small sections of the curve where they help most. Professional artists often move the template repeatedly, drawing one section at a time to build larger shapes.
Final Tip
Choose the tool that matches what you draw most often. If you’re constantly drawing creatures, flexible curves may be more useful than ellipse templates. If you love gothic architecture, a simple French curve set will likely get far more use.
Start with one tool, learn it well, and expand your collection only when you genuinely need to.
How to Use Rulers Without Making Your Art Look Stiff
One of the biggest myths in art is that rulers automatically make drawings look rigid or lifeless.
In reality, rulers only make artwork look stiff when they’re used for everything. The secret is to use them as construction tools, not creativity tools.
1. Use Them for Planning, Not Polishing
Think:
- Rough sketch (freehand)
- Key structural lines (ruler/French curve)
- Textures, damage, and imperfections (freehand again)
This gives you the best of both worlds. Your drawing has a strong foundation, but it still keeps the natural energy and irregularities that make horror artwork feel alive.
When you only use rulers for the underlying structure, the final piece feels believable rather than mechanical.
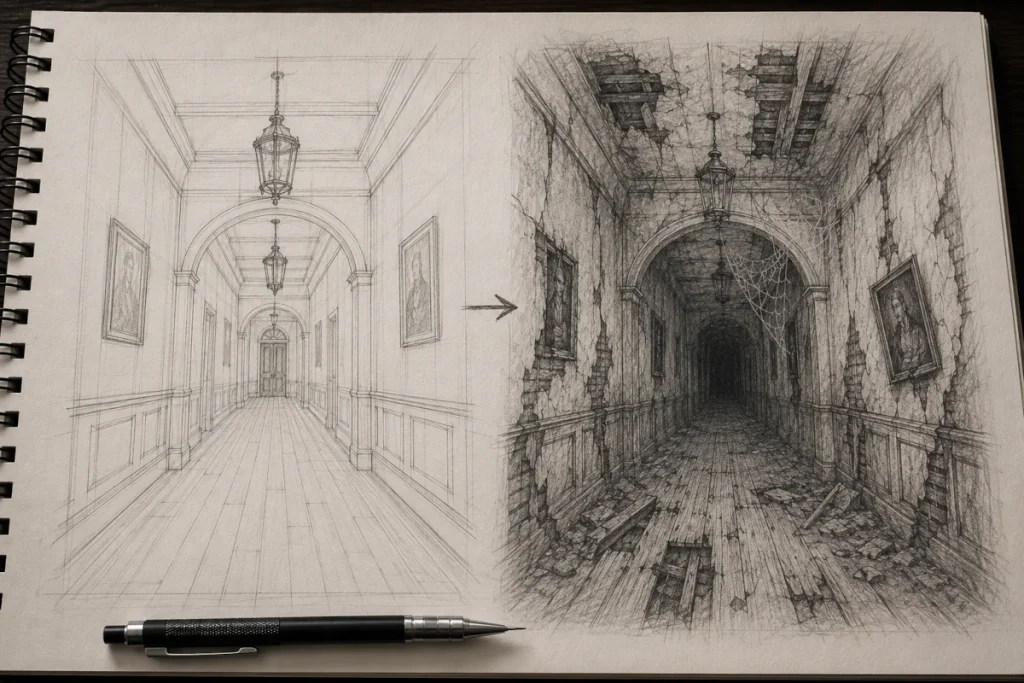
Example
A haunted hallway may start with ruler-drawn perspective lines, but the cracked walls, peeling wallpaper, broken floorboards, and creeping shadows are all added freehand.
The viewer notices the atmosphere, not the ruler.
Why it Works
The structure keeps the drawing believable, while the imperfections make it feel unsettling. Horror often depends on that balance between control and chaos.
2. Keep Initial Lines Light
Use soft pressure, sketch lightly, and build up your forms gradually rather than committing to dark lines straight away.
Heavy ruler lines can become difficult to erase and often leave drawings looking rigid. Light construction lines give you room to experiment, make adjustments, and refine your design as it develops.
Light ruler lines let you:
- Erase easily
- Adjust perspective without damaging the paper
- Blend shading naturally
- Hide guidelines beneath texture and detail
- Refine shapes before committing to final lines
Think of your ruler lines as scaffolding rather than part of the finished building.
Example
When drawing a haunted mansion, you might begin with very light perspective lines to establish the structure. Once the walls, windows, and roof are in place, those guidelines can be erased or hidden beneath shading, cracks, weathering, and other surface details.
The viewer sees the final atmosphere, not the construction work underneath.
Why it Works
Light construction lines keep everything flexible. Horror drawings often evolve as you work, and subtle guidelines allow you to make changes without fighting against dark, permanent marks.
The less attention your construction lines attract, the more natural and immersive the finished artwork feels.
3. Purposefully “Break” the Perfection Later
One of the biggest mistakes beginners make is adding damage before the structure is solid; therefore, build the scene correctly first, then make it fall apart.
A crooked hallway feels believable because it began as a properly constructed hallway before age, decay, and neglect took over.
Once your structure is in place, you can:
- Add cracks, chips, and broken tiles
- Tilt furniture or picture frames
- Split bricks or splinter wooden beams
- Warp stair edges and damaged flooring
- Add stains, grime, mould, or claw marks
- Break symmetry to create unease
Example
Imagine drawing a haunted mansion.
First, use rulers and French curves to create accurate walls, windows, arches, and staircases. Once the structure feels believable, begin introducing damage: cracked masonry, sagging beams, shattered windows, and uneven flooring.
The building still feels real because the underlying construction makes sense.
Why it Works
Horror often comes from seeing something familiar become wrong.
A perfectly straight staircase isn’t frightening.
A staircase that was once straight but now sags, cracks, and disappears into darkness feels unsettling because your brain recognises that something has gone terribly wrong.
That’s why structure comes first, and decay comes second.
Nothing says “haunted” quite like architecture that clearly gave up its will to live.
Using Rulers for Creepy Perspective
One-Point Perspective: Endless Hallways of Doom
One-point perspective is one of the most effective tools for creating tension in horror art.
By directing every major line toward a single vanishing point, you naturally pull the viewer’s eye deeper into the scene. The deeper that point disappears into darkness, the stronger the sense of mystery and unease becomes.
Great for:
- Asylums
- Schools
- Hospitals
- Underground corridors
- Abandoned hotels
- Long tunnels and subway passages
Why it Works
Humans instinctively follow lines and pathways.
When every wall, floor tile, ceiling beam, and doorway leads toward the same distant point, your viewer can’t help but look deeper into the image. In horror art, that often means staring directly into darkness and wondering what might be waiting there.
That’s where the tension comes from.
Use Your Ruler to Build:
- Floor tiles
- Ceiling beams
- Door frames
- Long light fixtures
- Wall panels and railings
- Window frames
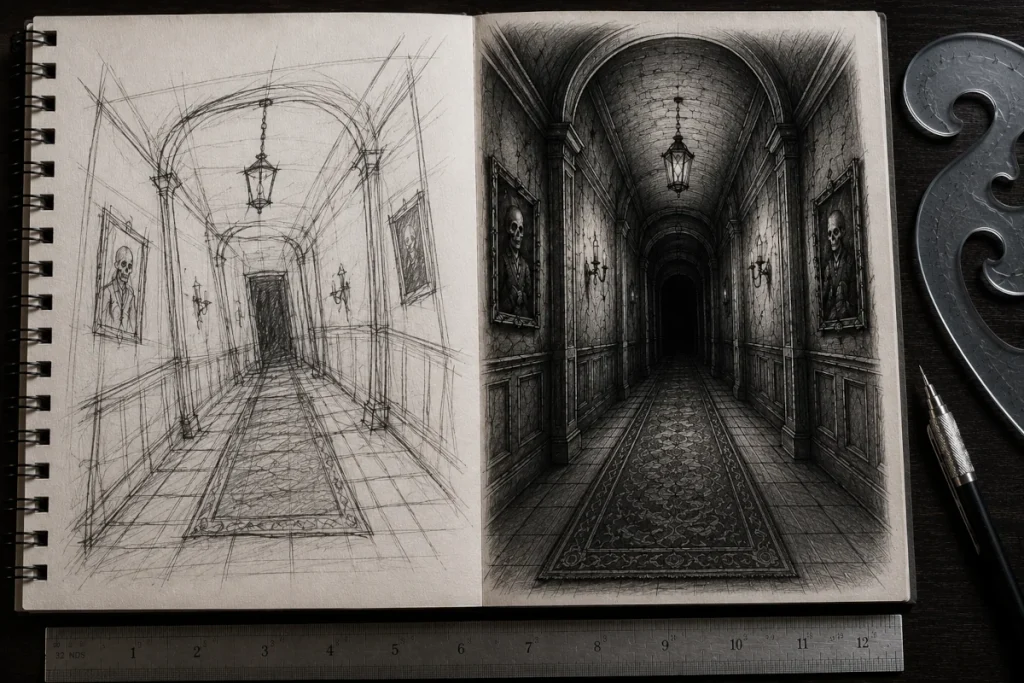
Example
Start with a simple one-point perspective hallway using clean ruler lines. Once the structure is established, introduce flickering lights, cracked walls, stains, broken doors, and distant shadows.
The perspective creates the sense of depth.
The horror elements create the fear.
Together, they produce the feeling that something is lurking just beyond what the viewer can clearly see.
Two-Point Perspective: Twisted Buildings & Creepy Streets
If one-point perspective is perfect for hallways and corridors, two-point perspective is where horror architecture really comes alive.
Instead of looking straight at a wall, you’re viewing the corner of a building, with each side receding toward a different vanishing point. This creates a stronger sense of depth and makes structures feel far more realistic.
That realism is important because horror works best when something believable starts to feel wrong.
Great for:
- Haunted houses
- Abandoned town scenes
- Cabin exteriors
- Street corners
- Victorian mansions
- Creepy churches and graveyard buildings
Why it Works
Two-point perspective makes buildings feel solid, grounded, and believable.
Once the structure feels convincing, you can begin introducing decay, damage, and distortion without losing the sense that the building could actually exist.
That’s what makes the scene unsettling rather than confusing.
Use Your Ruler to Build:
- Walls and building corners
- Roofs and chimneys
- Windows and doorways
- Fences and pathways
- Street lamps and signposts
- Porches and balconies
Example
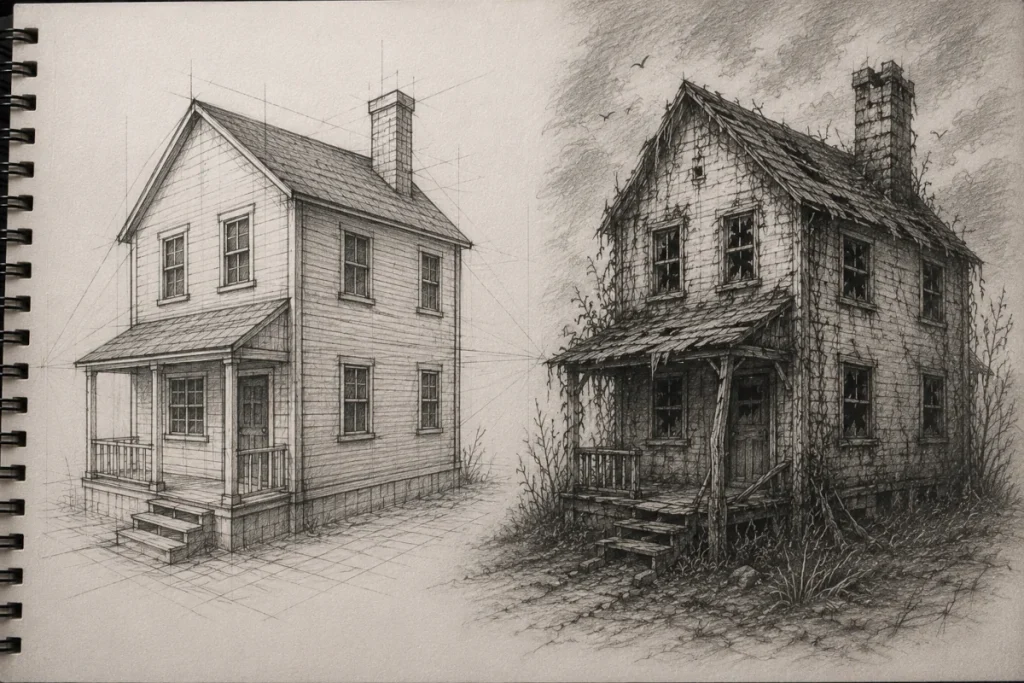
Start with a simple two-point perspective house using clean, accurate construction lines.
Once the structure is established, begin adding horror elements such as leaning chimneys, cracked walls, broken windows, sagging roofs, and overgrown vines.
The perspective creates the realism.
The decay creates the atmosphere.
Together, they make the viewer feel like they’re looking at a place that was once normal but has been abandoned to something darker.
Using French Curves for Creatures & Magic
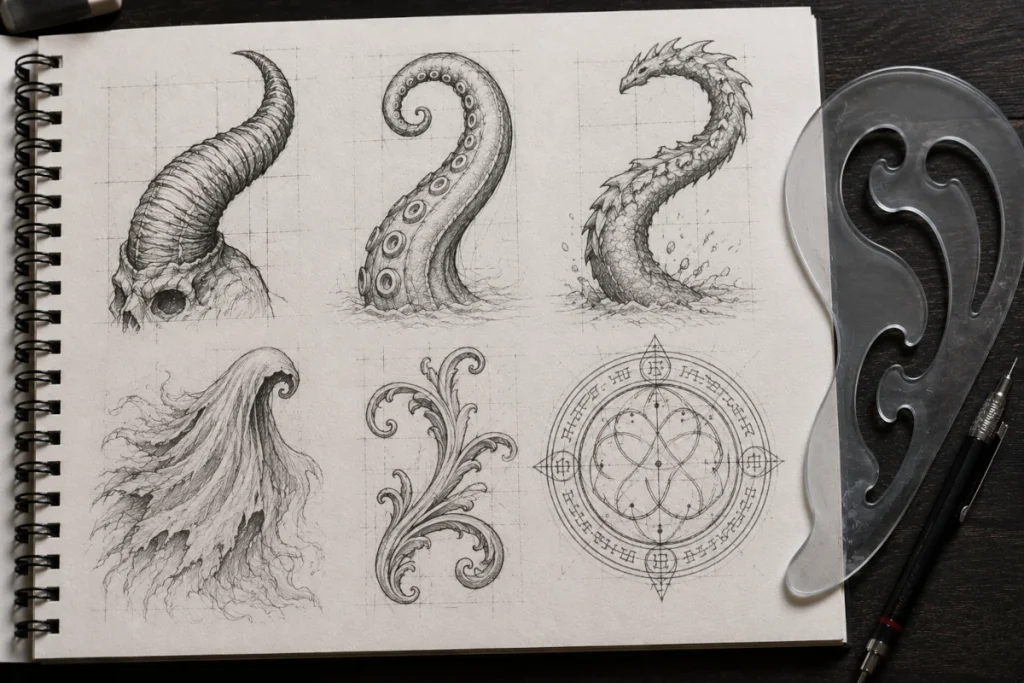
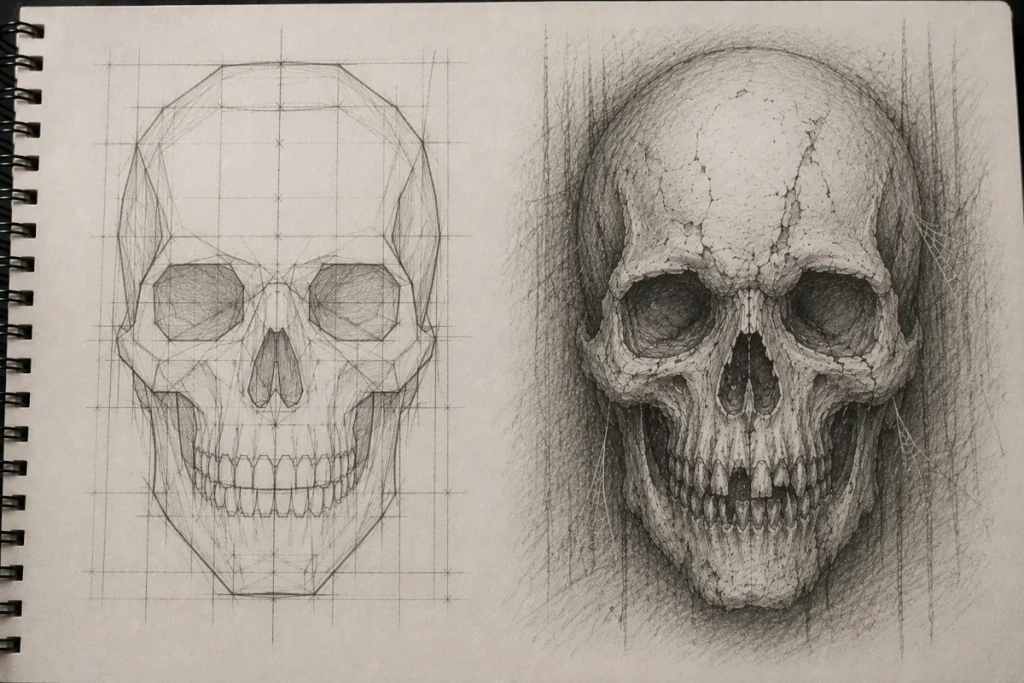
Creature Horns, Tails & Tentacles
One of the biggest challenges when drawing creatures is creating curves that feel smooth, natural, and intentional. Freehand curves can easily become uneven or wobbly, especially when drawing large horns, curling tails, or twisting tentacles.
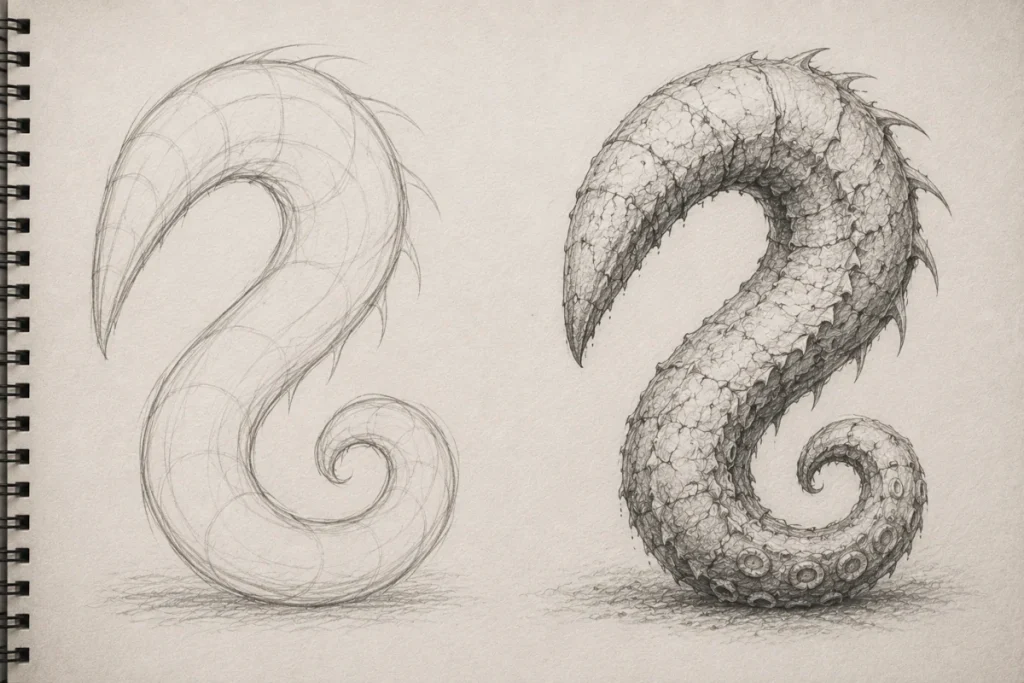
French curves help you build those flowing shapes with confidence before adding all the creepy details.
Perfect for:
- Ram horns
- Demon horns
- Twisted antlers
- Tentacles
- Serpent tails
- Claws and tusks
- Curved spines and creature anatomy
Why Horror Artists Use Them
Many horror creatures rely on long, flowing shapes. A tentacle that curves smoothly feels alive. A horn that spirals naturally feels powerful. A tail that sweeps through the composition helps guide the viewer’s eye around the drawing.
Use a French curve to establish the main shape first, then add details such as:
- Cracks
- Scales
- Ridges
- Veins
- Suckers
- Slime and decay
The French curve creates the form. The texture creates the monster.
If the silhouette looks interesting, the creature already feels convincing before you add a single scale, wrinkle, or claw mark. That’s why strong creature designs usually start with clean, confident shapes before moving on to surface details.
The foundation is simple. The nightmare comes later.
Flowing Fabric & Ghostly Movement
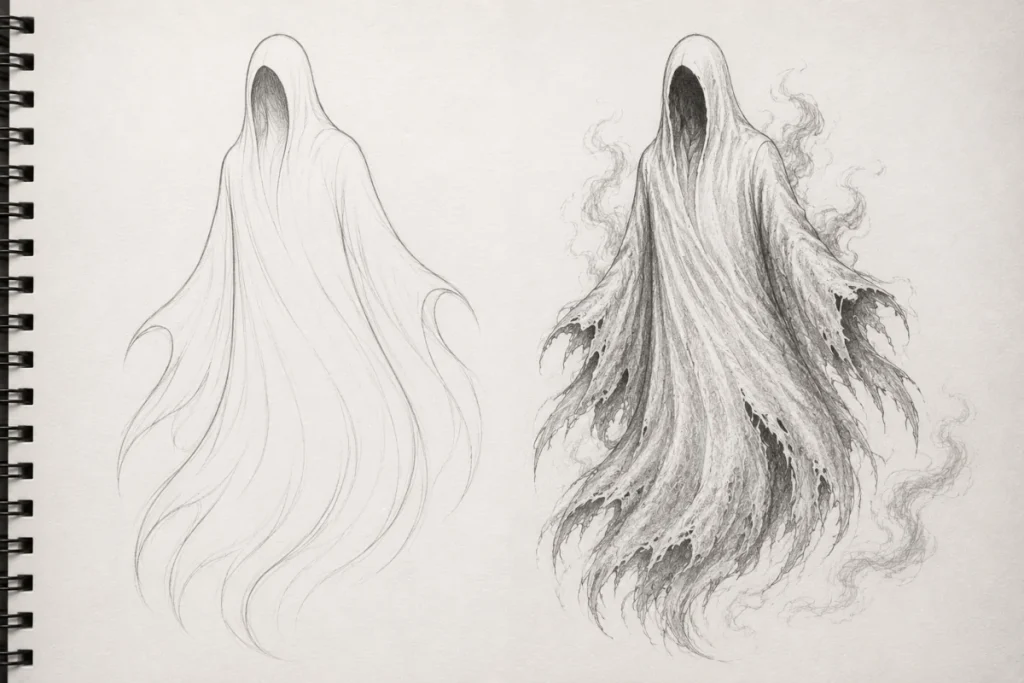
French curves aren’t just useful for creatures. They’re also excellent for creating smooth, flowing movement in ghosts, robes, cloaks, and other supernatural effects.
Use French curves to map out large, graceful sweeps of:
- Cloaks
- Dresses
- Robes
- Flowing shadows
- Wispy ghost trails
- Floating fabric
- Spectral smoke and mist
Why it Works
Large flowing shapes are often difficult to draw freehand without creating awkward bends or uneven curves. A French curve helps establish the overall movement first, giving the design a natural sense of flow.
Once the main shape is in place, switch back to freehand drawing and add:
- Wrinkles
- Tears
- Frayed edges
- Smoke-like distortions
- Uneven ghostly wisps
The French curve creates the movement. The freehand details create the atmosphere.
A ghost doesn’t become creepy because every line is perfect. It becomes creepy because the overall shape flows naturally while the smaller details feel unpredictable and unsettling.
Ritual Circles, Sigils & Arcane Symbols
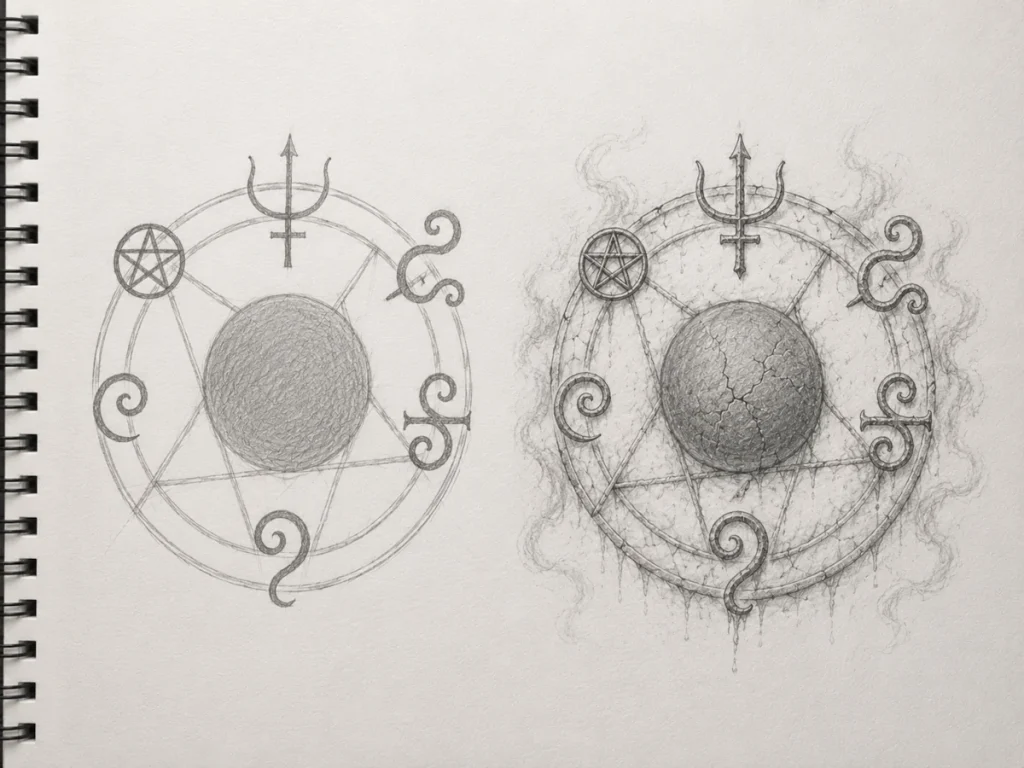
A wobbly ritual circle can make even the most terrifying demon look accidentally summoned. Precision matters when you’re working with magical symbols and occult designs.
French curves and templates help you create:
- Perfect rings
- Smooth inner circles
- Elegant glyph shapes
- Spiral designs
- Portal frames
- Arcane borders
- Mystical emblems
Why it Works
Many magical symbols rely on symmetry, repetition, and clean curves. Even small inaccuracies can make a design feel awkward or unfinished.
French curves help establish the structure first, giving your symbols a deliberate and believable appearance.
Once the framework is complete, add personality with:
- Cracks
- Smudges
- Chalk dust
- Ash
- Dripping wax
- Candles
- Bones
- Weathered textures
A clean foundation combined with distressed details creates the perfect balance between order and horror.
Common Mistakes & How to Avoid Them
Even though rulers and French curves are simple tools, there are a few common mistakes that can make horror artwork feel stiff, unnatural, or overly technical. Here’s how to avoid them while keeping your drawings clean, atmospheric, and full of character.
1. Overusing Straight Lines (Everything Looks Too Perfect)
The Mistake:
Using a ruler for every edge and detail in your drawing.
Why it Matters:
Horror relies on imperfection. Too many perfectly straight lines can make a scene feel stiff, lifeless, and lacking in atmosphere.
Fix:
- Use the ruler only for the main structure (walls, floors, frames).
- Add cracks, damage, texture, and decay freehand.
- Rough up edges deliberately to create a more natural, aged appearance.
The goal is to create a solid foundation while still allowing room for organic details and imperfections.
2. Pressing Too Hard With the Ruler
The Mistake:
Using too much pressure when drawing ruler lines.
Why it Matters:
Heavy pressure can leave dents and grooves in the paper. These marks often become visible later when you add shading, making it difficult to achieve smooth, clean results.
Fix:
- Use light pressure, especially when sketching guidelines.
- Build up darker values gradually during the shading stage.
- Keep construction lines faint so they can be adjusted or erased easily.
Light guideline work gives you much more flexibility throughout the drawing process and helps prevent unwanted marks from appearing later.
3. Smudging Your Drawing With the Edge of the Ruler
The Mistake:
Dragging a ruler across graphite-covered areas and accidentally smudging your drawing.
Why it Matters:
Smudges and streaks can make a drawing look messy and reduce the clarity of important details. They can also be difficult to remove completely without affecting surrounding areas.
Fix:
- Place a scrap piece of paper under your hand or ruler when working.
- Wipe the ruler’s edge regularly to remove graphite buildup.
- Lift the ruler completely rather than dragging it across the page.
Taking a few simple precautions can help keep your drawing clean and prevent unwanted marks from appearing during the drawing process.
4. Using the Wrong Curve for the Shape
The Mistake:
Trying to force a French curve into a shape that doesn’t naturally match the curve.
Why it Matters:
If the curve doesn’t follow the intended flow of your drawing, the final shape can look awkward or unnatural. This is especially noticeable in organic subjects such as creatures, horns, tentacles, and flowing fabric.
Fix:
- Rotate the French curve slowly until you find a section that matches your sketch.
- Use only the section you need rather than tracing the entire curve.
- Try a different French curve if the current one doesn’t fit the shape.
- Use a flexible curve instead when drawing longer or more complex flowing lines.
Taking a few extra seconds to find the right curve usually produces smoother, more natural-looking results.
5. Avoiding Rulers & Curves Because They Feel ‘Too Advanced’
The Mistake:
Avoiding rulers and French curves because you’re worried about using them incorrectly.
Why it Matters:
These tools are designed to make drawing easier, not harder. Avoiding them can slow your progress and make certain subjects, such as perspective, architecture, and flowing shapes, more difficult than they need to be.
Fix:
- Start with simple shapes such as doorways, windows, basic buildings, or curved horns.
- Practice a few lines during each drawing session until using the tools feels natural.
- Experiment without worrying about perfection. The goal is to improve your confidence and control over time.
The more you use rulers and French curves, the more comfortable they become. Like any drawing tool, they simply take a little practice.
6. Expecting Perfect Results Immediately
The Mistake:
Expecting rulers and French curves to solve every drawing problem instantly.
Why it Matters:
These tools are designed to help you create cleaner lines and more accurate shapes, but they still require practice. Understanding perspective, proportions, and construction remains an important part of the drawing process.
Fix:
- Use rulers and French curves as guides, not replacements for drawing skills.
- Build your drawings in stages rather than jumping straight to final lines.
- Practice regularly and be patient as your confidence and accuracy improve.
Like any art tool, rulers and French curves become more effective the more you use them. Small improvements add up over time.
7. Forgetting to Add Imperfections Later
The Mistake:
Leaving the drawing looking too clean and polished after using rulers and French curves.
Why it Matters:
Perfectly straight lines and smooth curves can sometimes make horror artwork feel less believable. Small imperfections often add character, atmosphere, and a sense of age or decay.
Fix:
- Add cracks, chips, dirt, and damage after the main structure is complete.
- Break up perfect edges with texture and small irregularities.
- Use freehand details to add personality and make the drawing feel more natural.
- Adjust shadows and textures by hand to create a more atmospheric result.
Rulers and French curves are excellent for creating structure, but the finishing details are often what bring a horror drawing to life.
Caring for Your Tools
Rulers and French curves require very little maintenance, but a few simple habits can help them stay accurate and last longer.
- Store them flat to help prevent warping.
- Keep them away from heat and direct sunlight.
- Wipe away graphite, charcoal, or dust after use.
- Handle them carefully, as plastic rulers and French curves can crack if dropped.
Taking a moment to care for your tools helps keep edges straight, curves accurate, and surfaces clean for future drawings.
Conclusion
Rulers and French curves may seem like simple tools, but they can make a significant difference to the accuracy, structure, and overall quality of your drawings.
They help you create cleaner perspective, smoother curves, and stronger foundations while still allowing plenty of room for creativity and personal style.
As you become more comfortable using them, you’ll find that they can save time, improve confidence, and make complex subjects easier to draw. Whether you’re creating haunted buildings, eerie creatures, flowing fabric, or magical symbols, these tools can help you achieve more consistent results.
Most importantly, remember that rulers and French curves are there to support your drawing process, not replace your skills. The more you practice combining structure with freehand details, the more natural, confident, and believable your artwork will become.
Keep experimenting, keep practising, and don’t be afraid to make these tools a regular part of your creative process.
What You Learned:
- Rulers help create straight, accurate lines for perspective, architecture, frames, and other structured horror elements.
- French curves help create smooth, flowing shapes that are difficult to draw consistently by hand.
- Rulers can improve perspective drawings such as haunted houses, creepy streets, cabins, and abandoned buildings.
- French curves are useful for organic horror subjects including horns, tentacles, tails, flowing fabric, and ghostly forms.
- French curves can help create ritual circles, sigils, glyphs, and other arcane designs with cleaner curves and more consistent shapes.
- Combining tools with freehand details helps prevent artwork from looking stiff or overly mechanical.
- Rulers and French curves are drawing aids, not shortcuts, and work best alongside regular drawing practice.
- Adding cracks, damage, texture, dirt, and other imperfections by hand helps create a stronger horror atmosphere.
More Horror Tools to Explore
These guides cover additional tools and techniques that can help you create more detailed, atmospheric horror artwork.
- How to Use Erasers in Horror Art (Types, Techniques and Effects)
Learn how different erasers can be used to create highlights, add texture, and develop atmospheric effects in horror drawings. - Circle Templates (Stencils) for Horror Art
Discover how circle templates can help you draw accurate moons, ritual circles, symbols, eyes, and other circular elements. - Specialised Markers for Drawing
Explore how different markers can be used to create backgrounds, effects, colour transitions, and atmospheric details.