Using Craft Knives in Drawing
Sharp Tools for Sharp, Spooky Details
Craft knives might look like horror props, but in your art toolkit, they’re far less dramatic than they appear. They’re sharp, precise, and surprisingly versatile tools that can help with everything from sharpening pencils to adding fine details and textures.
In drawing, craft knives are commonly used to sharpen graphite and charcoal pencils, scrape back highlights, create crisp edges, and add surface textures that would be difficult to achieve with pencils alone. When used carefully, they can bring extra depth and realism to your artwork.
There’s also something oddly satisfying about gently scraping a highlight into a creature’s eye or roughing up a haunted wall until it looks worn and weathered. Small details like these can make a drawing feel more atmospheric and believable.
Used properly, a craft knife can help you create razor-sharp highlights, distressed textures, scratched surfaces, and intricate details that add character to your horror artwork. Just remember that while it’s an excellent art tool, it’s still a blade and deserves the same respect you’d give any sharp tool.
What You’ll Learn:
In this tutorial, you’ll learn how to use a craft knife to create sharp highlights, realistic textures, and dramatic horror art effects safely and effectively.
- How craft knives can be used in horror art drawings
- The difference between carving highlights and scraping textures
- Techniques for creating cracks, fractures, fog, mist, and distressed textures
- How to use a craft knife to sharpen drawing pencils
- Common mistakes that can damage your paper or artwork
- When a craft knife is the right tool and when another tool is a better choice
- Essential craft knife safety, care, and maintenance tips
What Are Craft Knives?
Craft knives are small, lightweight cutting tools fitted with replaceable razor-sharp blades. You’ve probably seen the classic silver hobby knife (often called an X-Acto knife), but there are many different styles and blade shapes available.
For artists, the most important part is the blade itself. A craft knife can make extremely precise cuts, scrapes, and marks that would be difficult or impossible to achieve with a pencil alone. That’s why they’re commonly used alongside traditional drawing tools rather than as a replacement for them.
Artists use them for:
- sharpening pencils to long, tapered points
- carving into graphite or charcoal for fine highlights
- creating scratched textures and sharp details
- cutting paper, stencils, and templates
- removing tiny areas of graphite with precision
In horror art, a craft knife becomes an extension of your hand. It’s perfect for creating crisp highlights, weathered textures, damaged surfaces, and eerie details that help drawings feel older, darker, and more atmospheric.
Why Horror Artists Love Craft Knives
Craft knives feel almost purpose-built for horror artwork because of the textures, highlights, and surface effects they can create. Horror art often relies on worn materials, damaged surfaces, eerie lighting, and fine details. A craft knife gives you a level of control that’s difficult to achieve with pencils and erasers alone.
1. Razor-Thin Highlights
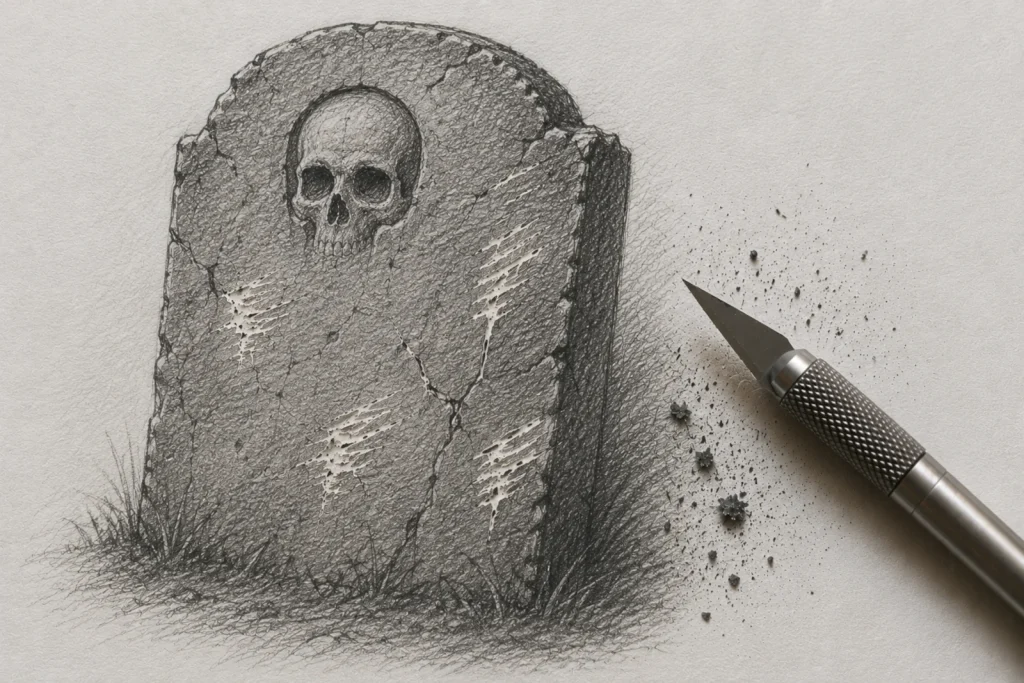
When light hits something sharply – a cracked tile, a shiny eye edge, a blade, or broken glass – a craft knife can carve that highlight cleaner than most erasers. Carefully scraping away graphite reveals the paper beneath and creates an ultra-bright, ultra-thin highlight that instantly catches the viewer’s eye.
These sharp highlights work especially well on wet eyes, teeth, blades, glass, and other reflective surfaces, making them look more realistic and dramatic.
2. Scratchy, Distressed Textures
Walls, wooden floors, gnarled tree bark, cracked skin, stretched fabric, and weathered stone all benefit from subtle scraping. A craft knife can create organic scratches, cracks, and distressed textures that feel natural rather than repetitive.
These effects are perfect for haunted houses, creepy creatures, abandoned buildings, and atmospheric horror scenes where age and decay help tell the story.
3. Ghostly Surface Marks
Sometimes you want a texture that looks as though something brushed against a wall, dragged across a surface, or left behind an unexplained mark. A craft knife can create subtle scratches, scuffs, and mysterious surface damage that adds atmosphere without overwhelming the drawing.
These small details often work in the background, quietly making a scene feel older, stranger, and more unsettling.
4. Crisp Edges That Pencils Can’t Achieve
For weapons, tools, broken glass, claws, or anything sharp in your horror scene, knife-carved lines can add a believable snap to the edges.
By scraping away graphite with precision, you can create clean, crisp highlights and razor-sharp edge details that help objects stand out from darker surroundings.
5. Ultra-Precise Pencil Sharpening
Many artists prefer knife-sharpened pencils because they allow you to control the taper and expose a longer section of graphite. This creates a point that’s ideal for shading, hatching, fine details, hair, fur, and textures.
A longer exposed lead also lets you vary your marks more easily, switching between broad shading and delicate detail work without constantly changing pencils.
Types of Craft Knives (And What They Do)
There aren’t hundreds of varieties you need to worry about – just a few solid options. While most artists use a standard hobby knife, different handles and blade styles can make certain tasks more comfortable or precise.
The good news is that for drawing, the blade matters far more than the handle. Most artists can achieve excellent results with a simple craft knife and a supply of sharp replacement blades.
Standard Hobby Knife (X-Acto Style)
This is the classic craft knife most artists picture when they hear the term. It features a slim handle and a sharp replaceable blade, making it ideal for detailed work and precise control.

Benefits:
- Great for fine details
- Replaceable blades
- Excellent control for highlights and scraping
- Widely available and affordable
For most artists, this is the only craft knife you’ll ever need. It’s versatile enough for pencil sharpening, highlight carving, texture work, and stencil cutting, making it an excellent all-round choice for horror art.
Snap-Off Utility Knife
A snap-off utility knife uses a segmented blade that can be refreshed by snapping away the dull section and exposing a new sharp edge. While it’s commonly associated with DIY and craft projects, some artists like using them for sharpening pencils and general studio tasks.
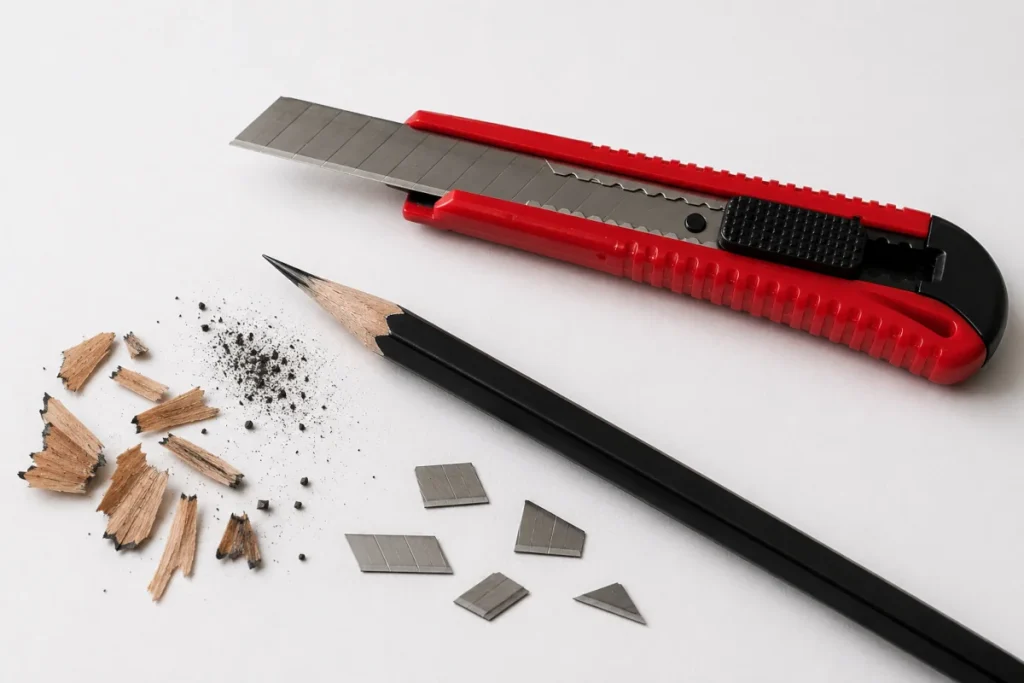
Benefits:
- Good for sharpening pencils
- Sturdy and durable
- Quick and easy to refresh the blade
- Less precise for tiny details, but very practical for general use
For detailed highlight carving and fine texture work, most artists will prefer a standard hobby knife. However, a snap-off knife can be a useful addition to your workspace if you regularly sharpen pencils or need a tougher blade for cutting paper, card, stencils, and templates.
Scalpel-Style Craft Knife
A scalpel-style craft knife uses an exceptionally thin, razor-sharp blade designed for precision work. These knives are often favoured when artists need maximum control for delicate scraping, fine highlights, and intricate texture effects.
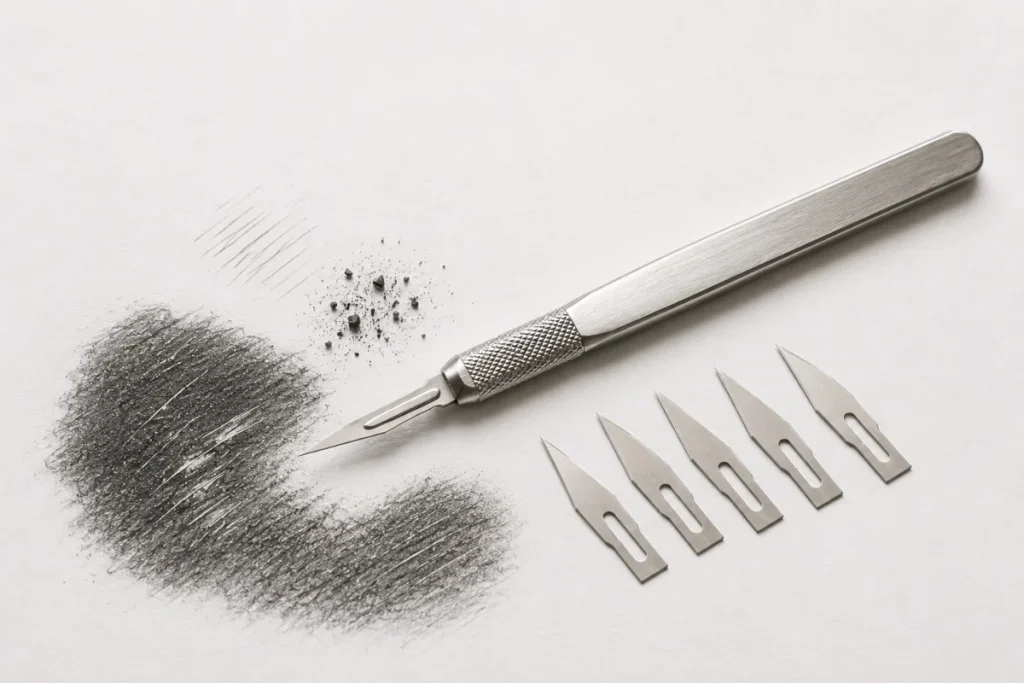
Benefits:
- Extremely sharp and precise
- Excellent for delicate scraping and fine detail work
- Ideal for tiny highlights and intricate textures
- Must be handled carefully and stored safely
For horror artists, this type of knife is particularly useful when creating hairline scratches, weathered textures, cracked surfaces, and razor-thin highlights that would be difficult to achieve with pencils or erasers alone.
Retractable Craft Knife
A retractable craft knife combines a sharp blade with a built-in safety mechanism that allows the blade to be extended or hidden when not in use. They’re popular with beginners because they’re easy to store, comfortable to handle, and versatile enough for a range of studio tasks.

Benefits:
- Safer to store and transport
- Great for sharpening pencils
- Comfortable for general cutting tasks
- Not ideal for ultra-fine detail work
While retractable craft knives can sharpen pencils effectively and handle basic cutting jobs, they usually lack the precision needed for tiny highlights, delicate scraping, and intricate texture work. For those tasks, a standard hobby knife or scalpel-style knife is usually the better choice.
For beginners, one standard hobby knife and a pack of replacement blades are more than enough to get started with most horror art techniques.
How to Use Craft Knives for Drawing (Safely & Effectively)
1. Hold the Knife Almost Parallel to the Page
This is one of the most important techniques to learn.
You’re not trying to cut the paper – you’re gently scraping the surface.
The blade should skim across the paper rather than dig into it. This gives you far more control and helps prevent accidental damage.
2. Use Light, Controlled Pressure
Soft, repeated passes work much better than one aggressive scrape.
Build up the effect gradually and check your progress often. It’s much easier to remove a little more graphite than it is to repair damaged paper.
3. Work Slowly
You want to carve details, not accidents.
Slow, controlled movements give you cleaner highlights, sharper textures, and better overall results.
4. Practice on Scrap Paper First
Every paper surface reacts differently.
Testing on a spare piece of paper helps you learn how much pressure to use before working on an important drawing.
It’s far better to experiment on a scrap sheet than accidentally damage a finished piece.
5. Clean the Blade Regularly
Graphite and charcoal can gradually build up on the blade over time.
A quick wipe keeps your highlights clean, your textures crisp, and your cuts more predictable.
Carving vs Scraping: When to Use Craft Knives Before or After Your Shading
Craft knives can create two completely different types of highlights depending on when you use them. This technique isn’t discussed very often, but it can make a huge difference in your results, especially in horror art.
Carving Before You Add Shading (Ultra-Clean Highlights)
If you carve thin lines or shapes before shading, you get:
- razor-clean, controlled highlights
- soft graphite settling around the cut
- a smooth, glowing look
- perfect for eyes, metal edges, and porcelain cracks
This is the technique artists use when they want those surgical, hairline highlights that pencils can’t achieve.
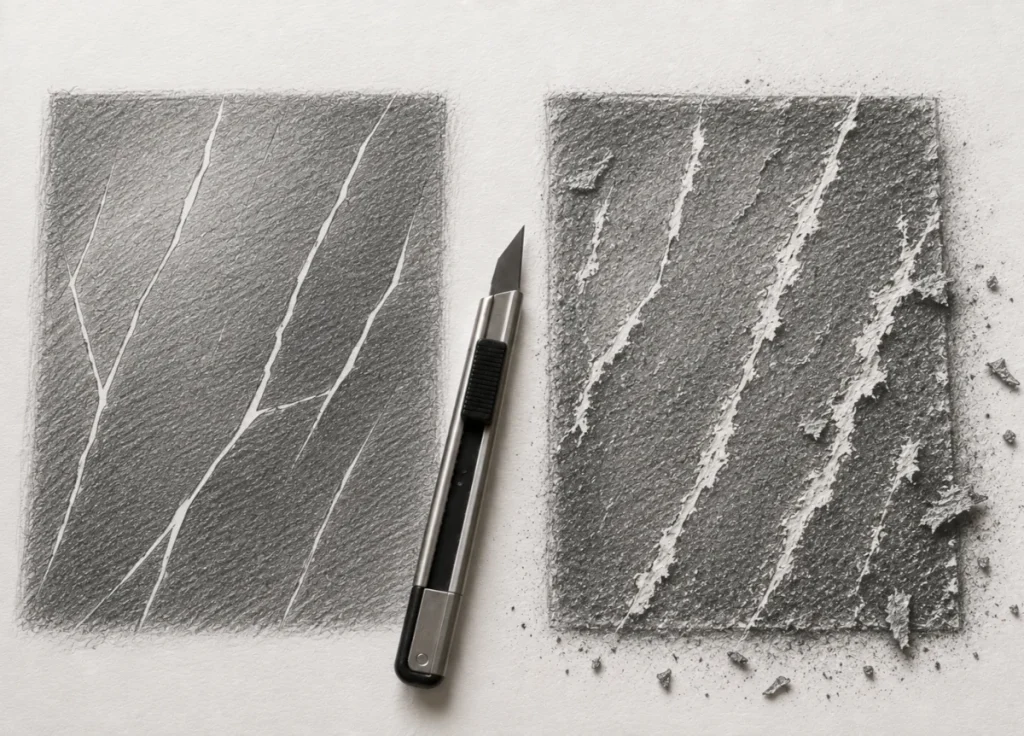
Scraping After Shading (Rough, Distressed Effects)
If you shade first and then scrape on top, you get:
- jagged, torn highlights
- distressed textures
- cracked surfaces
- foggy, ghostly marks
- gritty horror effects
This is what creates broken tiles, scratched walls, weathered surfaces, and eerie textures often seen in horror artwork.
Which One Should You Use?
- Use carving first for clean, precise, intentional accents.
- Use scraping after for rough, spooky, textured effects.
Most horror artists use both techniques in the same drawing – carving for clean, controlled details and scraping for atmospheric wear, damage, and texture.
Horror Art Techniques You Can Create With a Craft Knife
Now that you know when to carve and when to scrape, let’s look at some of the most effective horror art techniques you can create with a craft knife.
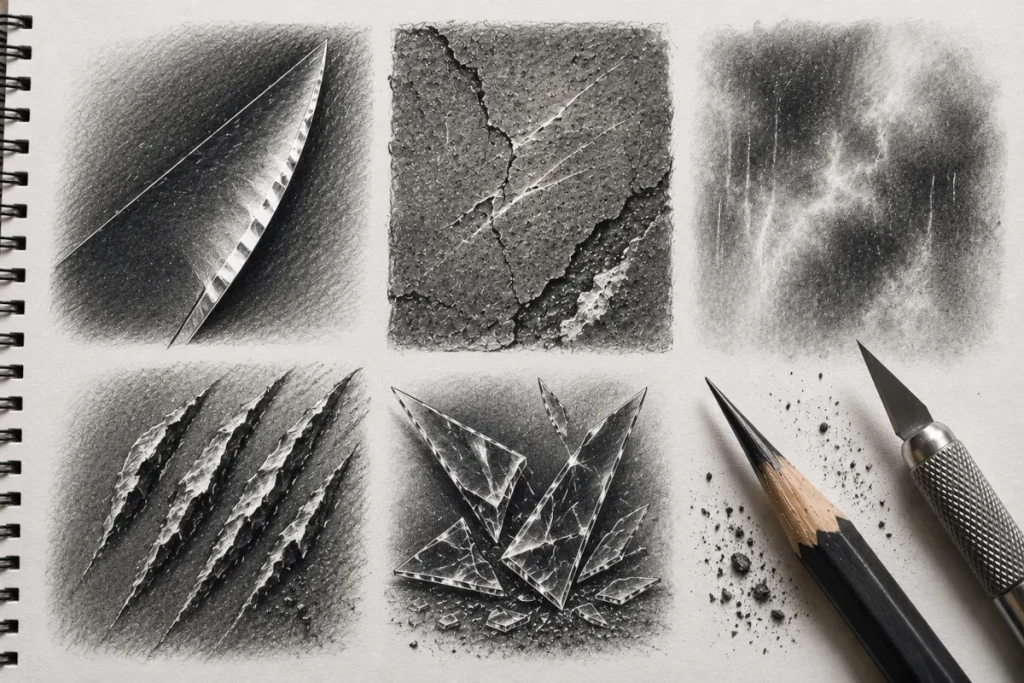
Carving Highlights in Dark Areas
Thin carved highlights can create bright reflections that are almost impossible to achieve with a pencil alone. By removing a tiny amount of graphite, you reveal the paper underneath and create crisp points of light that instantly stand out against dark shading.
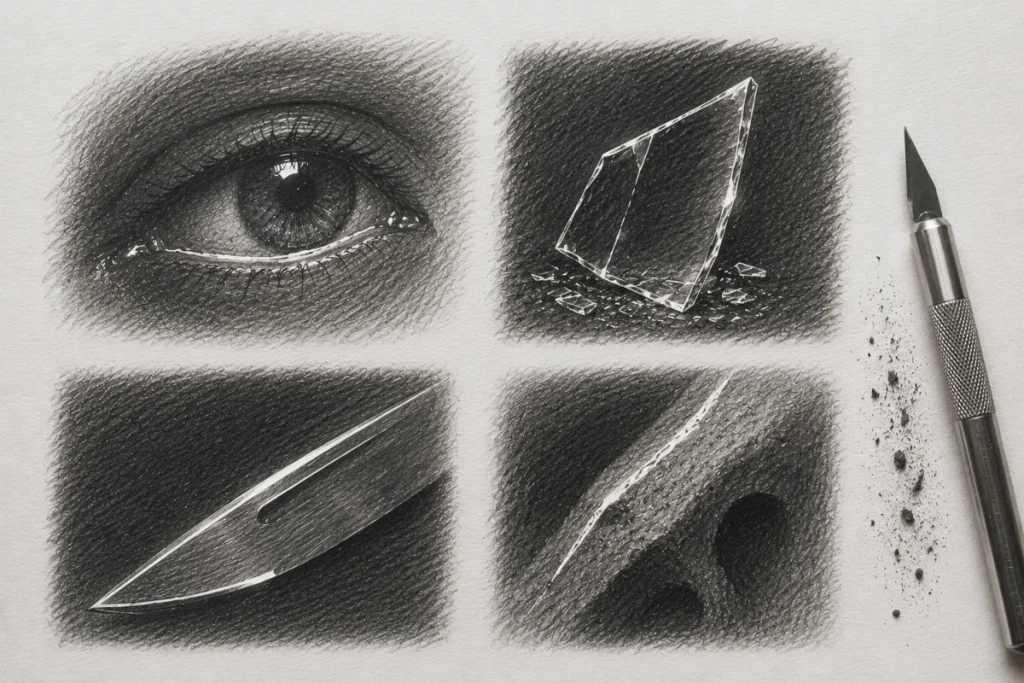
Perfect for:
- wet eyes
- broken glass
- blade edges
- shiny skin
- metal details
These bright slivers of light add instant drama and help draw the viewer’s eye exactly where you want it.
Scraping Cracks and Hairline Fractures
Small, sharp cracks look far more realistic when carved than drawn. The blade creates natural variations in width and depth, making fractures feel more authentic and less artificial than lines created with a pencil alone.
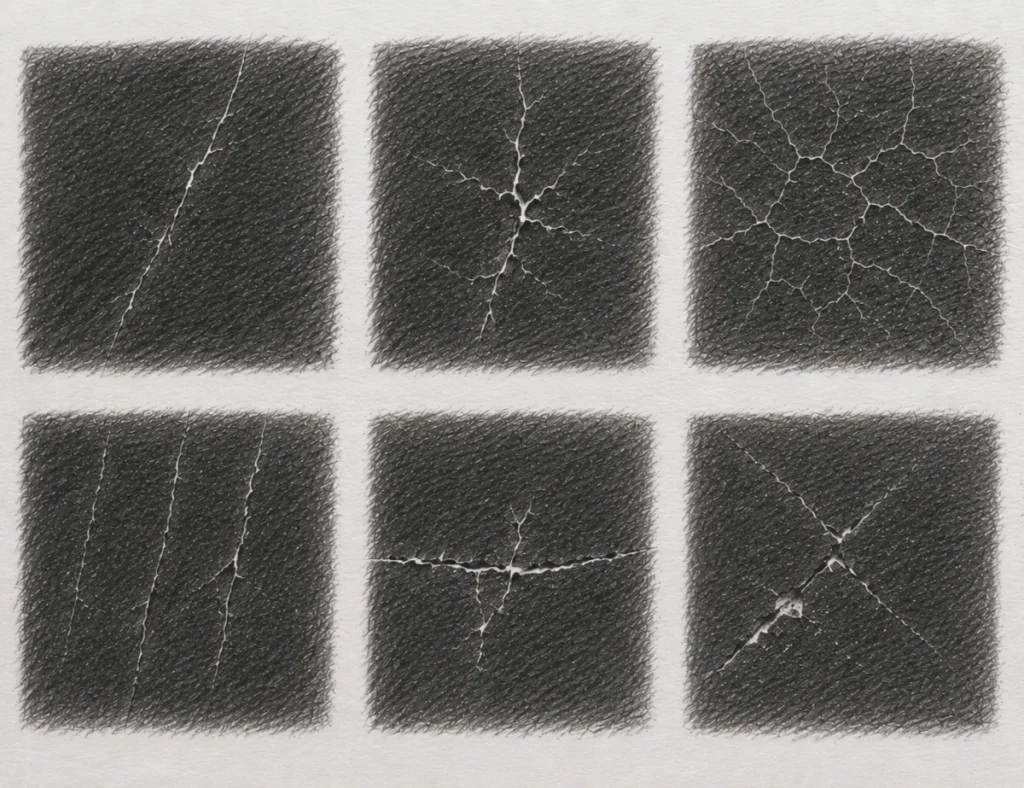
Use for:
- cracked walls
- damaged floors
- bone fractures
- porcelain doll faces (because why wouldn’t they be terrifying?)
These subtle imperfections instantly make surfaces feel older, damaged, and more believable.
Creating Distressed Textures
A craft knife can also be used to create rough, damaged textures that would be difficult to achieve with pencil marks alone. Light scraping removes graphite unevenly, creating natural-looking wear, scratches, and weathered surfaces that are perfect for horror artwork.
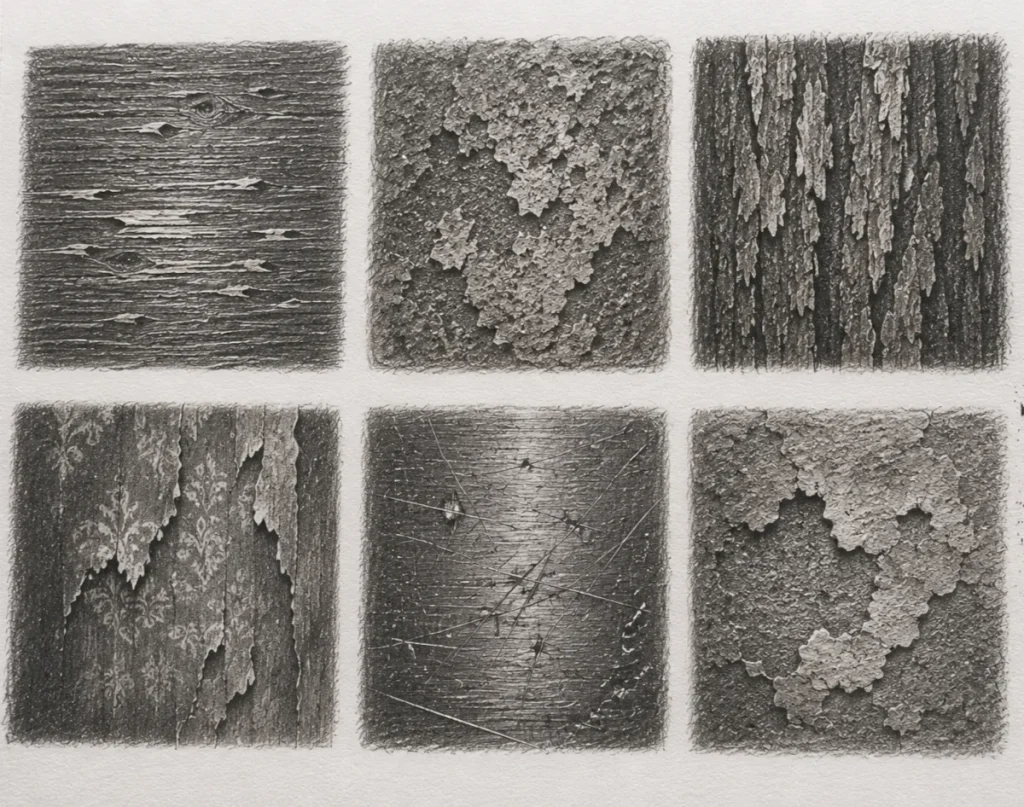
Drag the blade gently for rough, spooky textures on:
- boarded windows
- crumbling stone
- tree bark
- old wallpaper
These irregular marks create a sense of age, decay, and neglect, making environments feel far more believable and unsettling.
Carving Foggy or Misty Highlights
Light, sweeping scrapes can create soft highlights that look like mist, smoke, or drifting strands of hair. Because the lines reveal the paper underneath, they often appear brighter and more atmospheric than highlights added with a pencil or eraser.
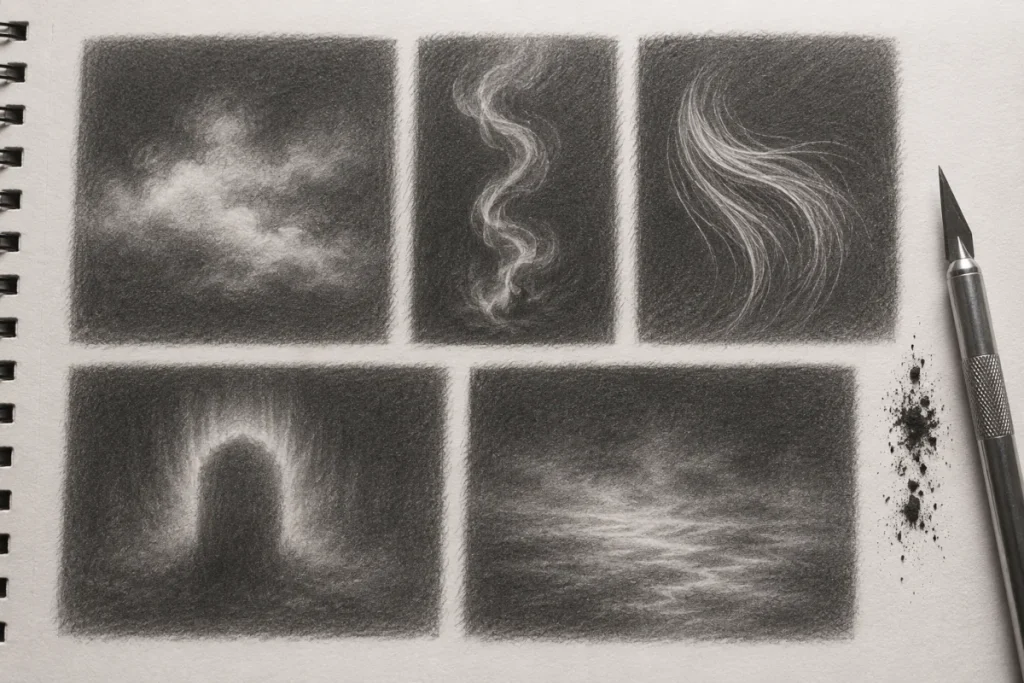
Light, sweeping scrapes create wispy highlights perfect for:
- fog
- hair
- smoke trails
- ghostly glows
These subtle highlights add movement and atmosphere, helping horror scenes feel more eerie, mysterious, and alive.
Sharpening Pencils
A craft knife isn’t just useful for scraping highlights and textures. Many artists also use one to sharpen pencils because it offers far more control than a standard sharpener. By carefully removing the wood casing, you can expose more graphite and create longer, sharper points for detailed drawing.
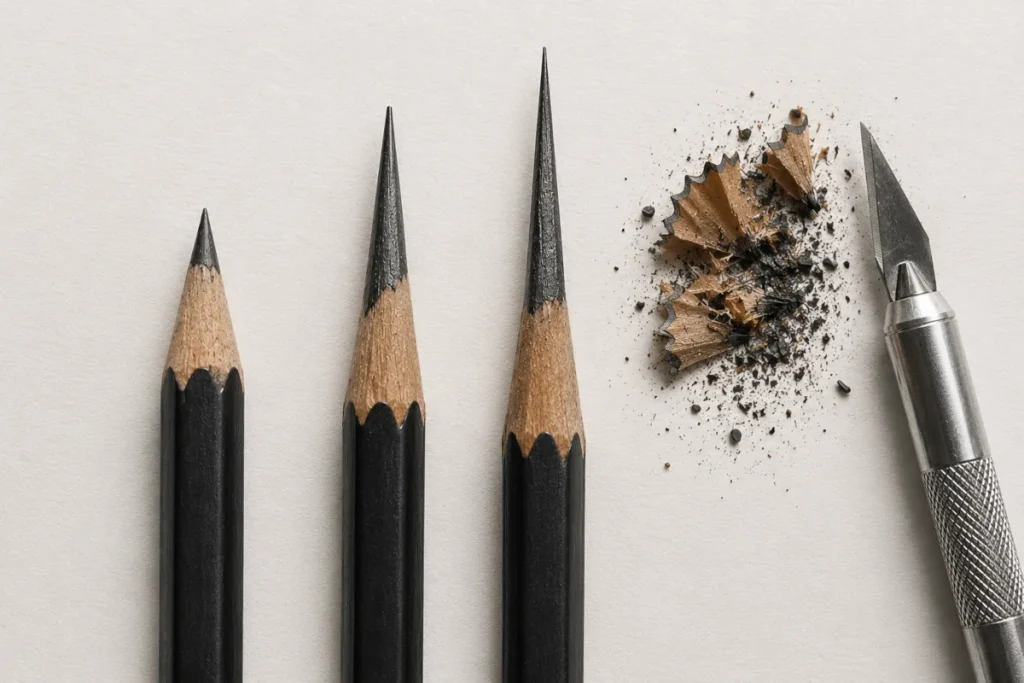
Knife-sharpened pencils let you:
- expose longer graphite
- control lead shape
- create fine details more easily
The extra control can make a noticeable difference when working on detailed textures, realistic shading, and precise horror illustrations.
Once you go knife-sharpened, you may never go back.
When Not to Use a Craft Knife
Craft knives can be incredibly useful, but they’re not the right tool for every drawing situation. Using one on the wrong surface can damage your paper faster than it creates highlights.
Different paper brands react very differently to scraping techniques, even when they appear similar on the surface.
Avoid using them on:
- thin or fragile paper
- sketchbooks with very little tooth
- cheap printer paper
- heavily burnished or heavily layered graphite (it can tear)
These surfaces are more likely to tear, pill, or become damaged when scraped.
If you’re unsure, test on the corner of a page or a scrap piece of the same paper first.
Common Mistakes (And How to Avoid Them)
1. Pressing Too Hard
One of the most common beginner mistakes is treating the craft knife like a cutting tool rather than a scraping tool.
When too much pressure is applied, the blade can tear the paper surface, create deep grooves, or leave permanent damage that becomes visible once shading is added.
If controlling pressure is something you struggle with, my guide on Mastering Pencil Pressure and Grades for Creepy Drawings will help you develop a lighter touch and better control.
Fix:
Use light, feathery scrapes and build the effect gradually. Several gentle passes will always produce cleaner results than one aggressive scrape.
2. Holding the Knife Straight Up
A craft knife should never be used like a pencil.
Holding the blade at a steep angle causes the tip to dig into the paper fibres instead of lifting graphite from the surface. This often results in scratches, tears, and uneven highlights.
Fix:
Keep the blade almost horizontal and allow it to glide across the paper. Think of it as gently shaving away graphite rather than carving into the page.
3. Using a Dull Blade
A dull blade can create more problems than a sharp one.
Instead of producing clean, controlled highlights, worn blades tend to drag across the paper, creating rough edges and unpredictable marks that can spoil fine details.
Fix:
Replace blades regularly. Fresh blades are inexpensive and provide far more control when creating highlights, textures, and details.
4. Using It on the Wrong Paper
Not every paper is suitable for scraping techniques.
Thin paper, low-quality sketchbooks, and weak surfaces can tear surprisingly easily when a blade is used on them. Even experienced artists test new papers before using a craft knife extensively.
Fix:
Always test the technique on a spare piece or an inconspicuous corner of the page before committing to important areas of your drawing.
5. Forgetting Safety
It sounds obvious, but it’s surprisingly easy to become focused on a drawing and forget you’re working with a very sharp blade.
Most accidents happen when artists rush, apply too much force, or scrape towards their fingers.
Fix:
Always cut away from yourself, keep your free hand clear of the blade’s path, and work slowly. Your horror artwork should look dangerous – you shouldn’t.
Caring for Your Craft Knife
A well-maintained craft knife is safer, easier to control, and produces cleaner results. Fortunately, craft knives require very little maintenance, and a few simple habits will keep them working smoothly for years.
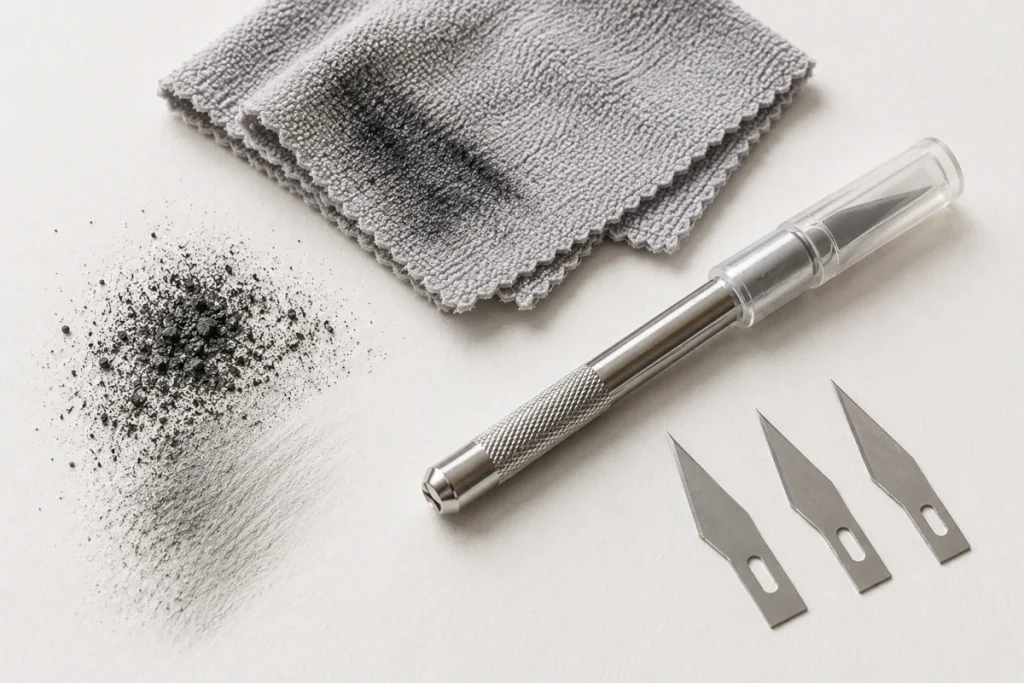
They’re easy to maintain:
- Replace blades regularly
- Store safely (retract or use a cap)
- Keep them dry
- Clean graphite off the blade
- Dispose of dull blades responsibly
Graphite residue can build up surprisingly quickly, especially if you use your knife regularly for highlights and texture work. A quick wipe with a soft cloth helps keep the blade clean and performing at its best.
Treat your knife well, and it’ll last for years.
What Craft Knives Can’t Do
Craft knives are incredibly useful for creating highlights, textures, and fine details, but they’re not a replacement for every drawing tool. Knowing their limitations is just as important as knowing when to use them.
Here’s what they won’t give you:
- Soft blends or smooth gradients
Craft knives remove material; they don’t blend it. They can lift graphite from the surface, but they can’t smooth transitions between light and dark areas.
They can create light foggy or misty effects by gently lifting the top layer of graphite, but that’s texture rather than true blending.
- Large, fuzzy highlights
Soft glowing effects are usually created with erasers, blending tools, or careful pencil work. Craft knives are designed for sharp, crisp highlights, not broad areas of light.
- Wide erasing
A craft knife is a precision tool. Trying to clear large areas will usually leave scratches and damage the paper surface.
- Soft organic textures
Craft knives excel at cracks, scratches, hair, metal edges, and distressed surfaces. Softer textures, such as fabric, skin transitions, or smooth shading, are usually better handled with pencils and erasers.
- Reliable results on delicate paper
Thin or fragile paper can tear very easily when scraped. Craft knives work best on sturdy drawing paper that can withstand a little surface abrasion.
Think of craft knives as tools for sharp, bright, crisp, and dramatic marks rather than soft, subtle, or blended effects.
Conclusion
Craft knives are one of the most useful tools for creating sharp highlights, fine details, and distressed textures in horror artwork. Whether you’re carving reflective eyes, scraping cracked surfaces, or sharpening pencils for precise linework and smoother shading control, they can produce effects that are difficult to achieve with pencils and erasers alone.
Like any tool, they work best when used correctly. Light pressure, the right paper, a sharp blade, and good safety habits will give you far better results than force or speed ever will.
Most importantly, don’t be afraid to experiment. Try carving highlights before shading, scraping textures after shading, and combining both techniques in the same drawing. With a little practice, a simple craft knife can become one of the most versatile tools in your horror art toolkit.
What You’ve Learned:
- Craft knives can remove graphite with precision, creating bright highlights that are difficult to achieve with pencils or erasers alone.
- Carving highlights works best in dark areas, helping create reflective surfaces such as wet eyes, shiny skin, metal, glass, and sharp blade edges.
- Scraping techniques can create realistic cracks, fractures, and damaged textures that look far more natural than simply drawing lines.
- Light scraping can produce distressed surfaces such as weathered wood, crumbling stone, tree bark, and old wallpaper.
- Gentle sweeping scrapes can create wispy effects including fog, smoke trails, stray hairs, and subtle ghostly highlights.
- Craft knives can be used to sharpen pencils, exposing more graphite and allowing greater control over the pencil point shape for detailed work.
- Using too much pressure, holding the blade at the wrong angle, or working with a dull blade can damage both the paper and your drawing.
- Strong, textured drawing papers handle scraping far better than thin or delicate papers, which can tear easily.
- Craft knives are excellent for sharp, dramatic effects, but they cannot replace blending tools, erasers, or techniques designed for soft transitions and large highlights.
- Regular blade replacement, safe storage, cleaning, and proper disposal of old blades help keep your craft knife safe and effective for long-term use.
More Horror Art Tools
If you’ve enjoyed using craft knives to create highlights, textures, and fine details, these tools can help you expand your horror art toolkit even further:
- Pencil Sharpeners for Horror Artists
A sharp pencil is essential for detailed horror artwork. From handheld sharpeners to electric models, this guide helps you choose the best option for creating clean lines, sharp highlights, and controlled shading. - Pastels for Horror Art
Pastels are excellent for creating fog, atmosphere, soft glows, and eerie backgrounds. Whether you’re working with soft pastels or oil pastels, they can add a level of mood and atmosphere that’s difficult to achieve with pencils alone. - Specialised Markers for Drawing
Specialised markers can create smooth gradients, deep shadows, colour washes, and dramatic transitions. They’re particularly useful when you want to add bold contrast or atmospheric effects to your horror artwork.